The post For clients (non-members) – how to use the Client Website! appeared first on MiBase New Zealand.
]]>
Logging in
There are two ways you can access our Clients Login page.
- If you have received our Welcome email, please click the link provided which will take you there. Type in your user name and password and click Login.
- Visit our Public Website. To the top right of the screen, you will see the word Login. From the dropdown menu select Member Log In. This will take you to the login page. Type in your user name and password and click Login.

Forgot, lost, or didn’t receive your login details?
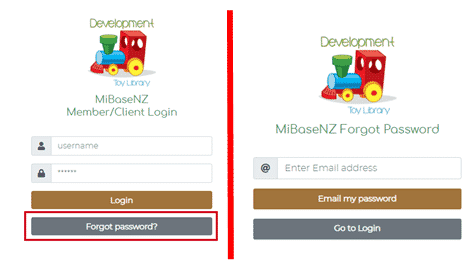
Never fear they are easy to retrieve. When you go to the Member/Client Login page, you will see down the bottom the Forgot password? button. Click this button and it will take you to the Forgot Password page.
Remember: This is a generic documentation, each Toy Library will have a different logo and colours.
Type in your email address and click Email my password. You will receive an email with both your username and password details. 
Home Page
Once you have logged in, you will be taken to the Home page. You will see a small introduction to our library and what we offer. Scrolling down you will see your personal details. You may have the option of editing these details or you may not. If you do, click the Edit button and make the changes, remember to save once done. If not, please email us with the changes and we can update it for you. To the right of the page, you will see all our details and opening hours.
Navigation Bar / Menu
At the top of the Home page, you will see a navigation bar listing all the different pages on our Client (non-member) Website. This can be seen and accessed from each page.
Note: this guide has been created for all toy libraries to use so some of the pages may not apply to our toy library. To the far right, you will see the word Actions. From the dropdown menu, you can choose to log out of our Client Website or visit our Public Website.
My Library
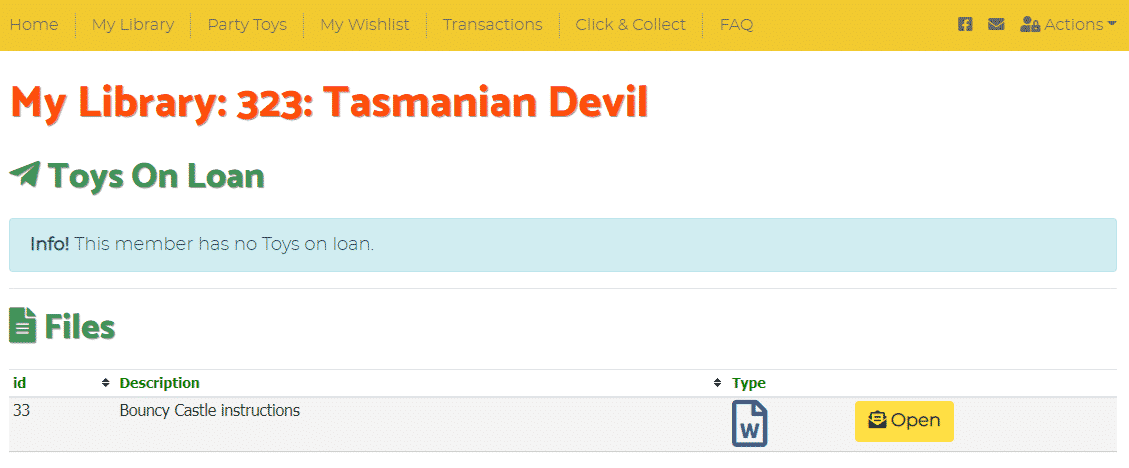
On this page, you can view all your toy loans, reservations, and bookings, if any. Any information we would like to share with you such as our Newsletters can also be seen under the heading Files and can be accessed by clicking the Open button. You have the option of renewing your toys here or deleting any reservations, or bookings.
Party Toys
Here you will see the full list of party toys available to hire. To reserve a toy or add a toy to your wishlist, click the View Toy button under the toy. You will be taken to the toy’s details page. Under the image, you will see a grey button, click to Add to my Wishlist. This toy will now appear on the My Wishlist page. Scroll further down and you will see a Reserve Toy button. Click this and you will be taken to the Reservation page.
Reserving a toy
Once you are on the Reservation page, you can see the availability of the toy on the calendar by using the coloured availability chart underneath as a guide. Click on the calendar the start date you would like the toy from. The calendar will automatically highlight the hire period for the toy. Click the Reserve button to the right of the calendar. The reservation will then appear under the heading Reserved Toys on the My Library page. We will also be notified of your reservation.
My Wishlist
As mentioned above, once you have added a toy to your wishlist from the toy’s details page, it will automatically be listed here on this page. You can see the status of the toy if it is in the library, if it’s on loan, or when it has been reserved. You can delete the toy from the wishlist by clicking the Delete button. You can reserve the toy by clicking the Reserve Toy button. This will take you to the Reservation page. Follow the steps mentioned above, Reserving a Toy, to see how.
Transactions
This page lists all your transactions; toy hires, payments, fees, and fines. Your account balance is shown at the bottom of the page.
Click & Collect
Just like the shops, you can select a day and time when you want to collect and/or drop off your toys. There are two options on this page.
- Book a time to pick up any toys you have reserved as well as select a time to drop them off. You must reserve toys first before you can use this option You just simply select from the dropdown menus provided
- For no toy reservations, if you just want to drop off the toys you already have on loan, then again simply select a date and time from the dropdown menus to do this
Remember to click Save for either option. Once you have made a booking, a Success message will appear and it will also appear under the heading Booking on the My Library page. We will also be notified of your booking.
FAQ
If you have any questions about our library, please check our Frequently Asked Questions page first for answers. If you cannot find what you are looking for please contact us with what you would like to know and we will reply as soon as possible.
The post For clients (non-members) – how to use the Client Website! appeared first on MiBase New Zealand.
]]>The post Client Website different from the Member Website appeared first on MiBase New Zealand.
]]>The two websites are very similar with some minor differences. Once they log in, they will see the following pages.

The main difference is the clients’ toy list is listed as Party Toys. There is no dropdown menu or filters like there is on the Member Website.
You will also not see the Roster page as clients are not required to complete duties.
With the Home page, clients will not see a reminder to renew their membership or the ability to renew it. Nor will they see the Duties heading. Lastly, they will be unable to view or add children as this option is not available for clients.
Under My Library, clients will not see the headings Roster Duties or Missing Pieces.
Otherwise, the rest of the Client Website is very similar to the Member Website with the ability to add toys to their wishlist, reserve toys, and view their transactional history.
The following article For clients – how to use the Client Website! is a guide you can give to your clients to assist them when using the website. Alternatively, you can add a link to this article to the Welcome email for the clients to read before logging on.
The post Client Website different from the Member Website appeared first on MiBase New Zealand.
]]>The post How to upload files to the Client Website appeared first on MiBase New Zealand.
]]>To add a file, go to Setup -> Upload Files.

Then select and add:
- Choose File: click the button, select the file from your device that you want to upload
You MUST upload files without any space or any type of brackets in the file name, for example:
– Correct: bouncy_castle_instructions.docx
– Incorrect: bouncy castle instructions.docx - Description: write a short description of the image/file
- Access to File: select member
- Category: select client
Click Upload.
Once a file is uploaded it will be added to the Uploaded Files list where you can Open the file to see it or Delete the file if you no longer need it.

The file will then appear under the My Library page on the Client Website.

The post How to upload files to the Client Website appeared first on MiBase New Zealand.
]]>