The post Toy Details page appeared first on MiBase New Zealand.
]]>The Toy Details page can be accessed from a number of pages within MiBaseNZ. These include the Stocktake page, Toy Alerts list, and the Toys List page.
For this article, we will be accessing it through the Toys List in the second menu. From there click on the yellow View button alongside the toy you would like to see.
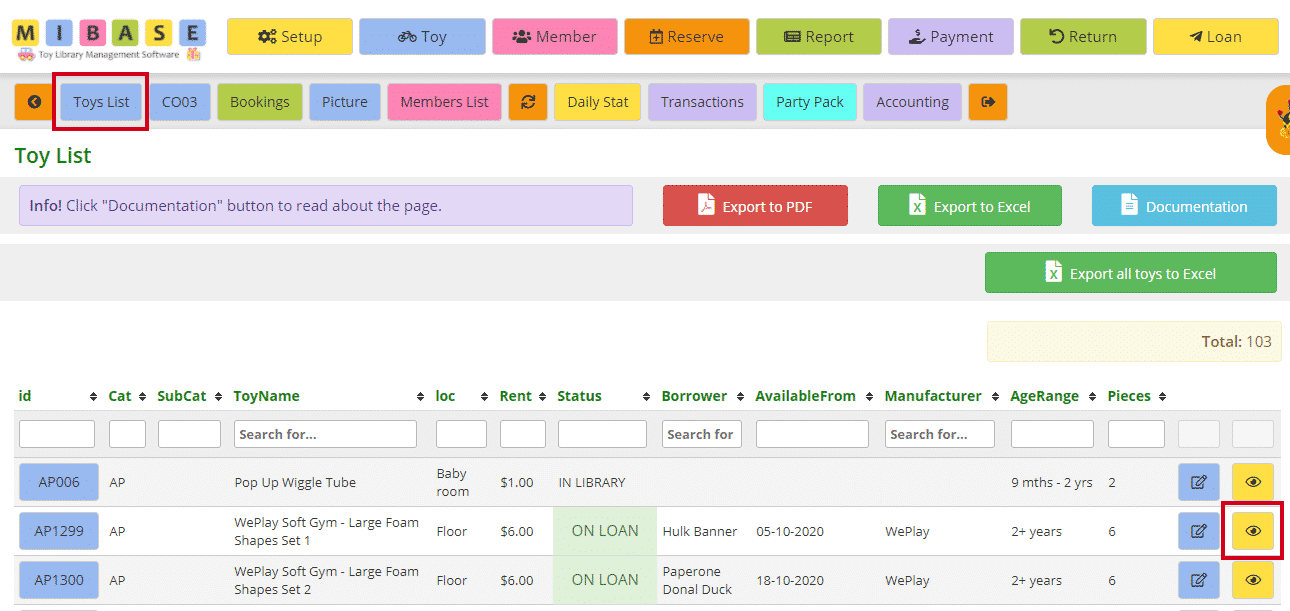
There is a lot of information on this page. We will break it down in sections and explain it in more detail below.
Toy Name

At the top of the page, the toy id and toy name will appear.
If this isn’t the toy you were wanting to view, you can type in the name of the toy you were after in the Search Toy field and select from the dropdown menu.
If this is the toy and you would like to edit any details, click the blue Edit Toy button to the right.
Underneath the toy name, there are three columns of information.
Toy Information
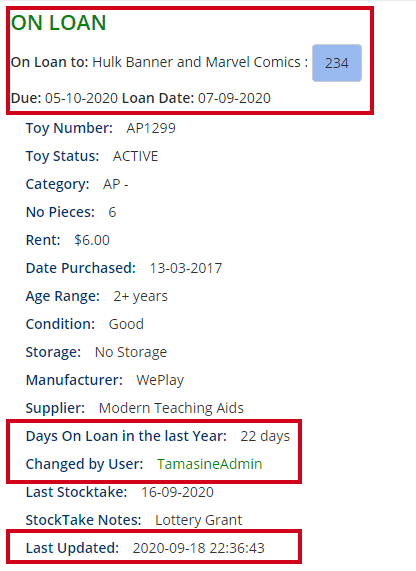
The first column on the left lists all the information that has been saved in the Edit a toy page.
Note: some headings will only appear if information has been added.
The three sections outlined in red you will not see in the Edit a toy page.
- On Loan to: this toy is currently out on loan. You can also see the Due Date and Loan Date which is the start date of the loan. Clicking the blue member id number will take you to the Member’s Detail page.
If the toy was in the library, this information would not appear - Days on Loan in the last year: this is the total days the toy was out on loan
- Changed by User: this automatically updates listing the username of the last admin who made changes to this toy
- Last Updated: this also automatically updates with the date and time of the last change made to this toy
Description & Contents List
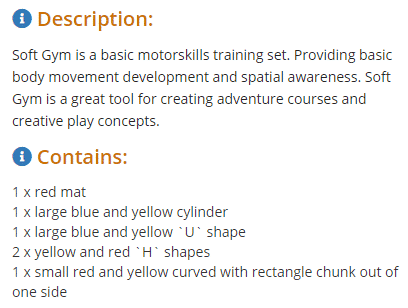
The second column shows the description of the toy and list of pieces for that toy. This information is added in the Edit a Toy page. Follow this link for further information regarding this.
Bag Label & More Info
The third column is where you can select a bag label to print for this toy.
Click on the dropdown menu and choose from the large selection of bag labels. Once you have selected click the green Open BagLabel on pdf.
If there is a bag label you would like to create or amend one in the list for your library, you can Open a Ticket and we will add it for you. For further information on this read this article, Customised Bag Labels.
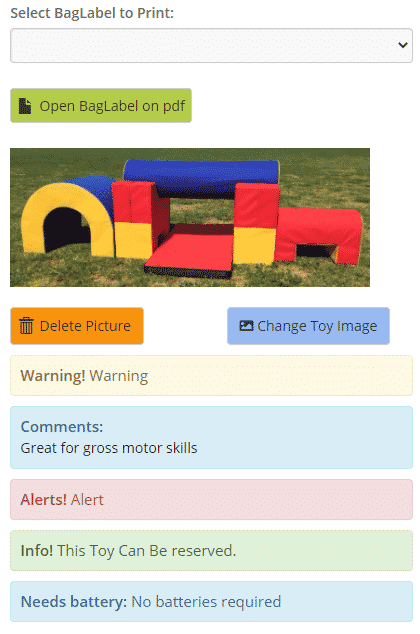
Underneath the bag label is the toy image. You can either delete the image or change it. Follow this link on Uploading Images for further information.
Underneath this, you can see a number of comment or alert boxes. These will only appear if the information has been added in the Edit a toy page.
Missing Parts
Continuing down the page underneath all the information is the Missing Parts section. This is where you can add pieces of the toy that are missing, broken, replaced etc. Follow this link on Missing parts for further information on how to do this.
If no parts are missing you will see this:

If there are missing parts, a list will appear like this:

Toy History
Every time the toy is loaned out, it will be recorded in this table. It will list up to 10 toy loans.

To view any more than that you will need to click the blue All History button. This will take you to the toy’s history page where you can see the full list of previous loans.
To the top right of the page, you will see
- Total: the number of loans for this toy
- Total Days out: total number of days the toy was out on loan
Although it doesn’t quite look like it, both tables contain the same information. The second table just shows the toy’s name which is not necessary for the first table.

You can also export this information to PDF or Excel by clicking the relevant buttons.
The post Toy Details page appeared first on MiBase New Zealand.
]]>The post Missing Pieces – Bulk email appeared first on MiBase New Zealand.
]]>Before you send the email however you must record the missing piece and allocate the member to it.
To learn how to do this follow this link Recording Missing Pieces
Follow this link to view the Missing Pieces page
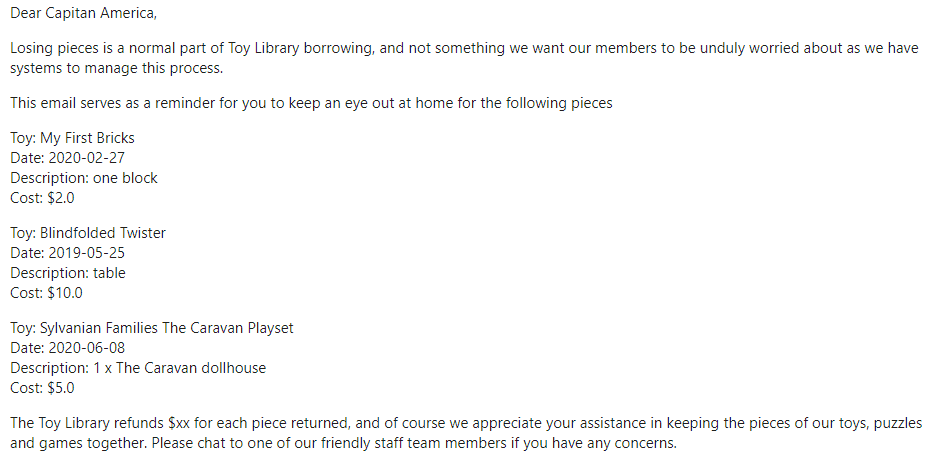
Once this is done, you can send the email. This email will also list any previous missing pieces recorded against this member so it also serves as a reminder.
Email Template
Once you have recorded the missing piece, the next important step is to create/modify this email template.
Go to Setup -> Email Template, type in ‘missing’ as shown below and click the yellow edit button.

Then change the content in the email.
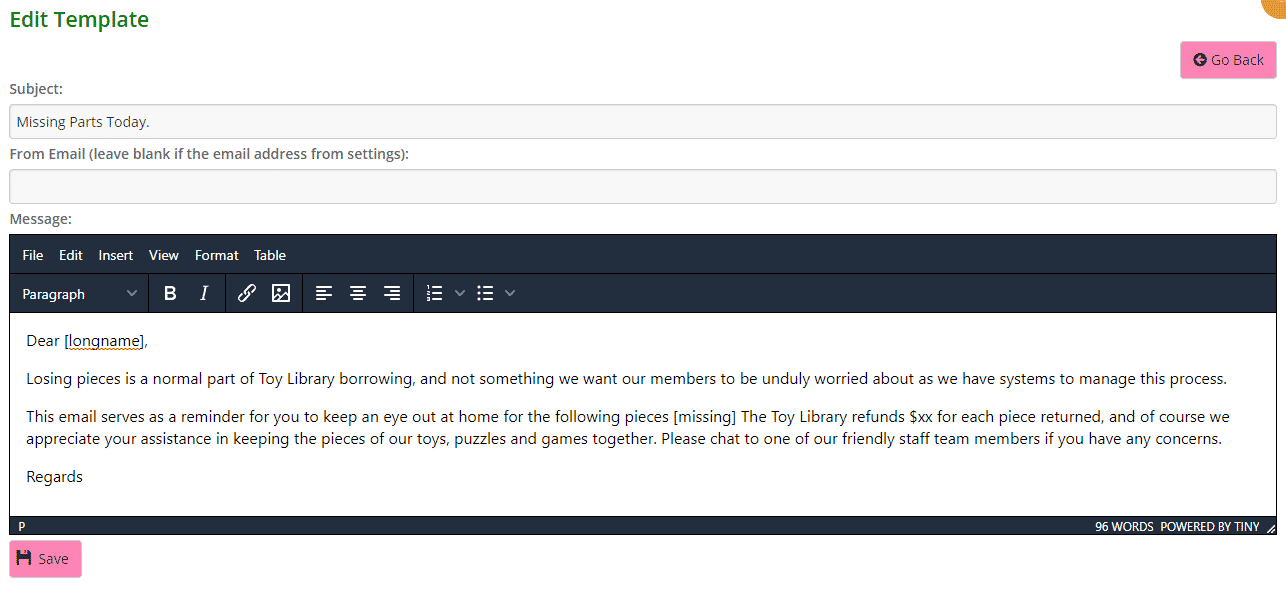
Click Save.
A Success message will appear. Clicking Go Back will take you back to the Email Templates page.

Specific Shortcode
For this particular email, you need to use the shortcode [missing] as seen above. This will list all the missing pieces allocated to the specific member.

You can also add any generic shortcode you like to the email. Follow this link to view our full list of shortcodes.
Member Email
This is the email that the member will receive.
The post Missing Pieces – Bulk email appeared first on MiBase New Zealand.
]]>The post Missing Parts page appeared first on MiBase New Zealand.
]]>To see the list, go to Toy -> Parts
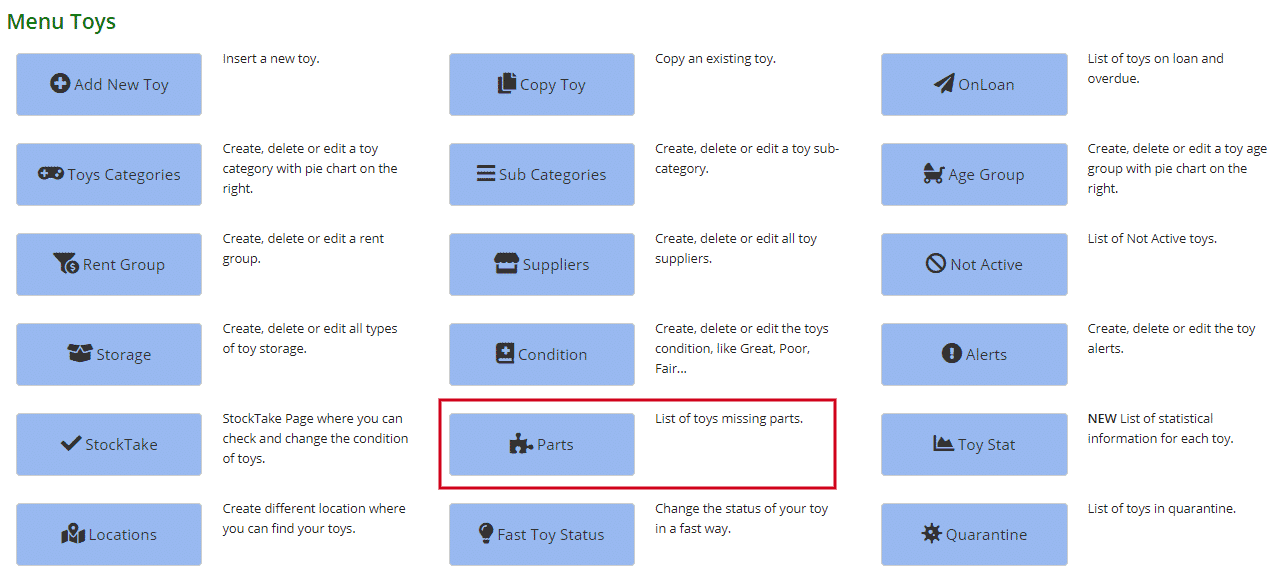
You can see in the list below the following information for each toy.
In the top right corner above the table, you can see the total number of missing or broken pieces.
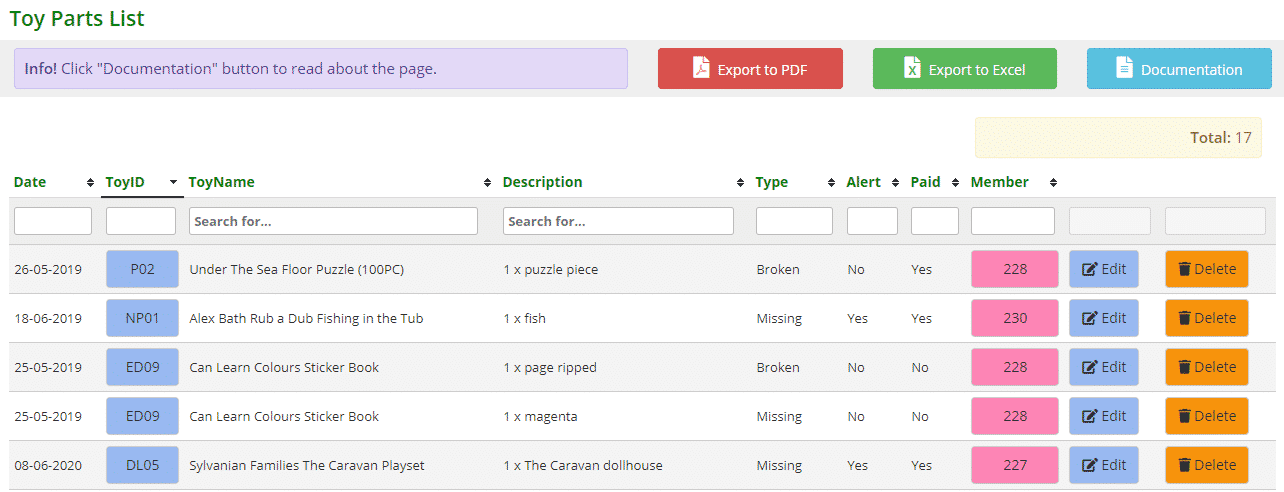
- Date: when the missing or broken part was recorded.
- Toy ID number
- Toy Name
- Description: the details of the part missing or broken.
- Type: the type of issue or defect with the part.
- Alert: ‘Yes’ means the alert box was selected when the part was being added. This part will appear as an alert or warning on the toy loan page.
- Paid: ‘Yes’ indicates the member has paid the fee for the missing or broken part.
- Member id number. Indicates the member responsible for the missing or broken part.
To edit or update the toy part’s details, click on the blue Edit button.
To delete the toy part if it has been found or fixed, click on the orange Delete button.
Remember to reimburse the fee charged on the Payments page if that is what your toy library does when a missing piece is found.
To sort or filter the list, click the arrows next to the heading you want to sort or filter the list by or type in the search boxes underneath the headings.
You can also download the list to PDF and/or Excel by clicking the Export to PDF or Export to Excel buttons. This will export the full list, not a filtered list. If you want to download a filtered list, export to excel and sort or filter through there.

These missing or broken parts can also be viewed in three other places within MiBaseNZ.
1. In the individual toy’s detail page under Missing Parts. Click on a toy id number, scroll down the page and you will see the list of missing or broken pieces.
2. In the member’s detail page under Missing Pieces. Click on a member id number, scroll down the page and you will see the list of missing or broken pieces.
3. In the member’s website account under the My Library tab.
To learn how to How to record Missing or Broken Pieces, follow this link.
The post Missing Parts page appeared first on MiBase New Zealand.
]]>The post How to record missing or broken parts appeared first on MiBase New Zealand.
]]>To record a missing or broken piece, click on the Toys List button in the second menu.

Search for the toy by its id number or name. Click on the yellow View Toy button alongside it.

You will be taken to the toy’s detail page.
Scroll down the page till you see the heading Missing Parts. (Even though this is a list for missing pieces, you can also add details for pieces broken/fixed/require batteries etc.)
To the right of the heading, you will see a blue New Part button. Click on that button.

From here you can add all the details relevant to the missing or broken piece.

- Missing Part Details: add in the details of the missing/broken piece.
- Date: automatically adds the date.
- Type Part: choose from the dropdown menu what is wrong with the piece. Is it missing/broken/requires batteries?
- Cost: if you have a missing or broken piece fee, add it here by typing in the number or using the arrows to select it.
This fee will automatically be debited from the member’s account and will appear on their Payments Page. If this does not happen you will need to do it manually - Member: choose from the dropdown menu the member who misplaced or broke the piece.
- Alert User: select this box if you would like an alert/warning to appear on the toy loan page.
- Paid for missing part: select this box if the member has paid the fee.
Click Save. You will see the Success message appear underneath. An Error message may appear if there is a problem.

Click the Back to Toy Detail button OR the View Toy with parts list and it will take you back to the toy’s detail page. Scroll down to Missing Parts and you will see the missing piece has been added to the list.
You can see the member’s id number has been added. You can also edit or delete by clicking the relevant button alongside it.

You can also access this page by selecting the toy’s id number which appears on the second menu at the top of the page next to the Toy List button.

Once you click Save, the missing piece automatically appears in the member’s website account under the My Library tab for the member to see.

The missing piece and warning also automatically saves in the Toy Parts List.

It also automatically saves in the member’s detail page under Missing Pieces.
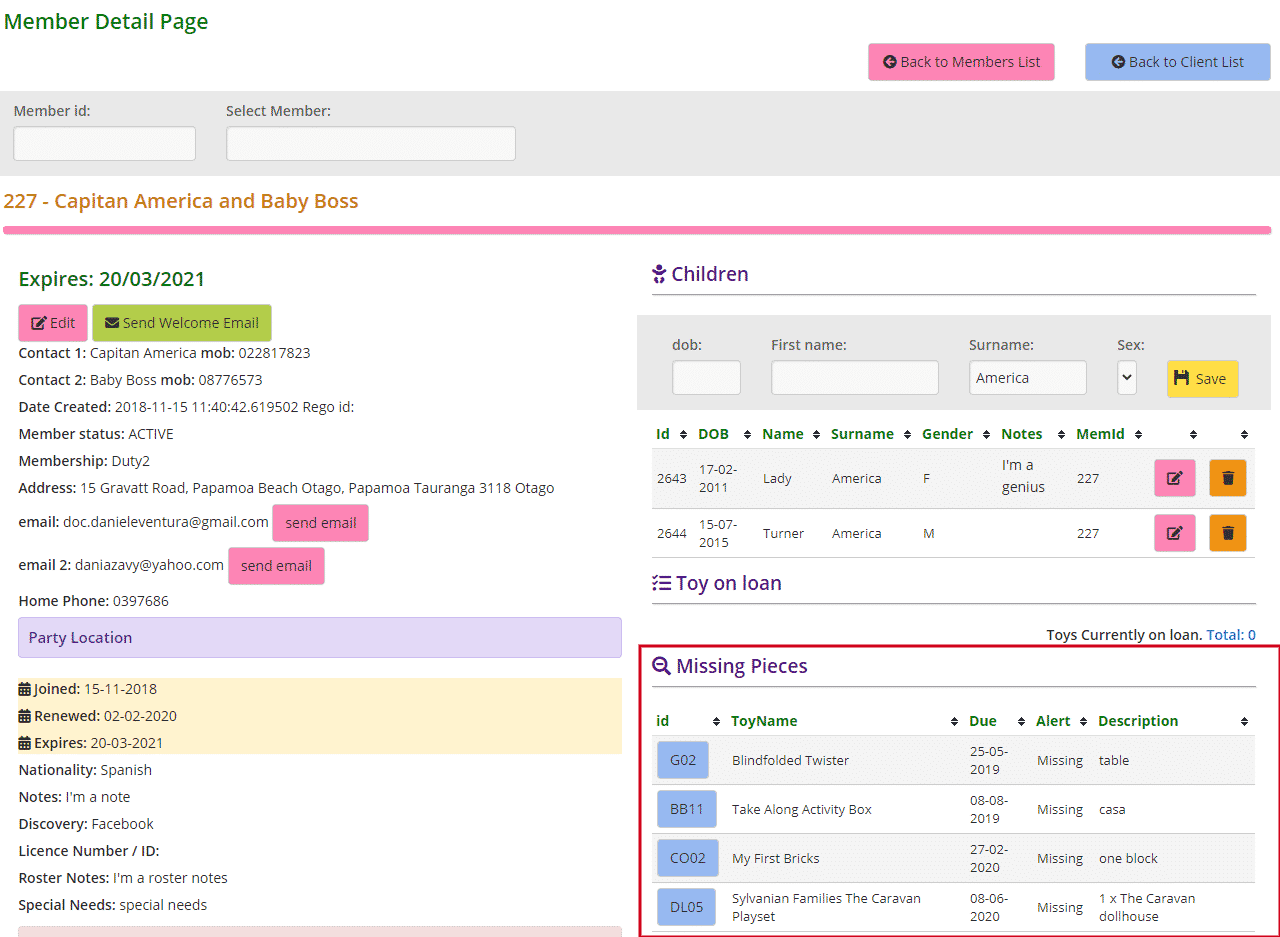
When this toy is hired out by a member, if you have selected the “Alert User” box when adding a missing part, it will appear on the Loan page.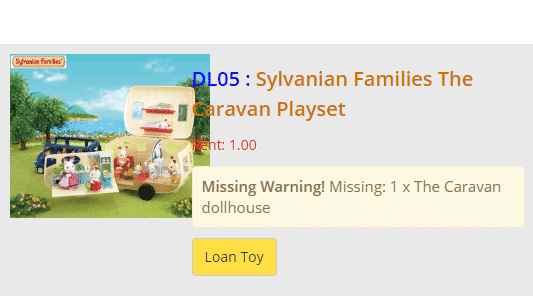
To view the full list of missing or broken pieces for all the toys in your library, go to the Missing Parts page.
The post How to record missing or broken parts appeared first on MiBase New Zealand.
]]>