The post How to change the rent value of toys appeared first on MiBase New Zealand.
]]>To change the rent value of an individual toy, find the toy in the Toy List, click the blue Edit button and change the rent value from the dropdown menu, remembering to click Save.
To change the rent value in bulk, however, can only be done by changing the rent assigned to a toy category which means all toys within that category will update to the new rent value selected. The issue with this though is if toys in that category have different rent values.
Unfortunately, MiBaseNZ cannot isolate all toys with the same rent value across different categories to update them. If you do not want to change all the toys within that toy category to be the same, you will need to change the toys individually as outlined above.
If you are happy for all toys within that category to have the same rent value then go to Toy -> Toy Categories.
Click the blue Edit button on the category in which you like to change the rent, change the rent value and click Save.
Click the OK button and it will take you back to the Toy Category List page.
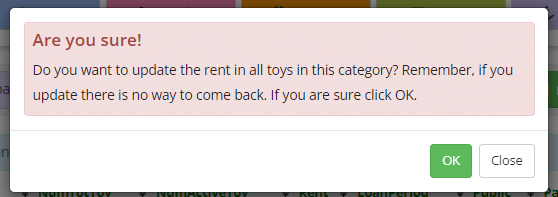
Click the purple Update all toys button and click OK to the alert message. All toys within that toy category will now have the same rent value.
The post How to change the rent value of toys appeared first on MiBase New Zealand.
]]>The post How to approve a member that joined online appeared first on MiBase New Zealand.
]]>When a new member signs up a couple of things happen.
First, the system automatically sends the new member the Membership Application Received email. If you are not sure what this is and whether it has been set up properly for your library, follow this link.
Next, your library will be sent the following automatic email New User Add.
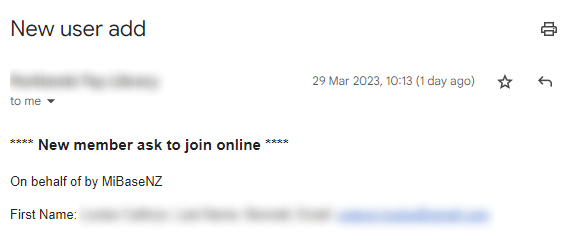
At the same time, on the home page of the Admin Website, you will see the following appear under the heading Online Member Applications to Approve.
To approve the application, click the Go to button.
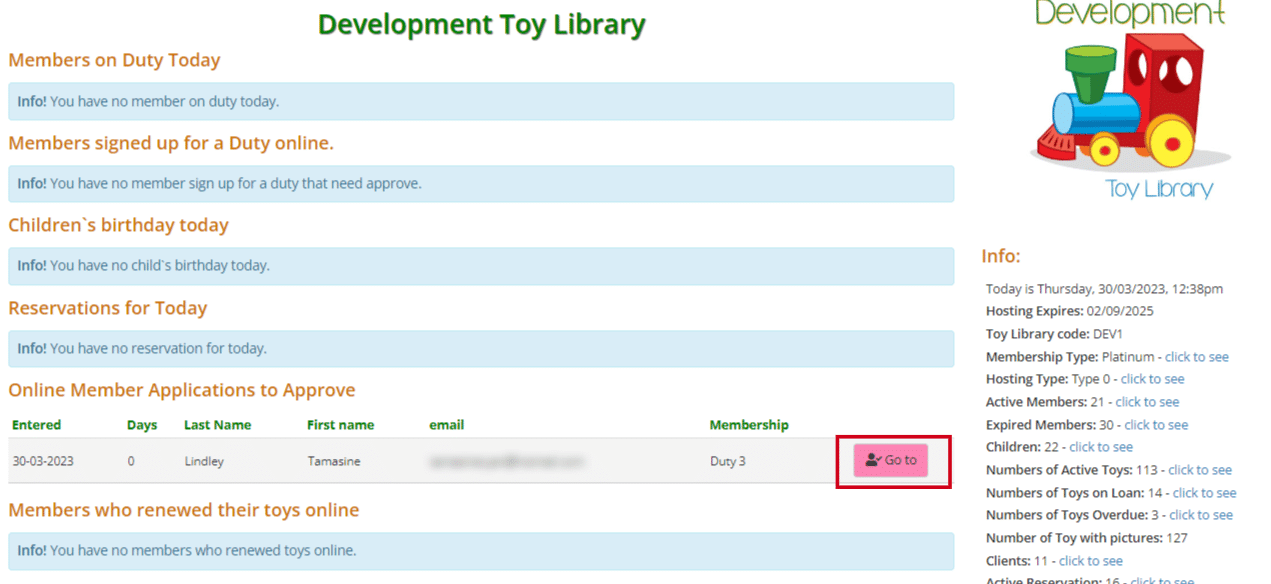
This will take you to the Members Approve List where you can Approve the member by clicking on the button or Delete them.

If you choose to delete or click that button by mistake, never fear, you will be taken to another page where you will have the option to confirm your choice or to cancel.

If you have chosen to approve the new member, click the Approve button and you will be taken to the New Member approved page where you can review the information provided before clicking the Save New Member.

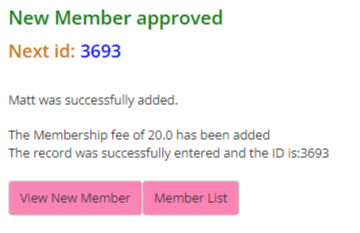
Once you have clicked Save, you will be taken to the following page confirming what has been added. You can either View New Member which will take you to the Member Detail page or select the button for the Member List.
The post How to approve a member that joined online appeared first on MiBase New Zealand.
]]>The post Terms & Conditions appeared first on MiBase New Zealand.
]]>Click the highlighted text to take you to the Terms & Conditions page.

The post Terms & Conditions appeared first on MiBase New Zealand.
]]>The post SMTP2GO – new email system appeared first on MiBase New Zealand.
]]>Note: Your account has been set up specifically for your toy library. Please DO NOT change the Settings in particular the SMTP Users. Doing so will break the connection between MiBaseNZ and SMTP2GO. Any queries please Open a Ticket.
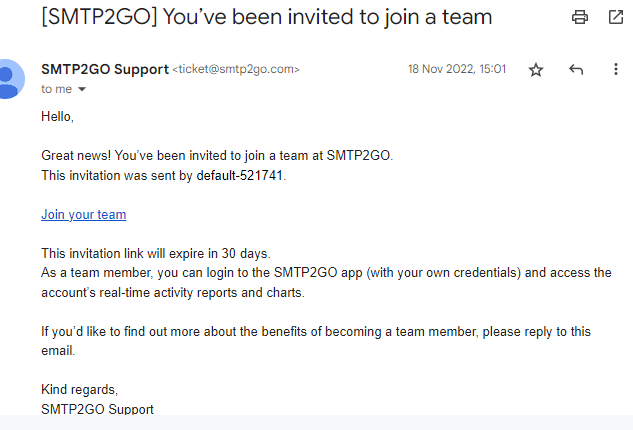
You will be sent an invitation email. Click the link Join your team.
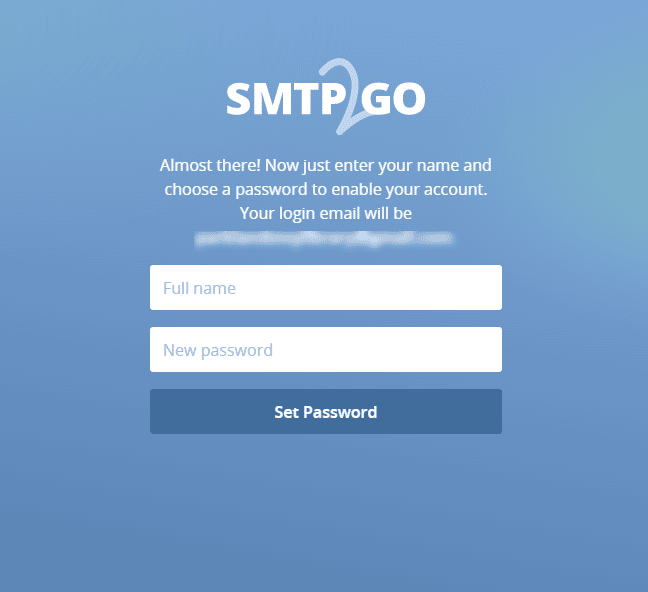
This will take you to the website where you will be asked to set your password.
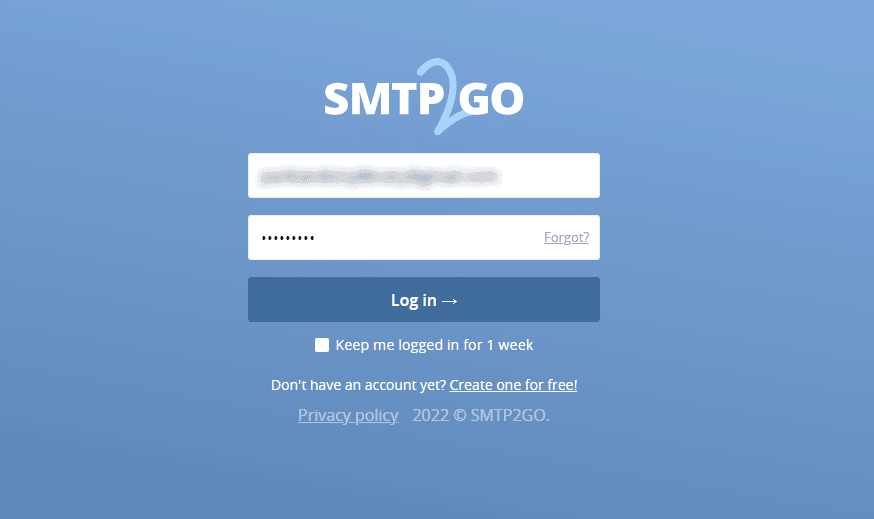
Once this is done, if it doesn’t already take you to the login page, go to https://app.smtp2go.com/login/ and log in.
Enter your email (the one the invitation email was sent to) and the password that you set.
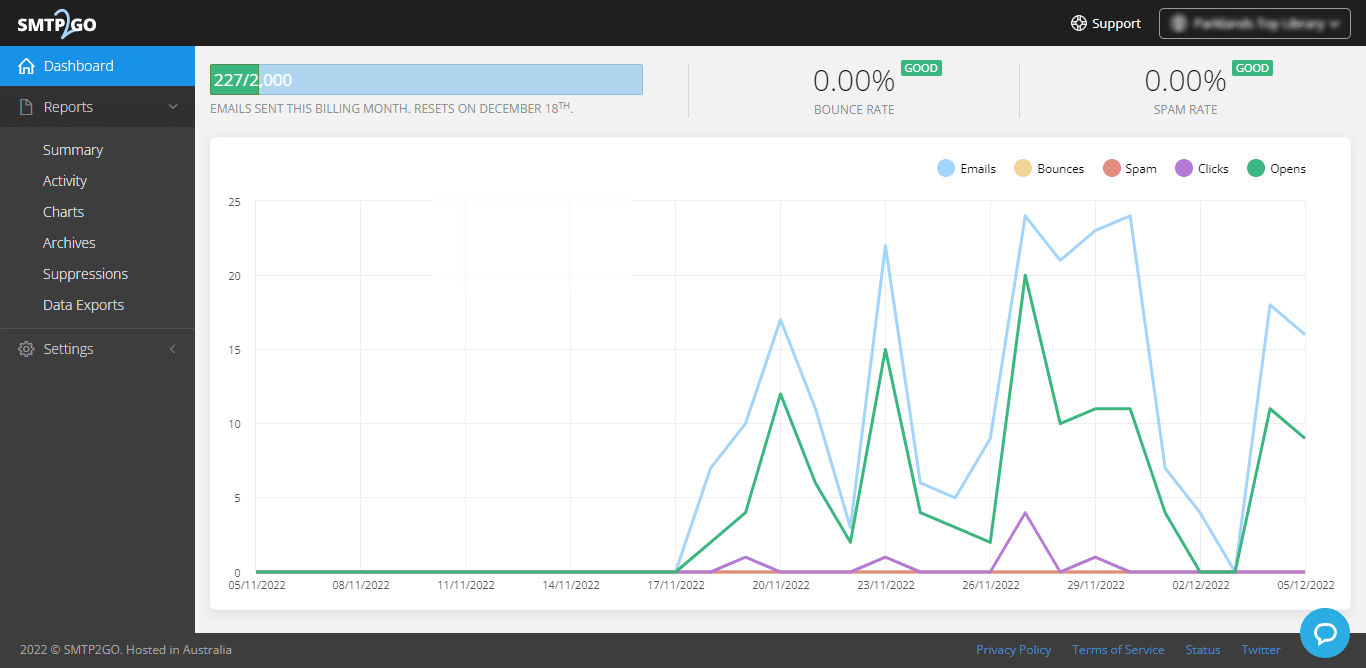
The Dashboard will give you an overview of your emails. How many have been sent, how many have gone to spam or have bounced, how many have been opened and how many have had the links clicked within the email.
Under the heading Dashboard, you will see Reports. Click the arrow to see the list of reports. The first two reports are the only two you really need to use.
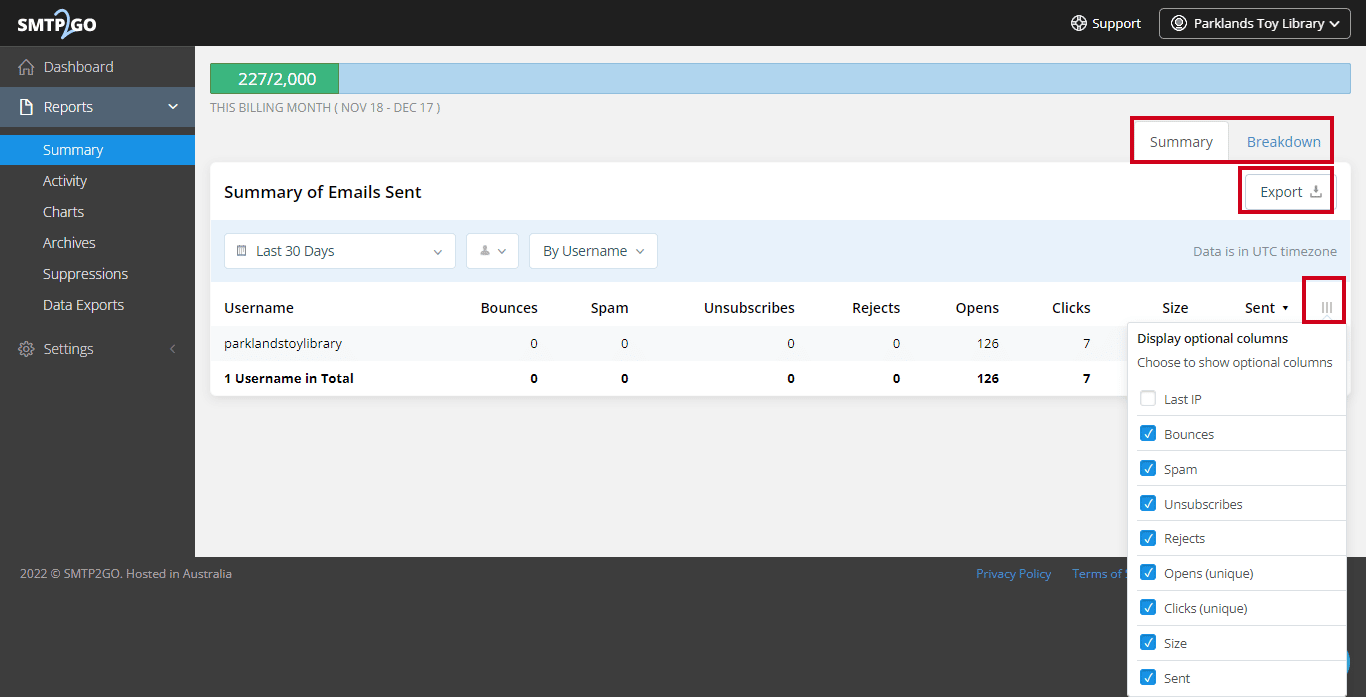
Summary – this page will give you a summary of the emails sent and if you would like to see, a breakdown of each of the emails.
To the right of the table are 3 vertical lines, the search filter. Click this and select which columns you would like to see displayed. It is best to click all to get the full range of information. There is also an Export button if you would like a printout of the information.
Activity – this page is similar to the Activity Log in MiBaseNZ in that it lists all emails sent with the most recently sent emails at the top. To the right of the table are the 3 vertical lines. Select which columns or search results you would like to see displayed.
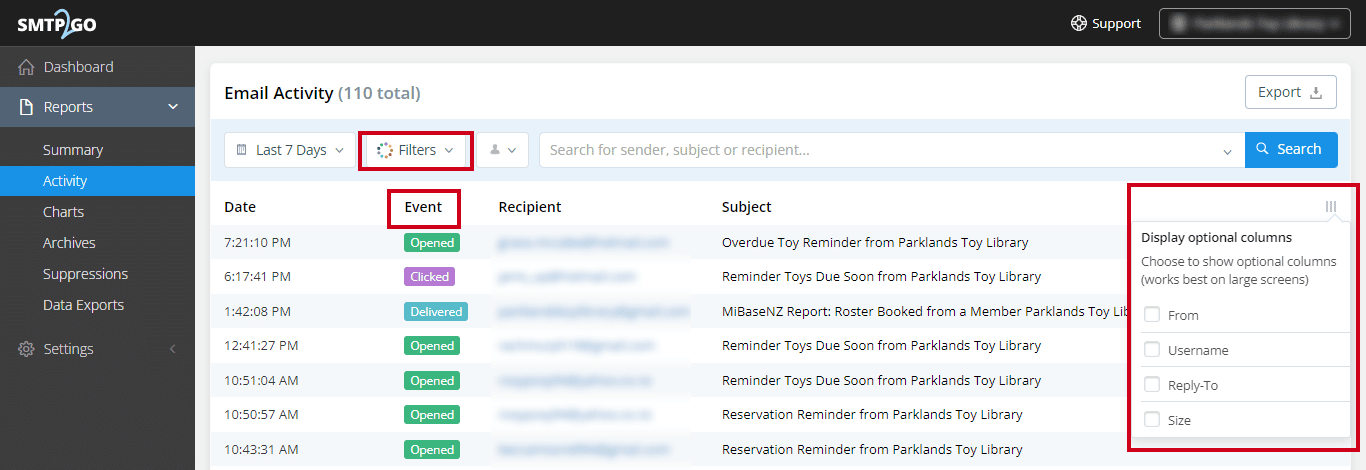
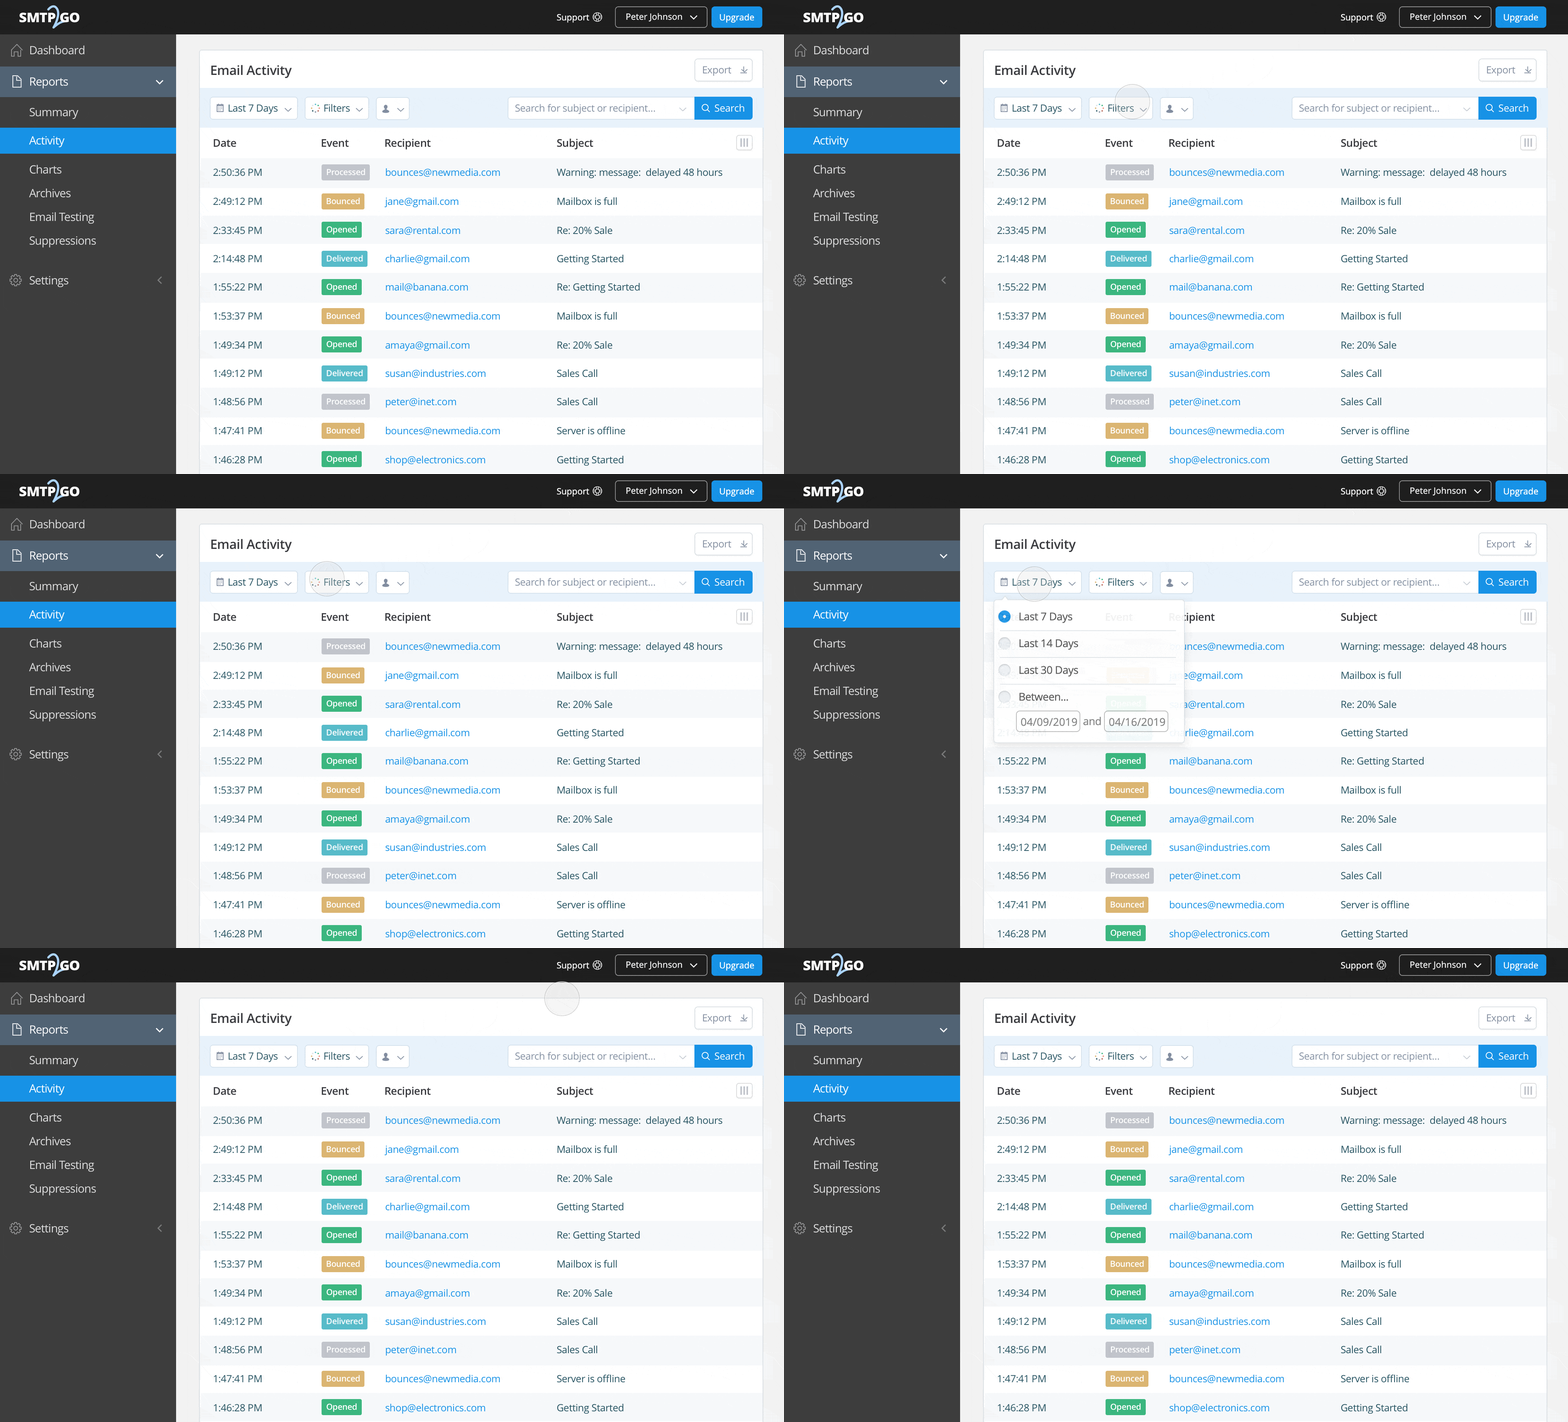
The colour-coded Event types can be further explained in the Filters dropdown menu which includes:
- Processed: our servers have received your email and have queued it in our system for delivery to your recipient
- Soft Bounce: a temporary issue that may potentially self-resolve for future emails sent to that address, e.g. ‘mailbox full’ or ‘email content detected as spam’
- Hard Bounce: a permanent rejection, e.g. an invalid email address (see below)
- Rejected: a rejected email caused by the recipient’s previous hard-bounce, spam complaint, or unsubscribe
- Spam: the recipient has flagged an email as spam from their web-based email system’s inbox
- Delivered: the email was successfully delivered to the recipient
- Unsubscribed: the recipient has clicked your unsubscribe link
- Resubscribed: a previously unsubscribed recipient has decided to resubscribe to your emails
- Opened: the email has been opened by the recipient
- Clicked: the recipient has clicked/opened a link in the email
If an email has hard or soft-bounced, hover the cursor over the event tag to get a quick tooltip showing the bounce reason.
You can also click on any recipient’s email address to pull up the in-depth delivery details menu, which includes a Timeline tab (all events in chronological order), a Headers tab (the email’s original headers), and a Details tab (the outbound IP address, SMTP username, time, date, and more).
How to fix Hard Bounces
SMTP2GO categorizes bounced emails as either ‘Soft’ or ‘Hard’ by analyzing the error message that is sent to us by the recipient’s mail server. A hard bounce occurs when there is a permanent issue or there is no chance that the email address will work in the future. Common causes for hard bounces can be due to a recipient’s address being invalid or not existing, authentication issues (SPF/DKIM/DMARC), or due to spam filtering or reputation issues.
What happens when a Hard Bounce occurs?
Our system automatically blocks (for 7 days) any attempt to send to an email address that has hard bounced. This is an important policy: if we continually tried to send emails to hard bouncing email addresses, we would very quickly damage our reputation in the email community. After 7 days, the hard-bounced email address will be automatically unblocked and sending can resume. If there are still issues with the recipient’s email address, however, it will hard-bounce time and time again. You should, therefore, remove hard-bouncing email addresses from your mailing list.
We record blocked attempts to send emails and call these rejected emails. Rejected emails are attempts to send emails to any email address that has hard-bounced within the past 7 days, has previously reported an email as spam, has previously unsubscribed, or has been manually added as a suppression. You should aim to have zero rejected emails.
How do I resolve a Hard Bounce?
The recipient will need to resolve the hard bouncing issue from their side. You may need to contact them using alternative means, not via email of course, asking them for their correct email address. If you cannot contact your member/s in a different way, then remove the email from their account.
Important
All Toy Libraries with SILVER and GOLD subscriptions will have 2000 emails to send each month, PLATINUM will have 5000 emails.
The post SMTP2GO – new email system appeared first on MiBase New Zealand.
]]>The post DELETED status for members accounts you no longer want to see appeared first on MiBase New Zealand.
]]>Remember, members’ accounts cannot actually be deleted. It will still be in your database, you just won’t be able to see it.
The only way to see your deleted members is to download a list on the 1-click function page. This will be explained in further detail below.
There are two ways to delete a member. Either changing the status on their Member Detail page or if they are on the Not Active list, changing the status there.
Member Detail page
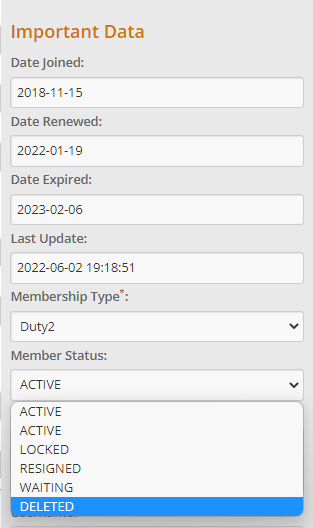
Find the member you would like to delete. Click the pink Edit button. Under the Important Data section, find the Member Status dropdown menu and select DELETED.
Click Save Member.
Not Active page
Go to Member -> Not Active
Find the member you would like to delete. Under the Change Status column, select DELETED from the dropdown menu.
Then click the orange refresh button at the top of the page to save.

1 Click Function page
Once the status is changed to DELETED, their account will no longer be seen. As mentioned above, the only way to see your list of deleted members is to go to Setup -> 1 click function.
Select the Old Members to Excel button. A list of all your resigned, locked and deleted members will download to an excel spreadsheet.
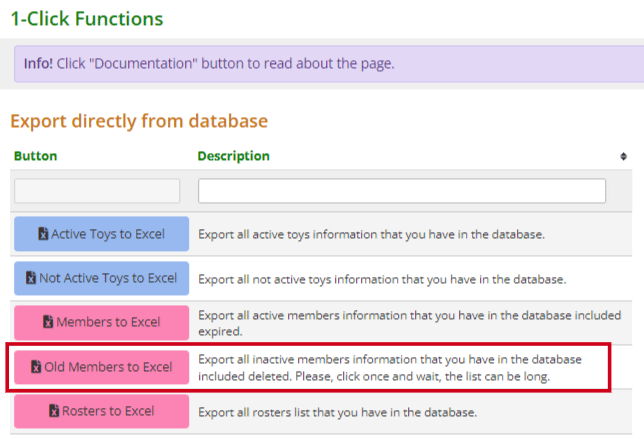
The very last column of this spreadsheet is the Status column. You can filter out your deleted members from there.
Reactivating a deleted members account
If for some reason you would like to activate a member’s deleted account, the only way to do it is to know their member ID which you can find in the above excel list. Go to the Member Detail page of any member and in the Member id field type the id number in.

When their details appear, click the pink Edit button and change their Member Status to ACTIVE. Click Save Member.
The post DELETED status for members accounts you no longer want to see appeared first on MiBase New Zealand.
]]>The post Member Alerts page appeared first on MiBase New Zealand.
]]>The member will be able to see their alert on the Member Website when they log in. It will appear on the Home page in a red box.
Admin can see the alert on the Loan page and the Member Detail page.
Member Alerts once added will also automatically be added to a list on MiBaseNZ’s Member Alert page.
To access this list go to Member -> Alert
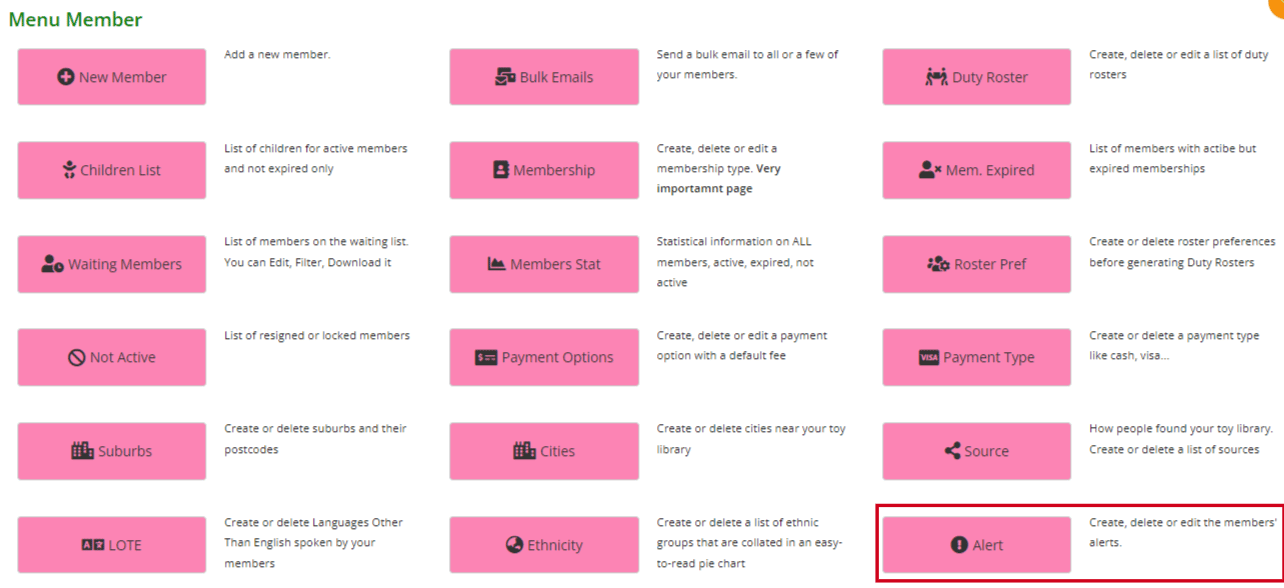
From here you can check, edit and delete any information on the list.

- MemID: the member’s individual id. If you click the box you will be taken to the member’s detail page
- MemberName: self-explanatory
- Membership: self-explanatory
- Status: the status of the member’s membership
- AlertDetails: the information that will appear in the red alert box on both websites
- Delete: if this alert is no longer required you can just click the orange Delete button. The page will automatically update removing the alert. The alert will also be removed from the member’s detail page on both websites as well as on the Editing Member page
- Edit: if this alert needs to be edited in some way click the pink Edit button and you will be taken to the Editing Member page where you can make the changes. Remember to click Save
To sort or filter the list, click the arrows next to the heading you want to sort or filter the list by or type in the search boxes underneath the headings.
You can also download the list to PDF and/or Excel by clicking the Export to PDF or Export to Excel buttons. This will export the full list, not a filtered list. If you want to download a filtered list, export to excel and sort or filter through there.
The post Member Alerts page appeared first on MiBase New Zealand.
]]>The post Returned page appeared first on MiBase New Zealand.
]]>To view this list, go to Toy -> Returned
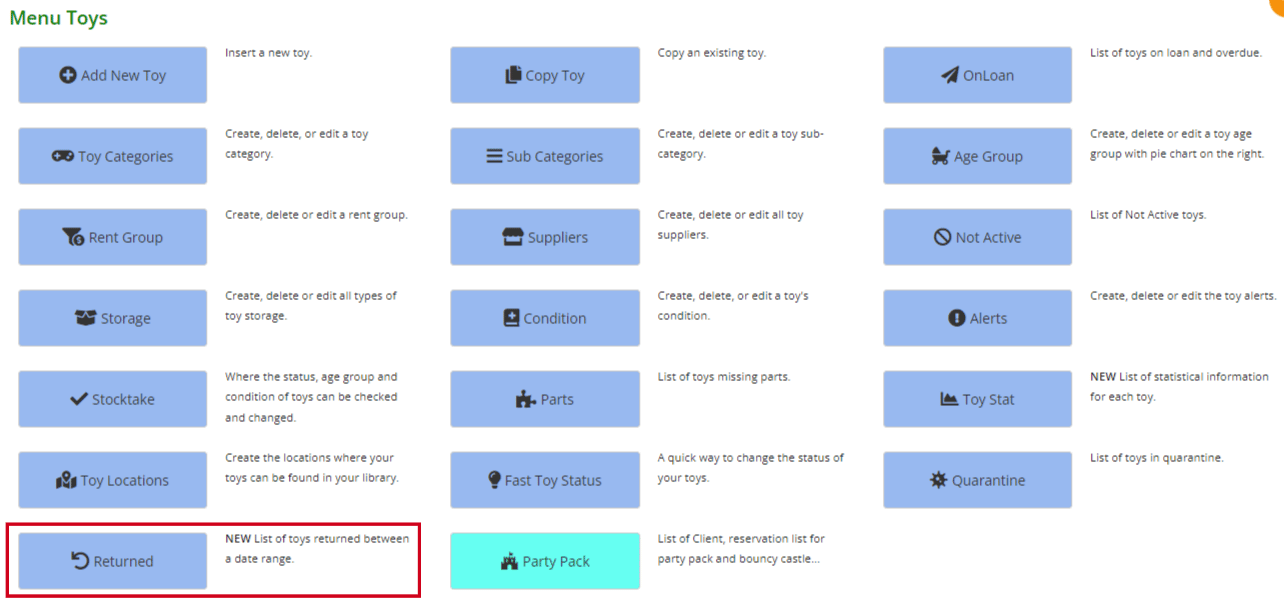
The most recent toys will be listed first.
If you wish to view toys returned for a particular session or for a given period, select the Start Day and End Day from the dropdown calendars, and click Search.
Click Reset to refresh the page.
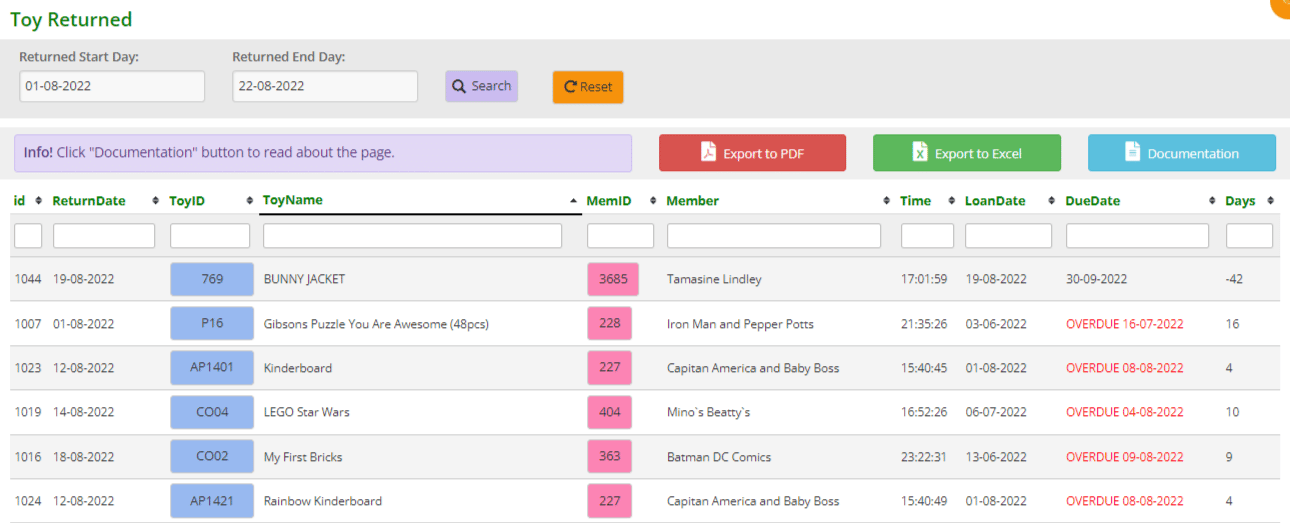
- id: the number generated for each returned toy; the higher the number the more recent the return
- ReturnDate: the date the toy was returned
- ToyID: the toy’s individual ID. If you hover your mouse over the blue box the image will appear. If you click the box you will be taken to the toy’s detail page
- ToyName: name of the toy
- MemID: the member’s id number. If you click the box you will be taken to the member’s detail page
- Member: the name of the member who returned the toy
- Time: time the toy was returned
- LoanDate: the date the toy was hired out
- DueDate: the date the toy was returned. As can be seen above, if the toy is overdue it will say so in red
- Days: the number of days the toy was loaned out. A negative number means the toy was returned that number of days before it was due. A positive number means the toy was returned that number of days past its due date
You can download this list to PDF and/or Excel by clicking the Export to PDF or Export to Excel buttons. This will export the full list.
If you want to download a filtered list, either use the date range option mentioned above OR export to excel and sort or filter through there.
You can also decide how many rows you wish to see on the screen by using the pagination at the bottom of the list.

The post Returned page appeared first on MiBase New Zealand.
]]>The post Weekly Stat page appeared first on MiBase New Zealand.
]]>To view this page, go to Setup -> Weekly Stat

You can see in the list below the specific information that is being collated.
To give you an understanding of the figures under each heading, for ActiveMembers, ActiveKids, ExpiredMembers, ActiveToys, and ActiveCompanies, these totals are collated on the day. ActiveReservation, ReservationLoaned, ReservationDeleted, ToysLoaned, ToysReturned, and Income are collated over the previous week.

The most recent week will be listed first.
If you wish to view certain weeks in a given period, select the Start Day and End Day from the dropdown calendars, and click Search. Click Reset to refresh the page.
- Date: once the page is live, it will be the date of every Monday moving forward
- Active Members: number of active members as of Monday morning
- Active Kids: number of active kids as of Monday morning
- Expired Members: number of expired members as of Monday morning
- Active Toys: number of active toys meaning their status is Active and not, for example, Processing
- Active Reservation: all current reservations from Monday morning
- Reservation Loaned: all reservations loaned during the previous week
- Reservation Deleted: all reservations deleted during the previous week
- Active Companies: number of active companies as of Monday morning. This only applies to libraries that have the Company as a Member module otherwise the number will remain 0
- Toys Loaned: all toys loaned during the previous week
- Toys Returned: all toys returned during the previous week
- Income: the total sum of money received during the previous week
You can download this list to PDF and/or Excel by clicking the Export to PDF or Export to Excel buttons. This will export the full list. If you want to download a filtered list, either use the date range option mentioned above OR export to excel and sort or filter through there.
The post Weekly Stat page appeared first on MiBase New Zealand.
]]>The post Customised Bag Labels appeared first on MiBase New Zealand.
]]>When starting up with MiBaseNZ, toy libraries are entitled to a customised bag label. Each toy library is different in what they would like to see on their bag labels. They can vary in size, have a barcode or not, may include warnings or alerts, have a toy description…whatever you would like to appear on your bag label is up to you.
MiBaseNZ already provides a large selection of bag labels however if none of these suits your toy library, you can simply request your own.
All you need to do is create a template or a mock example of what you would like on your bag label, Open a Ticket, attach the example to the ticket and we can create it for you. It doesn’t matter how you create the template, whether you just draw it or do an example in Word. The different size options are A4, A5 and A6 if you need a particular size.
To view the selection of bag labels simply go to any toy detail page. To the far right, you will see the following,

Click on the dropdown menu and choose from the extensive list. Once you have selected the label, click the green Open BagLabel on pdf.
The post Customised Bag Labels appeared first on MiBase New Zealand.
]]>The post How to do a bulk upload of toy photos appeared first on MiBase New Zealand.
]]>Whether you are a library starting out with MiBaseNZ or a library looking to replace old images, there is no need to spend a lot of time uploading images individually when it can be done in a much easier way.
For us to do this for you, you will need to prepare the images in a certain format as well as have them clearly named.
Step 1
Depending on how you take your photos, all images must be in a .jpg format. If they are already in that format, great! Otherwise, the images will need to be converted.
Step 2
All images must be resized to have a width between 600px and 1500px, the ideal width being 1200px. Too large an image will affect loading time.
A quick way to resize all your images at once is to use the program Imagify. Follow the link to see how.
Step 3
Name your images. They must all have a toy id (called idcat in MiBaseNZ) as the file name. If letters are used, the file name must be in lowercase.
For example, if your toy has the id AP001 the file must be ap001.jpg.
If you have only numbers in your toy id, for example 1234, the file name will be 1234.jpg.
Step 4
Once you have finished preparing all your images, they are ready to be sent to be uploaded to your system. To do this you will need to create a zip folder.
You can use the following program WeTransfer (it’s free for up to 2GB). Click on the link and it will take you to the following page.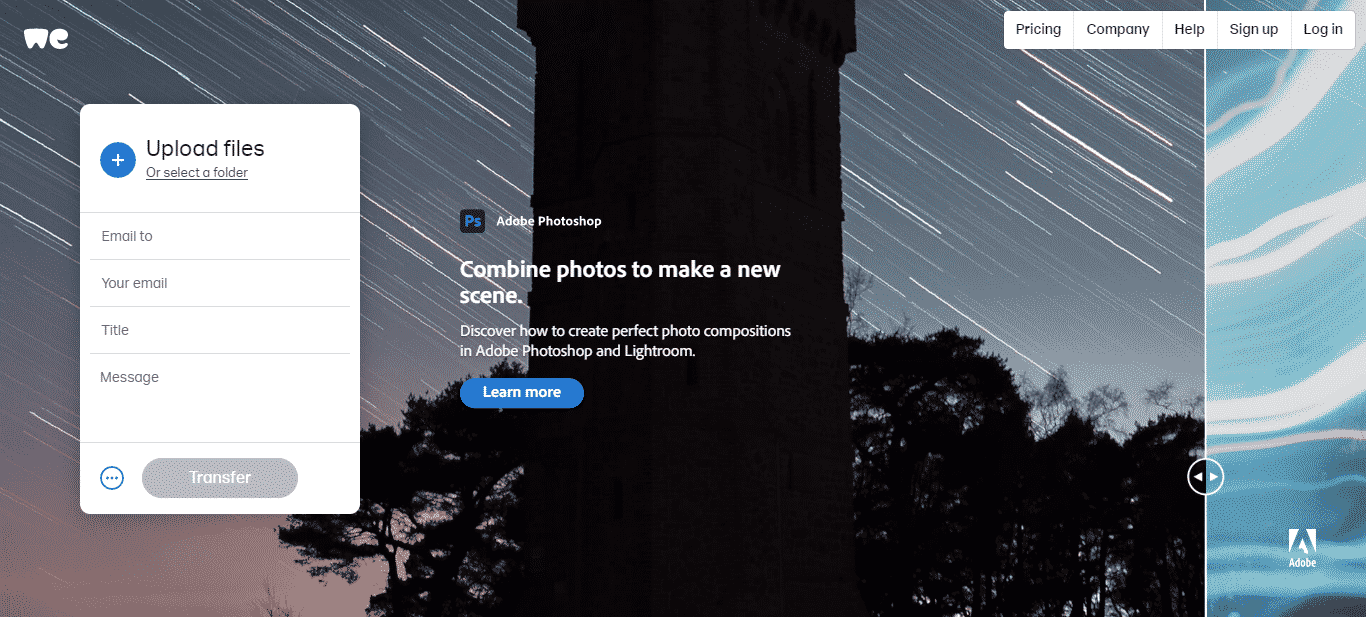
- Click the blue plus button to add all the images you would like to send
- Email to: info@mibase.co.nz
- Your email: add your toy library email or whatever email you can access as a verification code will be sent to you
- Title: add your toy library name
- Message: “toy images to be uploaded”
Click Transfer. A pop-up box will appear asking to enter a verification code.
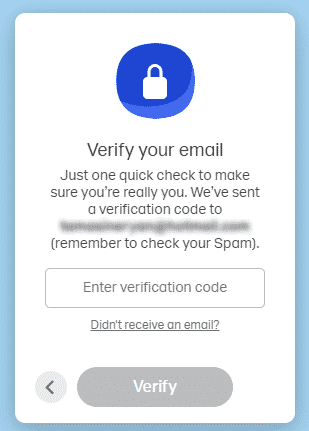
Once this has been done the files will start transferring. 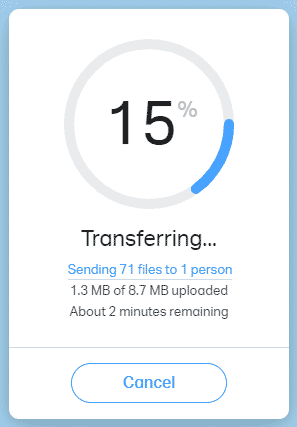
It will let you know when the email has been sent.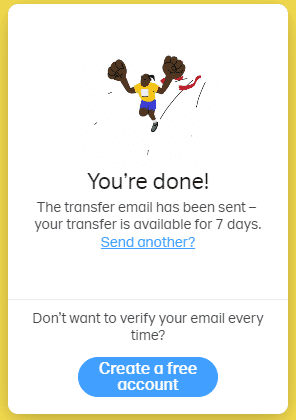
We will let you know when we have uploaded the images to your system.
The post How to do a bulk upload of toy photos appeared first on MiBase New Zealand.
]]>