The post Understanding and using the Payment System appeared first on MiBase New Zealand.
]]>Before you start using the Payments page it is important you create specific Payment Options for each of your membership types as well as for other forms of payments, for example, toy hire payments, missed duty fine, birthday bonus. This will not only make using the Payments page easier but it will also speed up the process. To find out how to Create Payment Options, follow the link.
To access the Payments page, click on the purple Payment button in the top menu. 
You will need to then select the member. There are two ways to do this. 
- Member id: type in the Member id number if you know it and press Enter on your keyboard.
- Search Member: search by name and select from the dropdown menu when it appears.
As you can see below, not only will you see all the transactions for this member but you will now be able to make a payment, and edit or delete them if necessary, and you will have the option to email or print a receipt for the member.
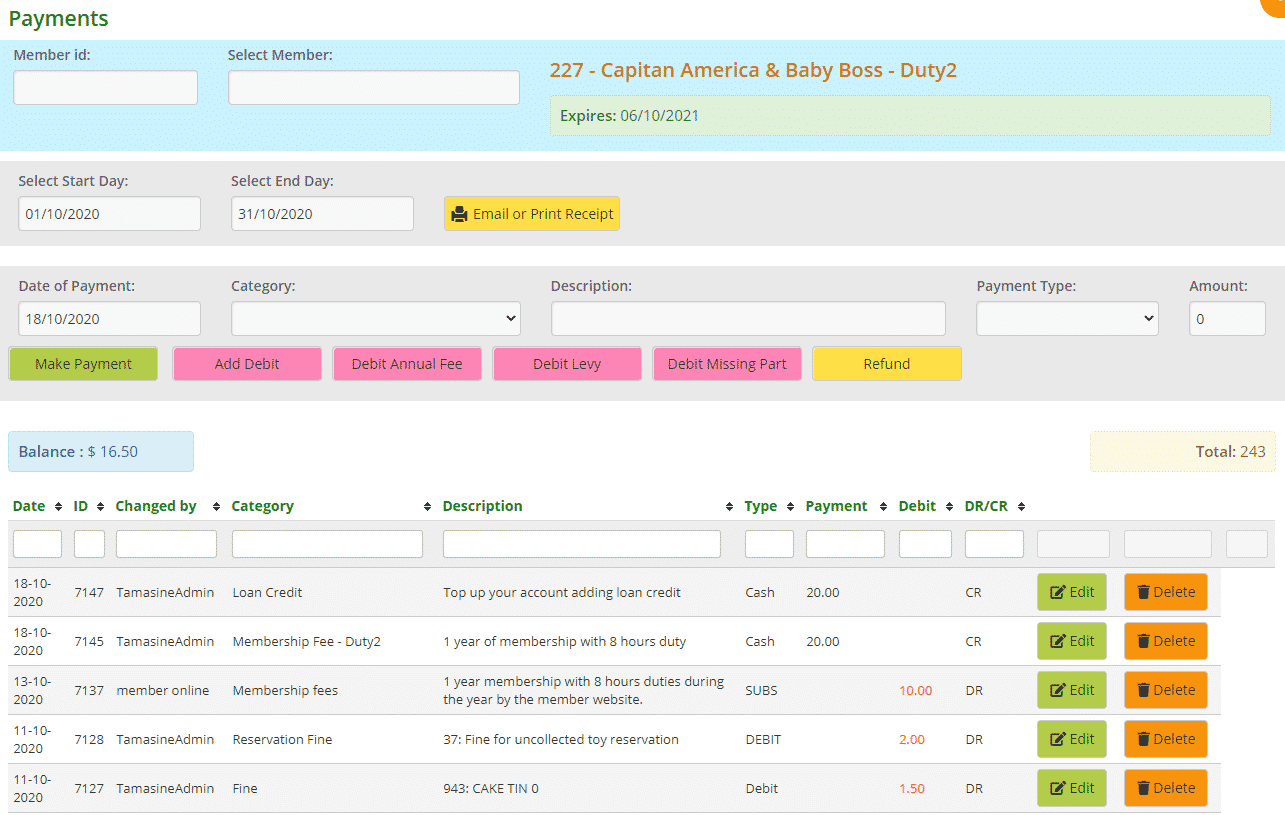
In the first grey row, you will see Select Start/End Day and the yellow Email or Print receipt button. To email or print a receipt for your member, a date range is required. Once selected, clicking the button will take you to the preview page. To learn more about being able to Email or Print a Receipt, please follow this link.
In the second grey row, this is where the payments are made for the member. To learn about these different transactions, please follow this link, How to make a payment. In the table underneath, you will see the green Edit button and the orange Delete button. Following this link will also explain these further.
Underneath these grey rows, you will see to the left the account Balance. If it is red, the member is owing.
To the right is the Total number of transactions the member has made for the entire duration of their membership with the library whether it has been one year or several (their “life” membership).
At the bottom of the table, you will see the word Total. The two figures alongside it are the total credits/payments and the total debits for this account for the entire duration of their “life” membership.
The post Understanding and using the Payment System appeared first on MiBase New Zealand.
]]>The post Member Transaction – Bulk email appeared first on MiBase New Zealand.
]]>The first important step is to create/modify this email template.
Go to Setup -> Email Template, type in ‘member_transaction’ as shown below, and click the yellow edit button.

Then change the content in the email.
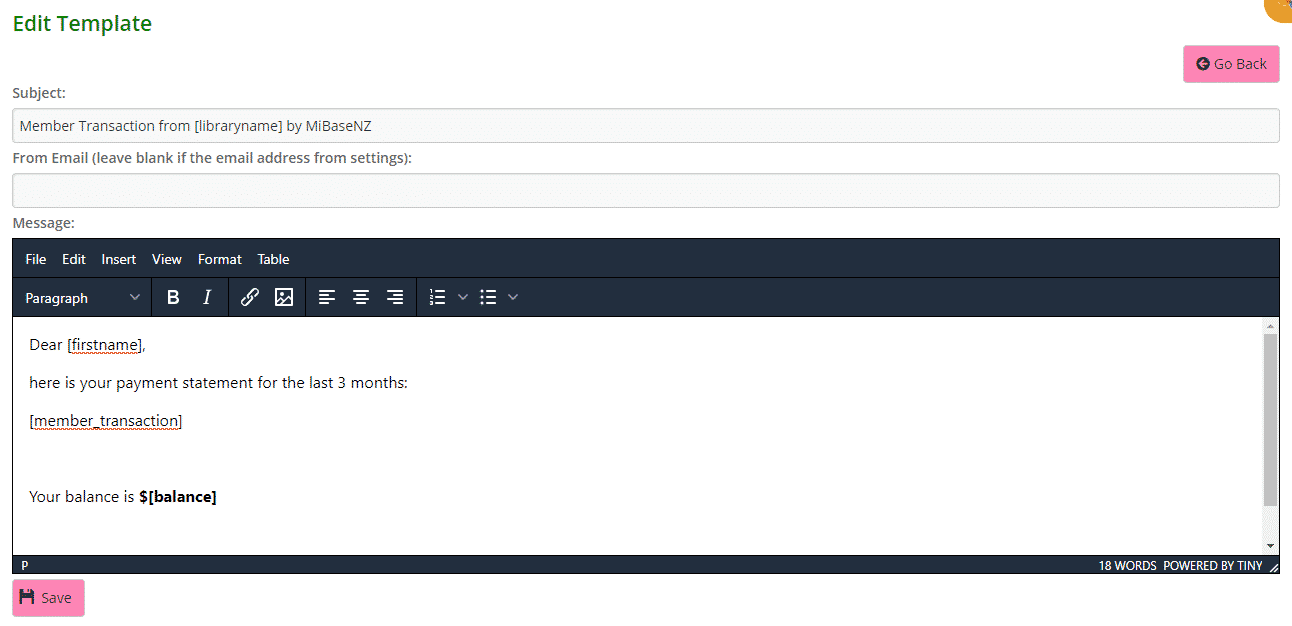
Click Save.
A Success message will appear. Clicking Go Back will take you back to the Email Templates page.
Specific Shortcodes
For this particular email, you need to choose from two specific Member Transaction shortcodes:
- [member_transaction] – will give you a list of the last 3 months of transactions
- [member_transaction_all] – will give the entire list of transactions.
Remember, for some members, this list will be very long!
Instead of sending this email, we suggest you activate the Transaction page in the Member Website. Follow this link to see how to Activate the Transaction page
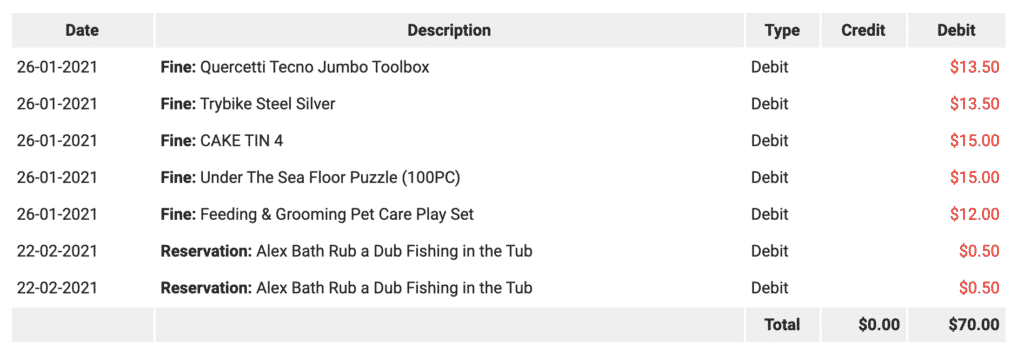
Both shortcodes will provide a list of transactions in a table format as seen below. The list will vary in length depending on which shortcode you use.
As you can also see above, some generic shortcodes have been used, [firstname] and [balance]. You can add any generic shortcode you like to the email. Follow this link to view our full list of shortcodes.
Transaction List
The post Member Transaction – Bulk email appeared first on MiBase New Zealand.
]]>The post Adding Transactions to the Accounting page appeared first on MiBase New Zealand.
]]>Just to remind you again, these transactions (paying or receiving) must relate to the toy library (power, rent, office supplies, grants, donations), it should not include day to day administration with members or toys.
Some of you may be wondering, if we have a bank account why do we need to add our transactions here? The reason being is that sometimes bank accounts do not show all the relevant information, whereas this is more descriptive, essential for auditing or producing financial reports.
To start adding your transactions, go to Accounting -> Accounting List
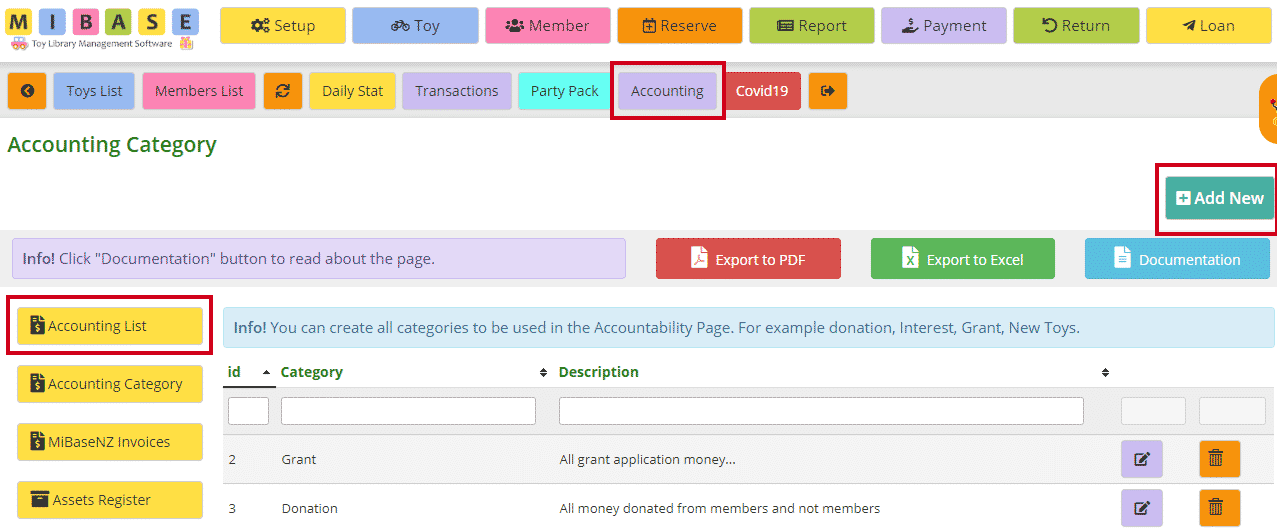
Click ‘Add New’.
Fill in the boxes. Remember, you can only fill in either ‘Income’ OR ‘Payment’, not both.
Click ‘Save’.

A Success box will appear. Continue to add transactions, saving after each one, or click ‘OK’ and it will take you back to the Accounting List home page where you will see the full list of transactions you have added.

If you have made a mistake or would like to update a transaction, click the purple ![]() “Edit” button.
“Edit” button.
If you would like to delete a transaction, click the orange ![]() “Delete” button.
“Delete” button.
To sort or filter the list, click the arrows next to the heading you want to sort or filter the list by or type in the search boxes underneath the headings.
You can also download the list to PDF and/or Excel by clicking the “Export to PDF” or “Export to Excel” buttons. This will export the full list, not a filtered list. If you want to download a filtered list, export to excel and sort or filter through there.
The post Adding Transactions to the Accounting page appeared first on MiBase New Zealand.
]]>The post Transactions – Second Menu appeared first on MiBase New Zealand.
]]>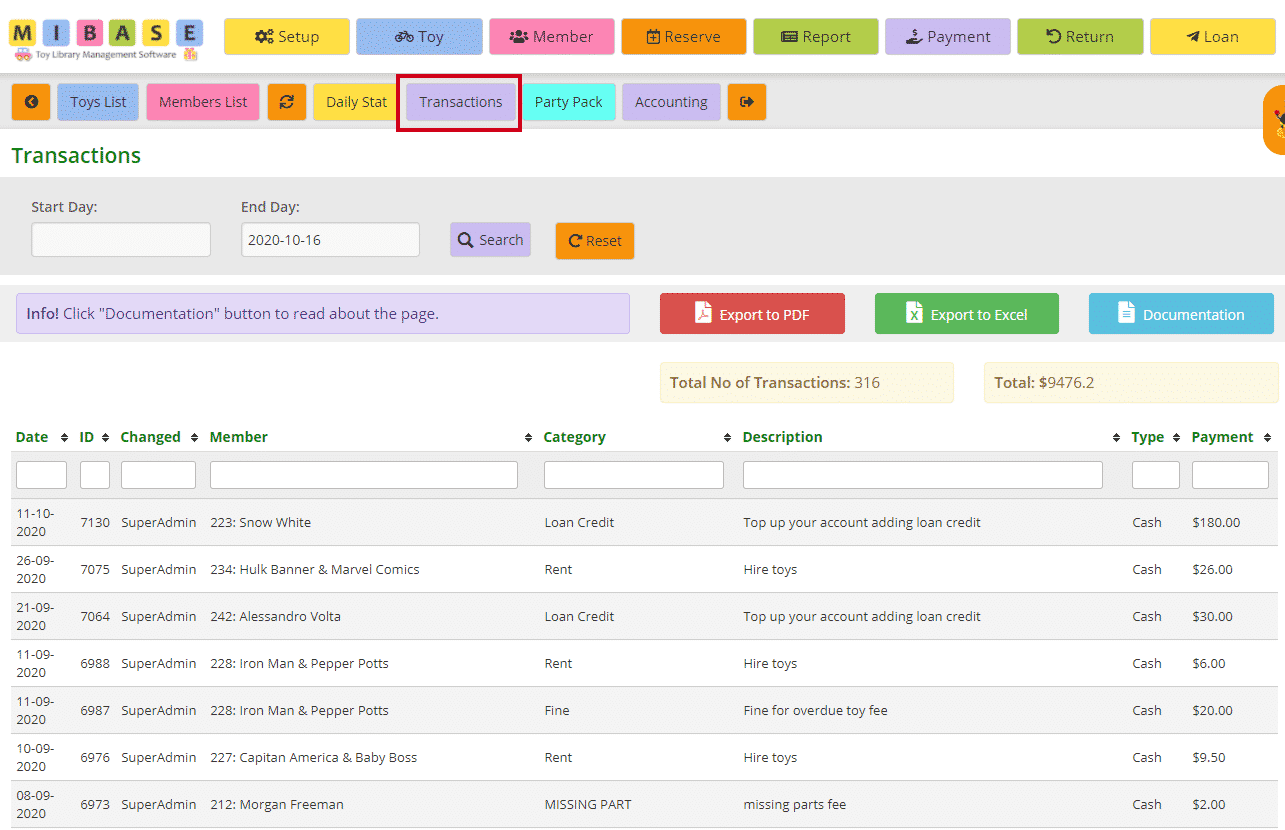
The most recent transactions will be listed first.
If you wish to view transactions on a certain day or in a certain period, select the Start Day and End Day from the dropdown calendars, and click the purple Search button.
Click the orange Reset button to refresh the page to the current library sessions or to make another selection.
Just above the table and to the right you will see the Total Number (No) of Transactions that have been made and the Total money value of these transactions.
You can also sort the list according to the table headers by clicking the arrows alongside it.
- Date: the day the transaction was made
- ID: the number generated for each transaction; the higher the number the more recent the transaction
- Changed: the login name of the user who entered the transaction
- Member: the name of the member incurring the transaction
- Category: when a transaction is entered in the Payments page, a category would have been selected
Note: each toy library will have their own specific categories set up for their transactions, no one will be the same.
To set up a list of categories follow this link Creating New Payment Options to learn how - Description: of the transaction. This is also usually set up when creating a payment option
- Type: the payment method such as credit, internet (or online), cash, or Visa. Again this is also usually set up when creating a payment option
- Payment: the value of the transaction
You can download this list to PDF and/or Excel by clicking the Export to PDF or Export to Excel buttons. This will export the full list. If you want to download a filtered list, either use the date range option mentioned above OR export to excel and sort or filter through there.

You can also decide how many rows you wish to see on the screen by using the pagination at the bottom of the list.

The post Transactions – Second Menu appeared first on MiBase New Zealand.
]]>