How Can We Help?
MiBaseNZ’s Top Menu items for the Member Website are the modules/pages in the navigation bar that can be seen across the top of each page.
![]()
Some of these modules/pages are automatic, one is a paid module, and two are linked with the public website settings. The remaining others will need to be activated on the Member Website Settings page if you choose to use them. See below for further information.
The automatic modules/pages are:
- Home – for more information on this page read the article Member Website Home page schema
- My Library – for more information on this page read the article My Library page
- My Wishlist – for more information on this page read the article My Wishlist page
- The Toys Menu is automatic however some settings are activated via the public website settings, Settings for the Toy Menu. The sub-heading Reservable Toys also needs to be activated in the public website settings if your library would like to use this function – follow this link to see how – Reservable Toys.
The FAQ page is linked with the public website settings, so if it has been activated there, it will appear on the Member Website. Read this article for further information – FAQ page.
The Click & Collect page is a paid module so your library will need to have purchased this for it to appear. For further information follow this link, Click & Collect module. To read the documentation for this module follow this link, Click & Collect Setup.
So, the remaining two pages are Transactions and Roster and to activate these you will need to go to Setup -> Members
Type the words “top menu” in the Description box. The list will be filtered to show the settings related to the Top Menu. Each setting can be easily changed by clicking the Edit button alongside it, making the change if necessary and clicking Save.
Once the settings are changed you must log out and then log back in again for the settings to take effect.
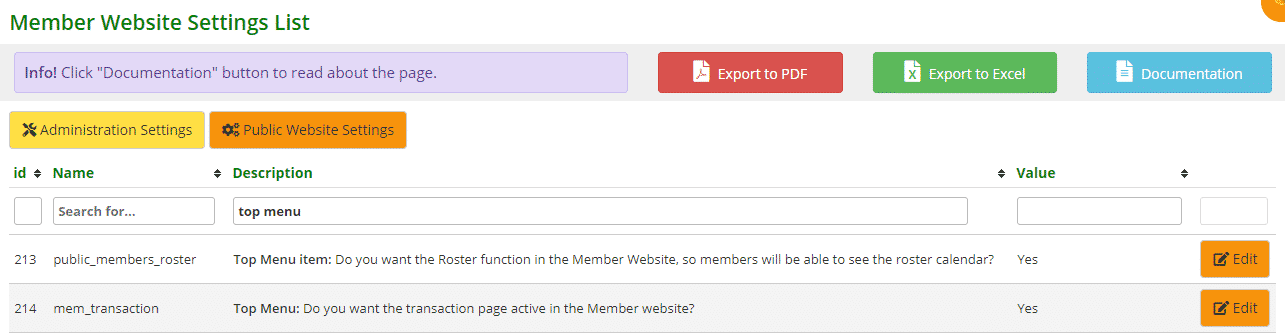
- #213 – public_members_roster: select Yes to activate the Roster page in the navigation bar.
Follow this link for further settings on specific functions for the Roster page
Follow this link to learn how to add or delete roster preferences to this page - #214 – mem_transaction: Select Yes if you would like the Transactions page in the navigation bar. To add an introduction to the page, add it under setting #215
Follow this link for further information on the Transactions page.
