The post How to change the rent value of toys appeared first on MiBase New Zealand.
]]>To change the rent value of an individual toy, find the toy in the Toy List, click the blue Edit button and change the rent value from the dropdown menu, remembering to click Save.
To change the rent value in bulk, however, can only be done by changing the rent assigned to a toy category which means all toys within that category will update to the new rent value selected. The issue with this though is if toys in that category have different rent values.
Unfortunately, MiBaseNZ cannot isolate all toys with the same rent value across different categories to update them. If you do not want to change all the toys within that toy category to be the same, you will need to change the toys individually as outlined above.
If you are happy for all toys within that category to have the same rent value then go to Toy -> Toy Categories.
Click the blue Edit button on the category in which you like to change the rent, change the rent value and click Save.
Click the OK button and it will take you back to the Toy Category List page.
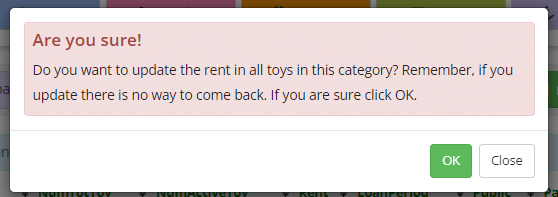
Click the purple Update all toys button and click OK to the alert message. All toys within that toy category will now have the same rent value.
The post How to change the rent value of toys appeared first on MiBase New Zealand.
]]>The post How to approve a member that joined online appeared first on MiBase New Zealand.
]]>When a new member signs up a couple of things happen.
First, the system automatically sends the new member the Membership Application Received email. If you are not sure what this is and whether it has been set up properly for your library, follow this link.
Next, your library will be sent the following automatic email New User Add.
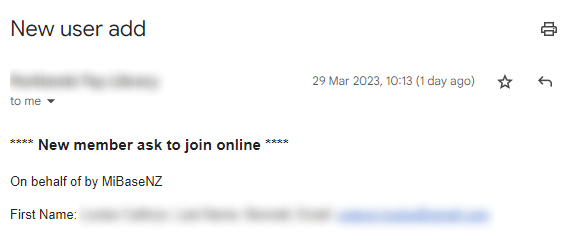
At the same time, on the home page of the Admin Website, you will see the following appear under the heading Online Member Applications to Approve.
To approve the application, click the Go to button.
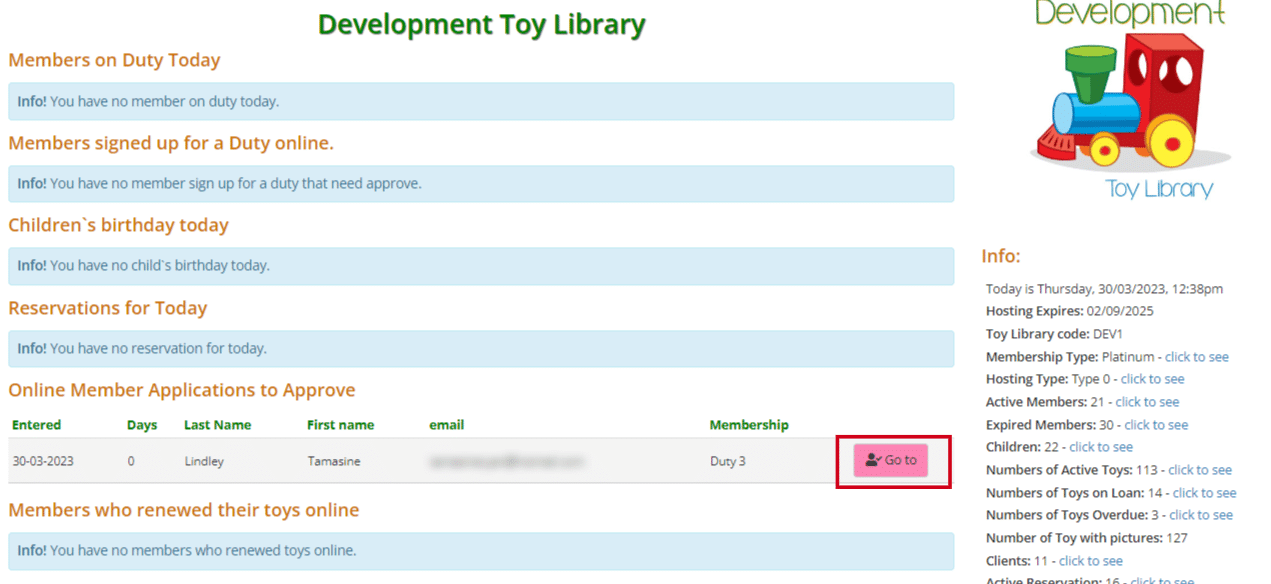
This will take you to the Members Approve List where you can Approve the member by clicking on the button or Delete them.

If you choose to delete or click that button by mistake, never fear, you will be taken to another page where you will have the option to confirm your choice or to cancel.

If you have chosen to approve the new member, click the Approve button and you will be taken to the New Member approved page where you can review the information provided before clicking the Save New Member.

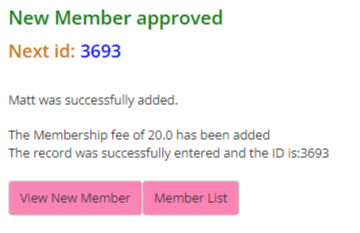
Once you have clicked Save, you will be taken to the following page confirming what has been added. You can either View New Member which will take you to the Member Detail page or select the button for the Member List.
The post How to approve a member that joined online appeared first on MiBase New Zealand.
]]>The post How to do a bulk upload of toy photos appeared first on MiBase New Zealand.
]]>Whether you are a library starting out with MiBaseNZ or a library looking to replace old images, there is no need to spend a lot of time uploading images individually when it can be done in a much easier way.
For us to do this for you, you will need to prepare the images in a certain format as well as have them clearly named.
Step 1
Depending on how you take your photos, all images must be in a .jpg format. If they are already in that format, great! Otherwise, the images will need to be converted.
Step 2
All images must be resized to have a width between 600px and 1500px, the ideal width being 1200px. Too large an image will affect loading time.
A quick way to resize all your images at once is to use the program Imagify. Follow the link to see how.
Step 3
Name your images. They must all have a toy id (called idcat in MiBaseNZ) as the file name. If letters are used, the file name must be in lowercase.
For example, if your toy has the id AP001 the file must be ap001.jpg.
If you have only numbers in your toy id, for example 1234, the file name will be 1234.jpg.
Step 4
Once you have finished preparing all your images, they are ready to be sent to be uploaded to your system. To do this you will need to create a zip folder.
You can use the following program WeTransfer (it’s free for up to 2GB). Click on the link and it will take you to the following page.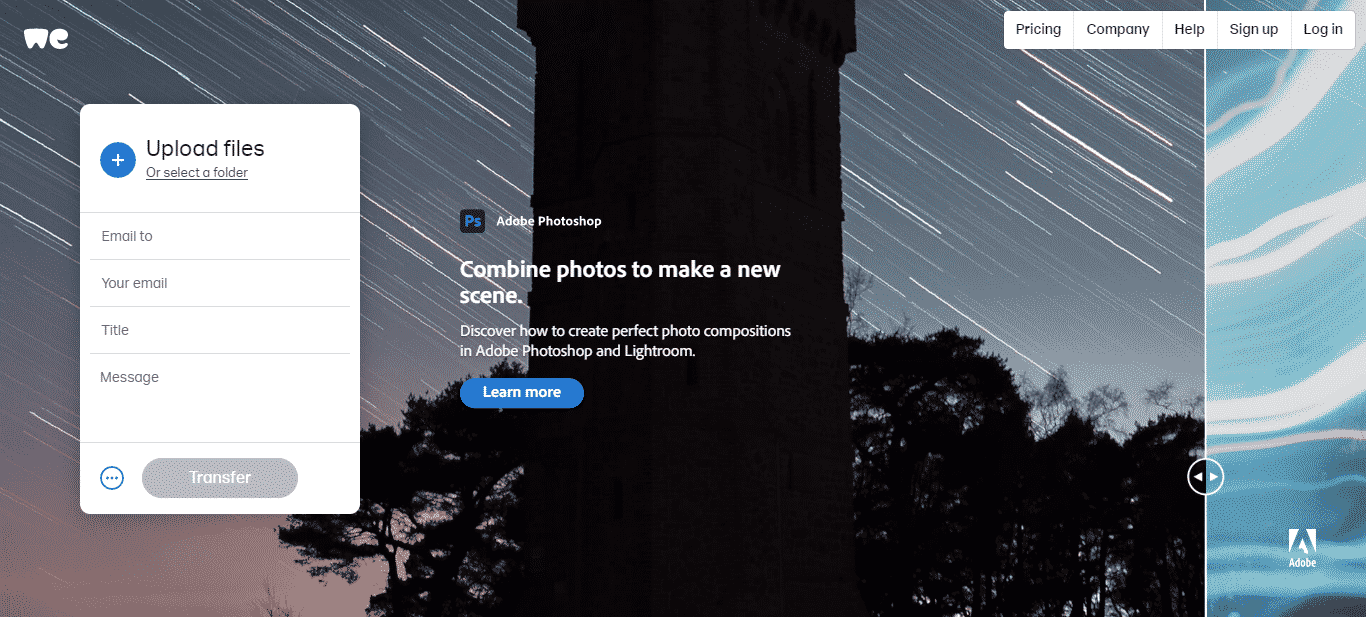
- Click the blue plus button to add all the images you would like to send
- Email to: info@mibase.co.nz
- Your email: add your toy library email or whatever email you can access as a verification code will be sent to you
- Title: add your toy library name
- Message: “toy images to be uploaded”
Click Transfer. A pop-up box will appear asking to enter a verification code.
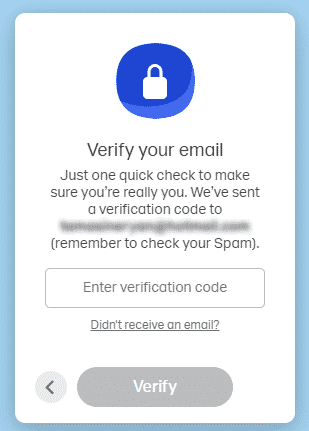
Once this has been done the files will start transferring. 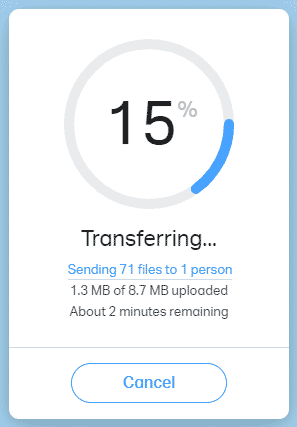
It will let you know when the email has been sent.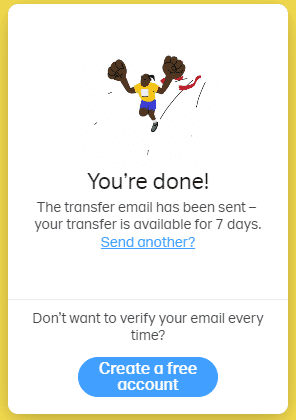
We will let you know when we have uploaded the images to your system.
The post How to do a bulk upload of toy photos appeared first on MiBase New Zealand.
]]>The post How to Open a Ticket appeared first on MiBase New Zealand.
]]>There are multiple places where you can access MiBaseNZ Help Desk.
Admin Home Page
You can find the link on the right column at the bottom of the page.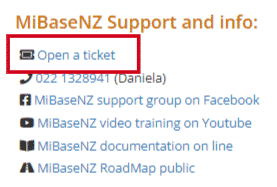
Admin Login Page
The link is located under the Forgot Password button.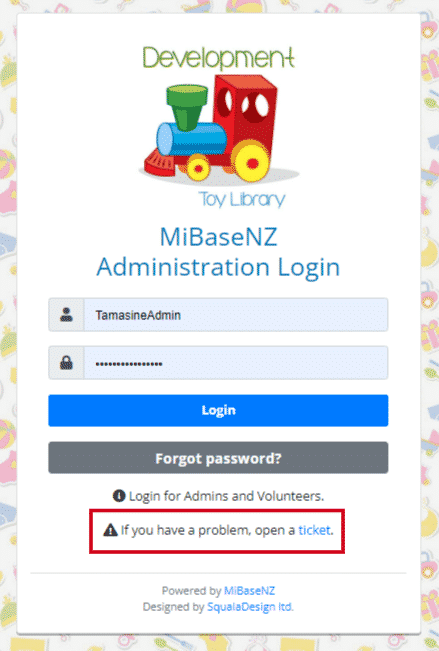
Facebook MiBaseNZ Support Group
Type in either “helpdesk” or “ticketing system” into the search field and various posts will appear with a link to the HelpDesk.
There is also a short article under the Files tab called MiBaseNZ Ticketing System
MiBaseNZ New System Update email
When a new system update is emailed to toy libraries a link to the HelpDesk is always added.
Opening a Ticket
Once you have clicked on the link, a new tab will open with the following page.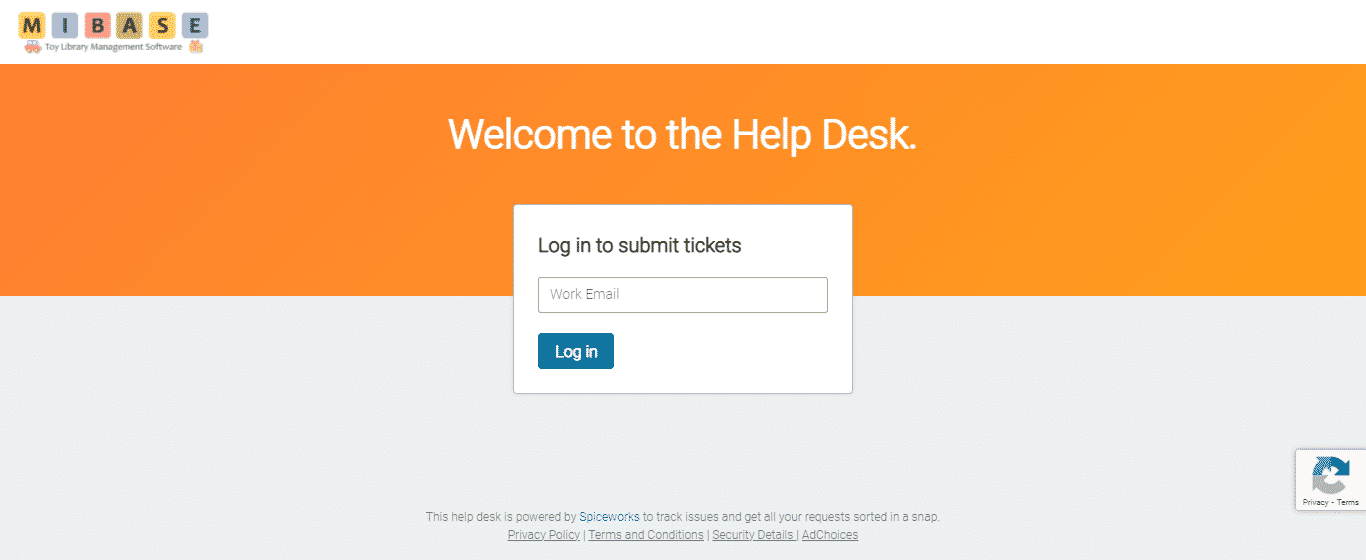
Type in your toy library email. Try and remember to use the same email when opening tickets.
Once you click Log in, an email will be sent to you with a link to log into the HelpDesk. Click on this link and you will be given access.
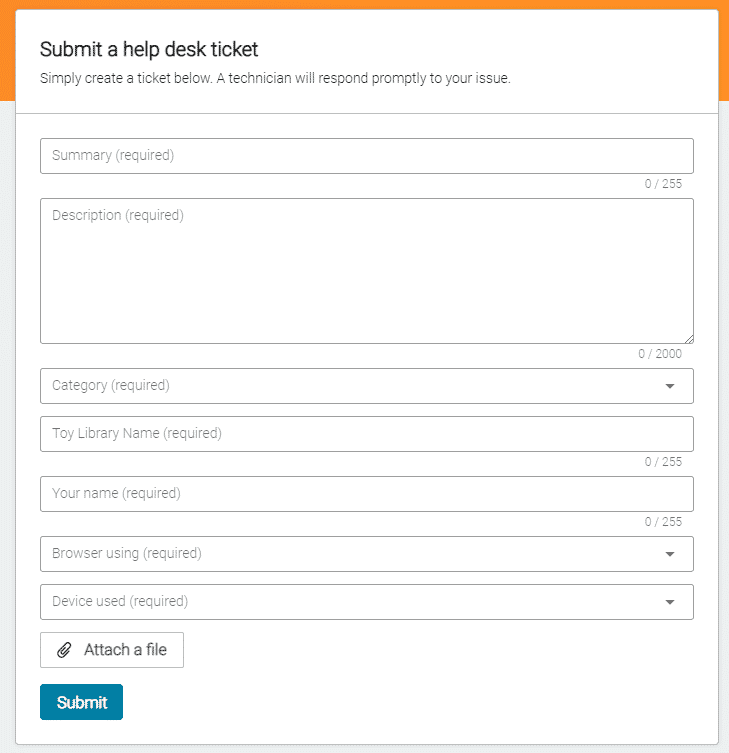
At the top of the page there is a Submit a ticket button.
Once you click this button the following will appear. Fill in as much information as you can. You also have an option to attach a document or photo. Click Submit once done.
When someone from the MiBaseNZ Support Team replies to your ticket, you will receive an email with the response.
You can reply directly via email or log back into the MiBaseNZ Help Desk, click on the ticket and reply.
Closing a ticket
A ticket is closed by the Support Team when:
- the issue has been fixed
- the request has been answered or completed
- a reply has not been received from the person that opened the ticket after 7 days
If a ticket has been closed, you can open it again by simply replying to the last email.
The post How to Open a Ticket appeared first on MiBase New Zealand.
]]>The post Why is my reservation system not working? appeared first on MiBase New Zealand.
]]>1. Have all your settings been set up correctly?
It doesn’t hurt to check your settings to make sure they are correct particularly if there are multiple administrators using the admin website or circumstances/librarians have changed in your library. We have found on occasions when the reservation system was initially set up, some libraries, for example, set up the admin side of things and as time goes on have decided to set up the Member Website and now allow members to make their own reservations but haven’t checked all the settings have been amended correctly. Here is the link to Setting up the Reservation System correctly.
2. Have you set up the Days and Times page correctly?
This one is important and is usually the most common error. The days you are open and closed are what appear on the reservation calendar. If these are not correct, then members will either select the wrong days or will not be able to select the right days or any days at all. To make sure your days are set up correctly follow this link to the Days and Times page.
3. Check if the toys are reservable
Whether you have some toys that are reservable or all of your toys are reservable, you need to make sure that they are. A common question is why can’t I see this toy to reserve it? When adding a toy to the system, sometimes ticking the box to make the toy reservable is missed, a very easy mistake to make.
But don’t worry, if all your toys are reservable it is as easy as going to Setup -> 1 click function and clicking the Reservable all toys button.
However, if you only have a select few toys that are reservable, you will need to go into each toy detail page, select Edit Toy, and make sure the This toy can be reserved check box has been ticked.
4. Check if the memberships are correct
This is important as when setting up your memberships there is a column that asks whether members with this membership can reserve toys or not. If this has not been selected to say Yes, then these members won’t be able to reserve. Go to Members -> Membership and look at the list of memberships. Under the Reserve column, check the memberships that are able to reserve, all say Yes.
If you have gone through this list and are happy you have everything set up correctly and the issue still continues, then please, Open a ticket and we will endeavor to fix it as soon as possible.
The post Why is my reservation system not working? appeared first on MiBase New Zealand.
]]>The post How to add additional days for toys on loan, for reservation dates, and for membership expiry dates appeared first on MiBase New Zealand.
]]>It allows you, the admin, to extend the due date of all the toys currently on loan, active reservation dates, and membership expiry dates for both active and expired members by a selected number of days without having to manually change the dates for each individual toy/member.
Depending on where your toy library is in NZ and when you will re-open will determine the number of days you would like to add.
Note: With toys on loan and reservations, this function does not allow you to select a certain date so all toys are due on the same day and all reservations can be picked up on the same day. It will just add the number of days your library is closed for to the dates. So if your toys have different due dates and reservation dates they will continue to have different due dates and reservation dates.
To add the days go to Setup -> 1 click function
You will see in the second column the heading Additional days for… Type in the number of days you would like to add to each field clicking the Add days button before moving to the next function.
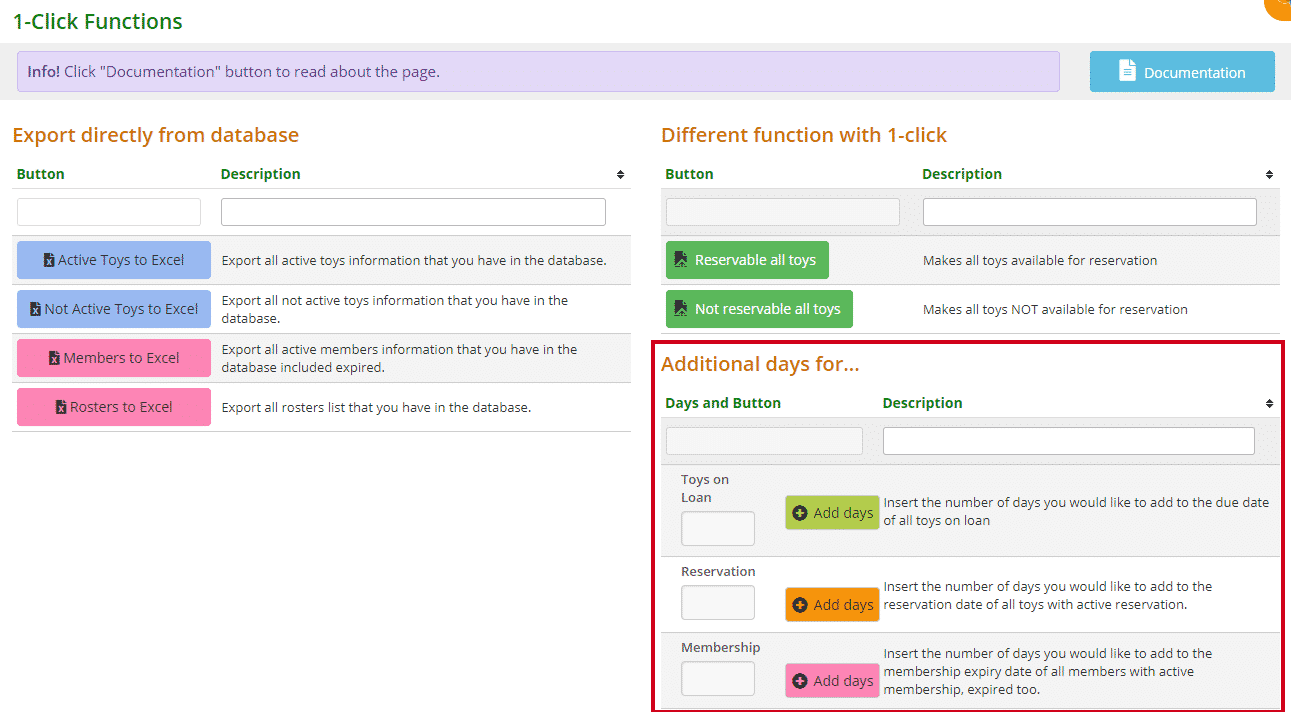
A Success box relevant to each function will appear stating all dates have now been updated.

The post How to add additional days for toys on loan, for reservation dates, and for membership expiry dates appeared first on MiBase New Zealand.
]]>The post How to optimise an image with Imagify appeared first on MiBase New Zealand.
]]>So with regards to MiBaseNZ, optimizing your images on the website is important for the following reasons:
- All images (toy picture, slideshow, images in news articles, profile pics, etc) are used in your Public and Member website, and if they are NOT optimized the website will become very slow and, in some cases, members will not be able to use it.
- The administration will be faster.
- You will save us, MiBaseNZ, from paying for more space which would keep the hosting costs from increasing.
- MiBaseNZ accepts only PNG and JPG, Imagify will help you to convert the file type if you have the image in a different format.
So, how can you ensure your images are optimized before uploading them?
Don’t worry, we have a very simple solution for you 
We have subscribed to a web application and we are sharing it with everyone. You will be able to use the web application called Imagify any time you need. You will have 10 GB, which is around 10,000 MB, each month to compress and resize your images.
To access Imagify
To access the application click here https://app.imagify.io/#/login, the username is your toy library email and the password has been sent to you. This is the email that you should receive from Imagify.
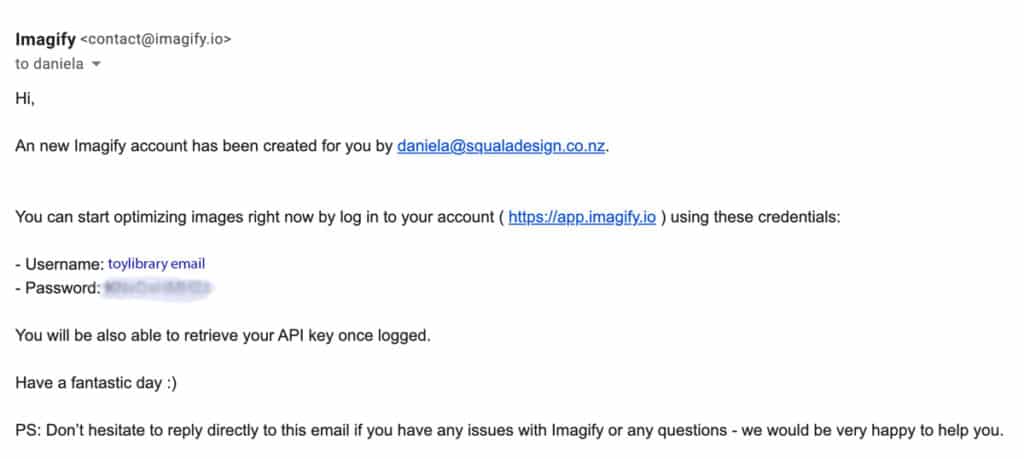
If you did not receive this, please open a ticket.
**The API key is not relevant to MiBaseNZ, please ignore this**
How to use Imagify
Once you log in, you can see the configuration on the left and the uploader on the right.
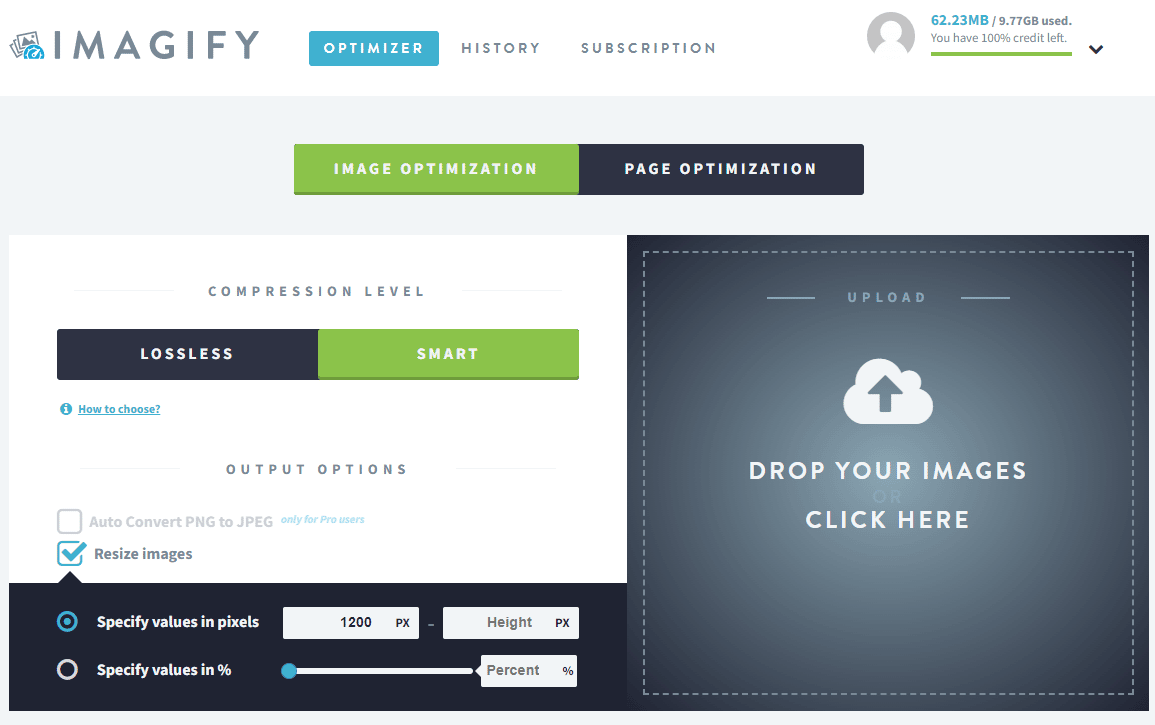
The Compression level should be SMART.
Select Resize images and Specify values in pixels.
Type 1200 in the width field.
Then, click the uploader box and select the images that you need to optimize.
Give the photos a little time to upload and compress. Once done, the following message will appear with the list of photos you have compressed. As you can see, it will tell you the old file size and the new compressed file size and also how much compression had been done.
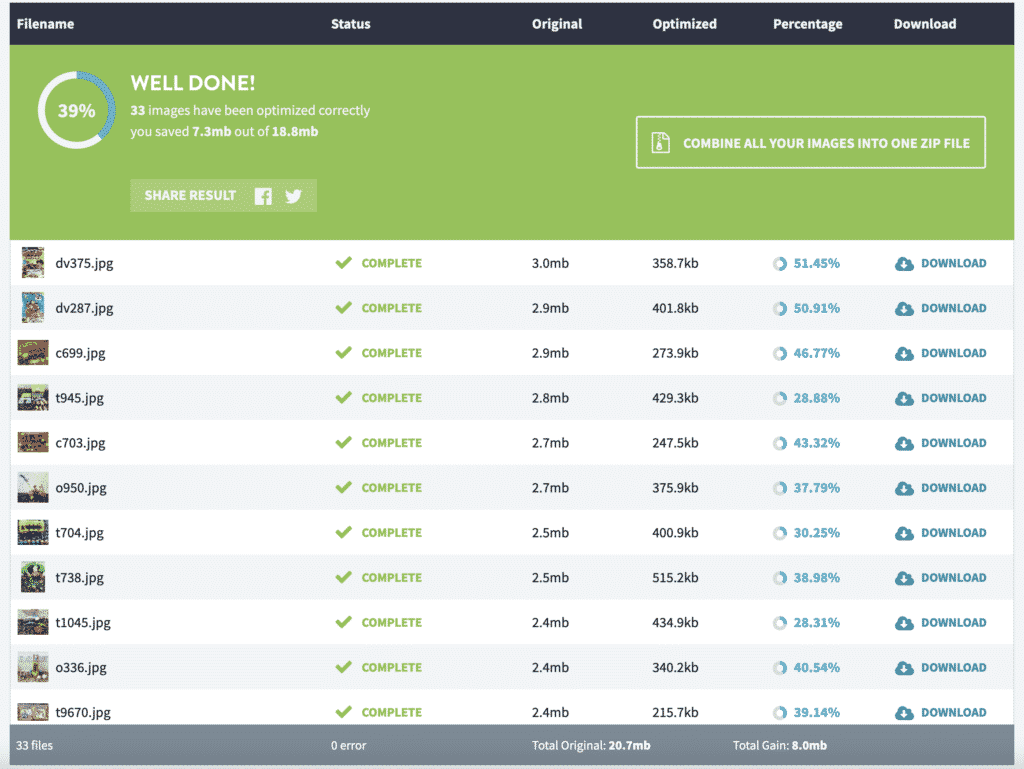
Click Combine all your images into one zip file, wait a bit and then click Download the zip file.
Uncompress the zip file and you are ready to upload all your pictures!
You can also download the image individually if you have only done one or two images. In which case once you click Download, the image will appear and you will need to right-click it and select Save image as… OR depending on the setup of your device it may automatically save in your downloads folder.
It is much easier to download a zip file.
The post How to optimise an image with Imagify appeared first on MiBase New Zealand.
]]>The post How to resign or lock a member appeared first on MiBase New Zealand.
]]>A locked member is someone who has potentially stolen toys from your library or who has not paid their fees. By locking a member it is letting all admin know to be aware of this member if they return.
All resigned or locked members can be viewed on the Not Active page and will also not receive any automatic or bulk emails.
There are two ways to resign or lock a member.
The first once set up is automatic, ongoing, and only applies to already expired members.
The second option is instantaneous requiring admin to manually make the change. This can be done for both current and expired members.
- allow MiBaseNZ to automatically move them to the Not Active list by activating the cron job for the automatic email Resigned Members. Once this is set up you can choose how long after the membership has expired that they will be moved. An email will be sent to the member and their details will be automatically moved from the Expired Members list to the Not Active list.
To set this up go to Resigned Members – Automatic Email. - Manually change the status of the member on their Member Detail page which will automatically move them from the list they are currently on to the Not Active list. The steps to achieve this differs slightly for current members and expired members.
Current Members
Find the member you would like to resign or lock either through the Active Members link on the home page or the Members List on the second menu bar.
Once you have found the member change their status to RESIGNED or LOCKED by selecting from the dropdown menu. Refresh the page.

This member will now be listed on the Not Active list.
Expired Members
Find the member you would like to resign or lock either through the Expired Members link on the home page or the Expired Members list by going to Member -> Mem. Expired.
Once you have found your member click the pink Edit button alongside their name.

On the right-hand side in the Important Data box, scroll down to the Member Status and select RESIGNED or LOCKED from the dropdown menu.
Click Save Member.
This member will now be listed on the Not Active list.
The post How to resign or lock a member appeared first on MiBase New Zealand.
]]>The post How to change my toy library contact details appeared first on MiBase New Zealand.
]]>Each contact detail is under its own separate setting so select the contact you would like to change and follow the instructions.
Once the settings are changed you must log out and then log back in again for the settings to take effect.
Email address in the Public, Member and Admin Website
There are two steps to changing your email address in MiBaseNZ:
- Contact us and tell us your new email address. This is important as we will need to change the email where you will receive the communication from MiBaseNZ Admin. For example, the automatic email reports
- Change the email address in the settings where it will appear on the websites
To do this, go to Setup -> Administration, search for the setting email_from, click Edit and type in the new address. Click Save.

Shortcode
If you would like to use the email shortcode in the email templates please use [email_library].
Note: if you change this setting you will also need to change the setting for the reports and bag labels, see further below.
Phone number in the Public and Member Websites
To change the number, go to Setup -> Members, search for the setting phone, click Edit and type in the new number. Click Save.

Shortcode
If you would like to use the phone number shortcode in the email templates please use [phone].
Note: if you change one or both of these above contacts, you will also need to change the following setting to amend these details on the reports and bag labels.
Phone number and email address on the Reports and Bag Labels
Go to Setup -> Administration, search for the setting contacts_on_report, click Edit and type in the new details. Click Save.

Location address in the Public and Member Websites
To update your toy library’s address, go to Setup -> Edit website and amend under the Right column section.
Read the article Edit your Public/Member Website for further information.
To update the map, read the article, How to add a Google map on your website.

Location address on the Reports and Bag Labels
Go to Setup -> Administration, search for the setting address, click Edit and type in the new address. Click Save.

Shortcode
If you would like to use the address shortcode in the email templates please use [address_library].
Facebook page in the Public and Member Websites
To change the Facebook link, go to Setup -> Public Settings, search for the setting facebook, click Edit and insert the complete Facebook Page URL included the https://. Click Save.

Shortcode
If you would like to use the Facebook shortcode in the email templates please use [facebook].
Instagram in the Public and Member Websites
To change the Instagram link, go to Setup -> Public Settings, search for the setting Instagram, click Edit and insert the new ID. Click Save.

Shortcode
If you like to use the Instagram shortcode in the email templates please use [instagram].
The post How to change my toy library contact details appeared first on MiBase New Zealand.
]]>The post How to insert a link or add an image appeared first on MiBase New Zealand.
]]>Two features of this text editor are the Insert/edit link and the Insert/edit image buttons.

Inserting a link
Text-based links are styled so that they stand out from other items on the page, they change colour as the mouse is moved over it, and the cursor will also change to a pointing hand.
To insert a link into text, whether it is just one word or a phrase, you need to follow these steps.
- First, load the page or website to which you want to link to. If it is a document you will need to upload it to MiBaseNZ’s Upload Files page.
- In the text, highlight the word or phrase you would like to link.
- Click the Insert/edit link button. A pop-up window will appear.
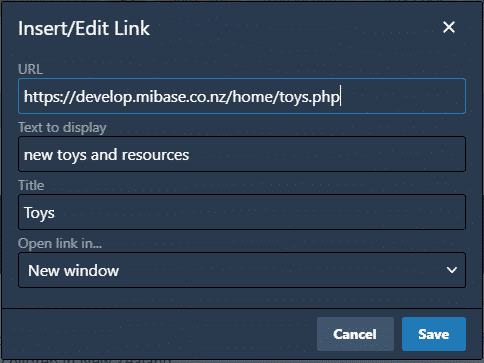
- Copy and paste the URL of the page or website into the URL field or the File Path from the Upload Files page.
The Text to display field should already have the word or phrase you highlighted. If you forgot to highlight, you can just type the words in here.
Add a Title.
The Open link in field should be New window so the page or website can be opened in a new window ensuring your website isn’t lost. - Click Save.
The word or phrase in the text will now be a different colour. Clicking the link (as you can see in the below image), a box will appear above it with the URL.
The last two buttons allow you to remove the link or open the link.

Inserting an image
To insert an image into text you need to follow these steps.
- First, know where you want to insert the image from as it determines where you upload the image.
- In the text, place the focus where you want the image to appear.
- Click the Insert/edit image button. A pop-up window will appear.
– If the image is already on MiBaseNZ’s Upload Files page, you can copy the File Path…

…and paste it in the Source field under General.

– If the image is on your computer click the Upload word and click Browse for an image. Find the image you would like to upload and either double click it or select Open.
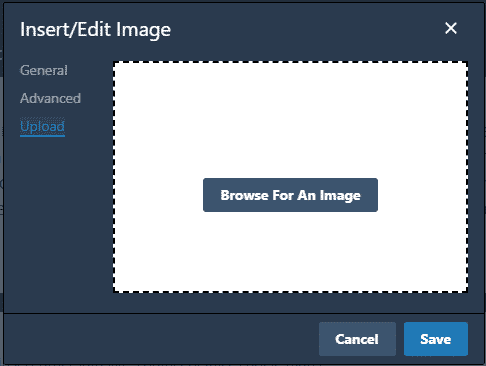
Once it loads, the pop-up window will switch back to the General pop-up window as mentioned above.
The Source field will automatically be filled with the URL for the image you have uploaded. - Add an Image title
- To ensure the size of the image is not too big, change the Width to 300. The height will automatically update. If it is already 300 or less, leave it.
- Click Save.
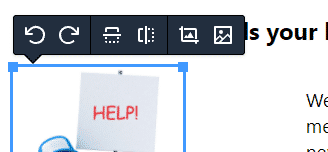
The image will now appear in the text. Clicking the image (as you can see in the below example), a box will appear above it with the following buttons:
- Rotate anti-clockwise
- Rotate clockwise
- Flip vertically
- Flip horizontally
- Edit image – another pop-up window will appear with editing options
- Image options – clicking this last button will open the Insert/edit image pop-up window.
*Note: In the Insert/edit image pop-up window you may have noticed the Advanced option. We advise you not to use this as it messes with the image hence no instructions provided.
The post How to insert a link or add an image appeared first on MiBase New Zealand.
]]>