The post DELETED status for members accounts you no longer want to see appeared first on MiBase New Zealand.
]]>Remember, members’ accounts cannot actually be deleted. It will still be in your database, you just won’t be able to see it.
The only way to see your deleted members is to download a list on the 1-click function page. This will be explained in further detail below.
There are two ways to delete a member. Either changing the status on their Member Detail page or if they are on the Not Active list, changing the status there.
Member Detail page
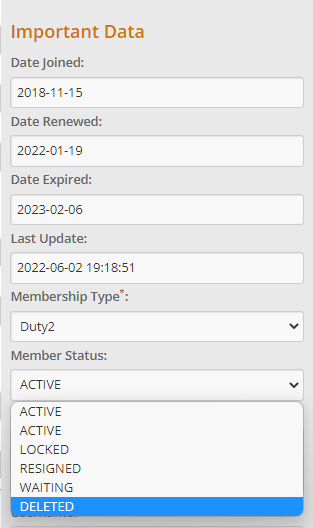
Find the member you would like to delete. Click the pink Edit button. Under the Important Data section, find the Member Status dropdown menu and select DELETED.
Click Save Member.
Not Active page
Go to Member -> Not Active
Find the member you would like to delete. Under the Change Status column, select DELETED from the dropdown menu.
Then click the orange refresh button at the top of the page to save.

1 Click Function page
Once the status is changed to DELETED, their account will no longer be seen. As mentioned above, the only way to see your list of deleted members is to go to Setup -> 1 click function.
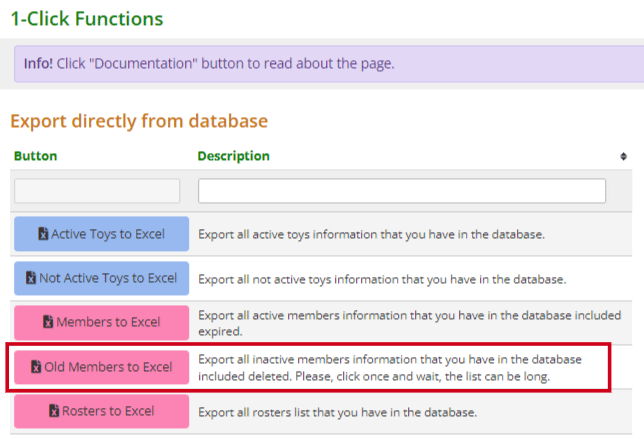
Select the Old Members to Excel button. A list of all your resigned, locked and deleted members will download to an excel spreadsheet.
The very last column of this spreadsheet is the Status column. You can filter out your deleted members from there.
Reactivating a deleted members account
If for some reason you would like to activate a member’s deleted account, the only way to do it is to know their member ID which you can find in the above excel list. Go to the Member Detail page of any member and in the Member id field type the id number in.

When their details appear, click the pink Edit button and change their Member Status to ACTIVE. Click Save Member.
The post DELETED status for members accounts you no longer want to see appeared first on MiBase New Zealand.
]]>The post Suppliers page appeared first on MiBase New Zealand.
]]>It is great for volunteers or helping future committee members when there has been a change or people leave.
Go to Toy -> Suppliers

Your suppliers will be listed in a table which is quite self-explanatory, see below example.
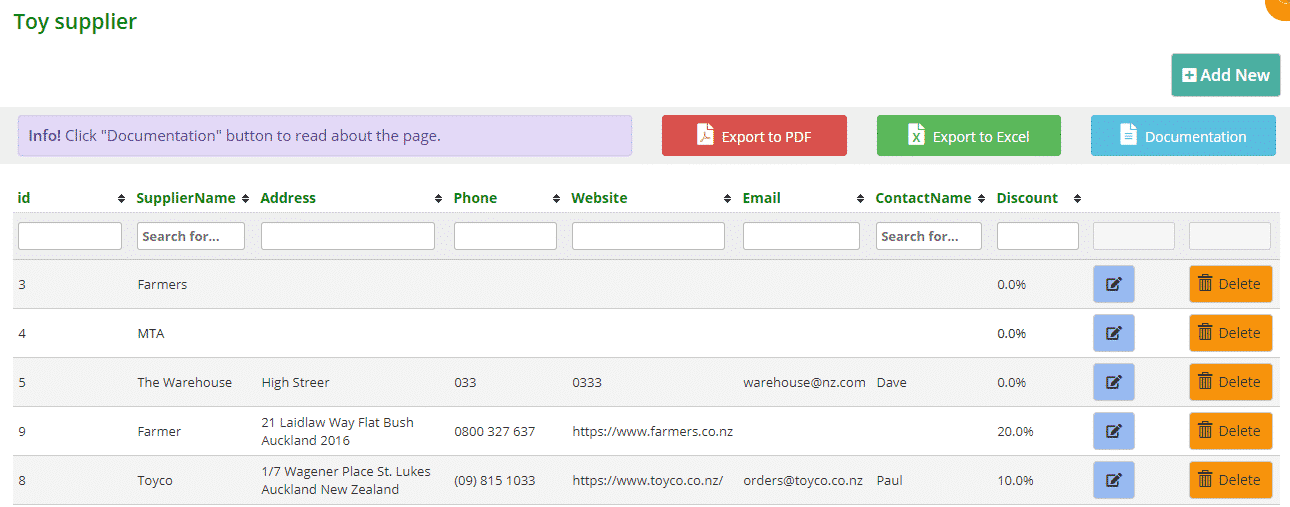
To edit the details of a supplier, click the blue Edit button alongside it.
To remove a supplier, click the orange Delete button alongside it.
To add a new supplier, click the turquoise Add New button at the top right of the page.

Fill in as much of the details as you can.
The discount field must only have a number, no symbol. It is measured by percentage so the symbol is automatically added when the details are saved. Refer to the Discount column in the above table.
Click Add New.
You will see the Success message appear underneath. An Error message may appear if there is a problem.

When you click OK you will be taken back to the Toy Supplier page.
The post Suppliers page appeared first on MiBase New Zealand.
]]>The post Toy Conditions – create, edit or delete appeared first on MiBase New Zealand.
]]>To create your list, go to Toy -> Condition

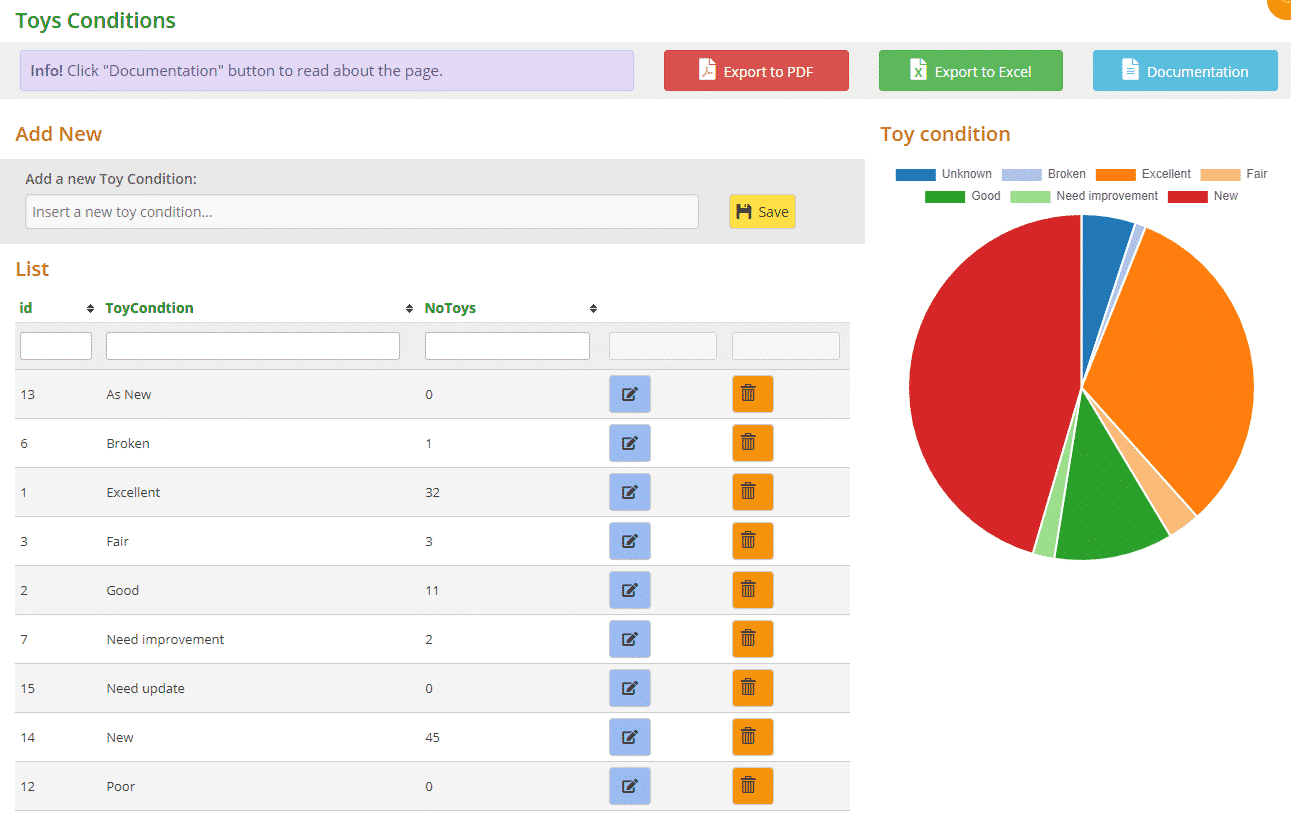
On the left, you can see the list of toy condition types and on top, you can add a new condition.
On the right, is a pie chart to provide you with a visual representation of the number of toys in each toy condition category. If you hover your mouse/arrow over each section of the chart, you can see the number of toys for each condition type.
You will see the Success message appear underneath.
![]()
To edit a toy condition, click the blue Edit button alongside it.
To remove a toy condition, click the orange Delete button alongside it.
If you delete a condition and there are toys still recorded under that type, the chart on the right will still record the condition and number of toys until you move them to another condition category. Once that’s done the chart will update. To change the condition type for a toy you can either go to Edit a toy page or the Stocktake page.
The post Toy Conditions – create, edit or delete appeared first on MiBase New Zealand.
]]>The post Deleting a toy category appeared first on MiBase New Zealand.
]]>However, if there are toys listed in the category you will need to move these toys before deleting. MiBaseNZ will not allow this category to be deleted until the toys have been moved. This Error box will appear.
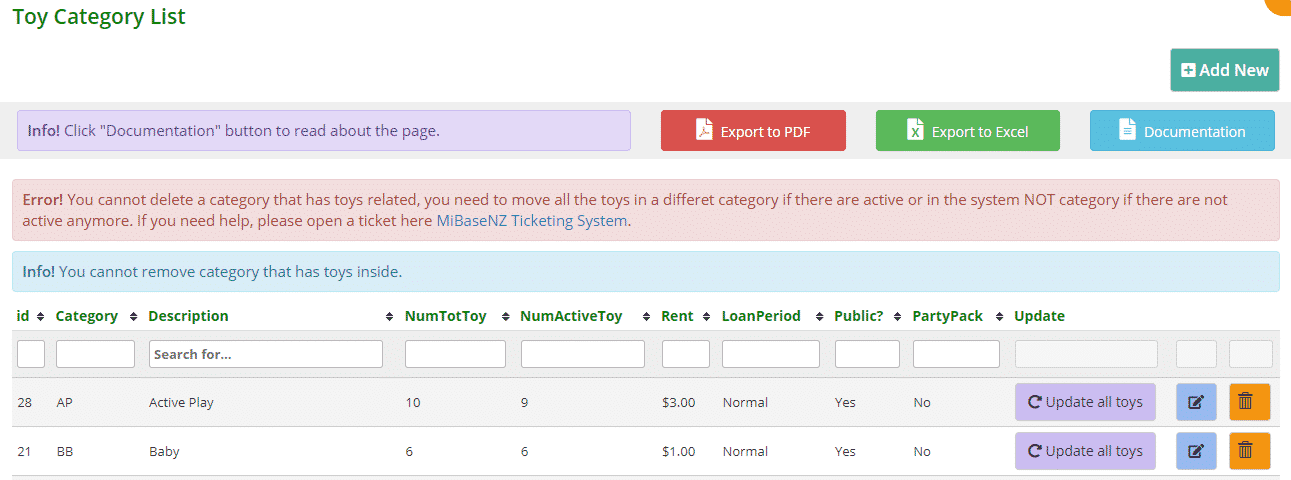
If the toys are Active, they will need to be moved to a different toy category.
If the toys are Not Active, they will need to be moved to the NOT: ALL INACTIVE toys category.
Each toy will need to individually be changed. If there are a large number of toys, you can Open a ticket and ask for help.
To change the toy category, click Toys List in the second menu. Type in the table header Cat the toy category of the toys you need to change.

Click the blue Edit button alongside the toy.
In the dropdown menu Category, select which category you would like to move the toy to.

Click Save Toy.
Once all toys have been changed, you will need to return to the Toys Categories page where you will see in the list the Number of Toys in both columns will be 0. See the below example:

You can now click the orange Delete button to remove the toy category and you will see the green Success message at the top of the page.

For more information about the Toy Category page follow the article The importance of toy categories
The post Deleting a toy category appeared first on MiBase New Zealand.
]]>The post Sub-Categories – create, edit or delete appeared first on MiBase New Zealand.
]]>Sub-Categories reduce clutter on your websites, which prevents people from being overwhelmed by a long list of choices. Having too long a list also makes it harder for viewing particularly if a person is using their mobile phone.
To create a sub-category, go to Toy -> Sub Categories

You will see a list of toy sub-categories if any.
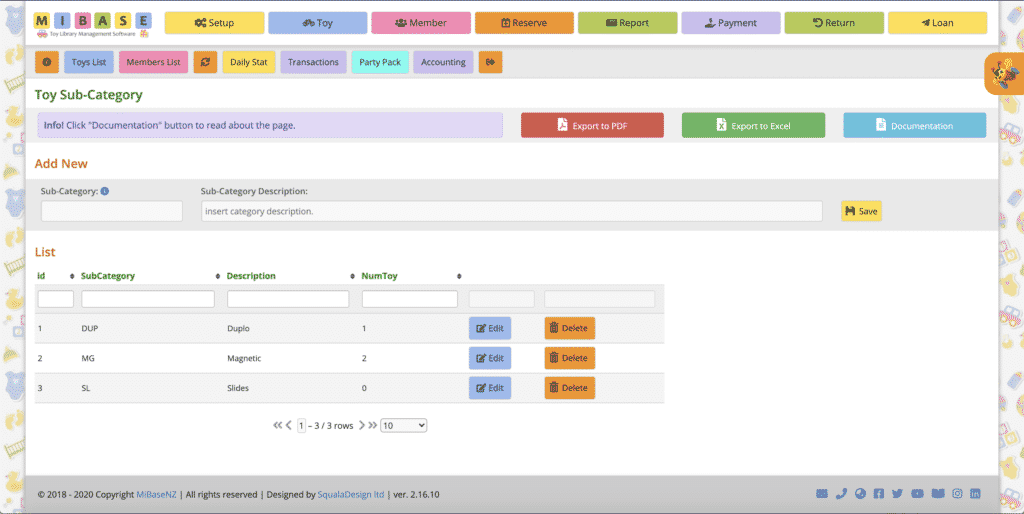
To remove a sub-category, simply click the orange Delete button alongside it.
To edit a sub-category, simply click the blue Edit button alongside it.
Note: you cannot change the SubCategory (the abbreviation of the description). If you have made a mistake, you will need to delete the category and start again.
To add a new toy sub-category use the form on top of the page.

- Sub-Category: No more than three characters. Make sure it aligns with the description, for example, DUP=Duplo, so it is easy to understand.
- Category Description: must be specific to the toys
Once you have added in the fields click Save.
You will see the Success message appear underneath. An Error message may appear if there is a problem.

To select the sub-category for a toy you will need to go to the toy’s editing page, Read this article Editing a Toy for further information.
Note: sub-categories can be used in more than one category
For example:
Puzzles – Magnetic
Construction – Magnetic
When members view toys in the Toy List on the Member Website, they will see at the top of the page the sub-category dropdown menu.
Once they have selected the category and sub-category, click Submit. A list of their choices will appear.
To see the full list again, click Reset.

The post Sub-Categories – create, edit or delete appeared first on MiBase New Zealand.
]]>This will also provide you an informative guide of what languages your members speak which can be helpful when making decisions with your toy purchases.
The post LOTE (Language Other Than English) – add or delete appeared first on MiBase New Zealand.
]]>This will also provide you with an informative guide on what languages your members speak which can be helpful when making decisions with your toy purchases.
Go to Member -> LOTE
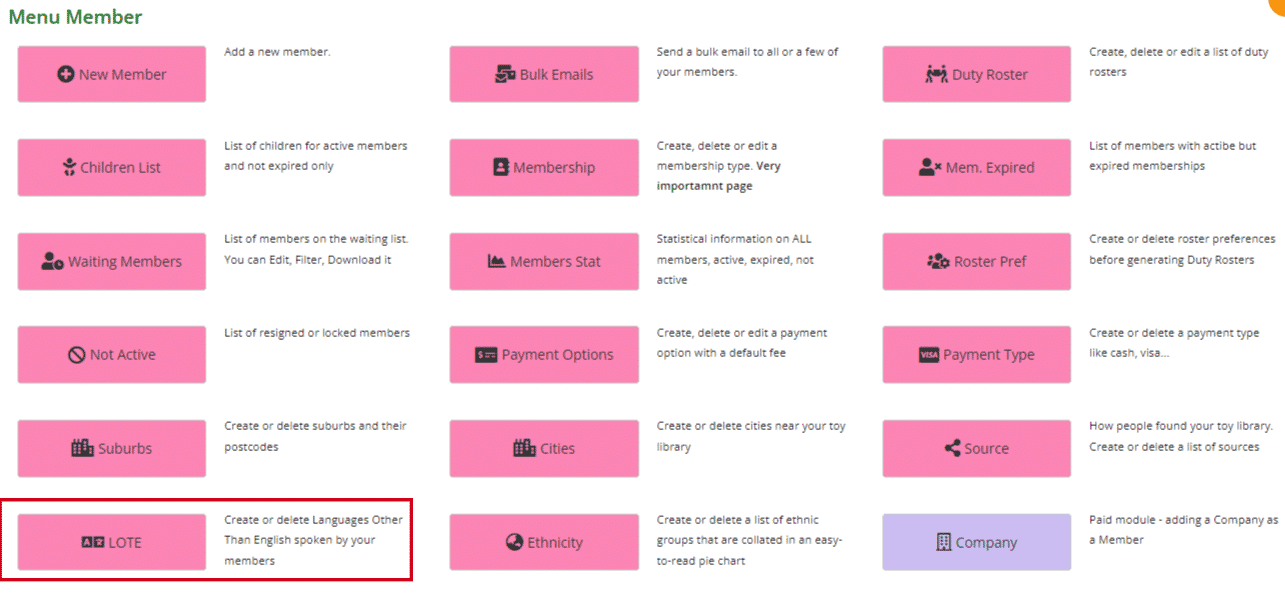
On the left, you can see the list of nationalities/languages.
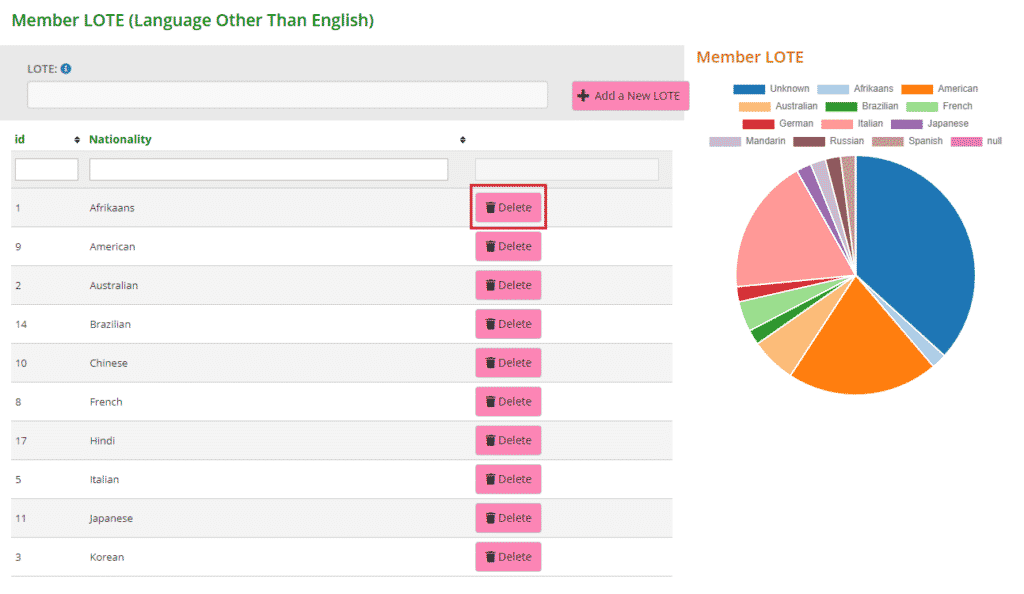
On the right, is a pie chart to provide you with a visual representation of your members’ nationalities/languages. If you hover your mouse/arrow over each section of the chart, you can see the number of members of that nationality/language.
To remove a nationality/language, click the Delete button alongside it.
To add a new nationality/language, type your preference in the LOTE field and click Add a New LOTE. It will automatically be added to the list.

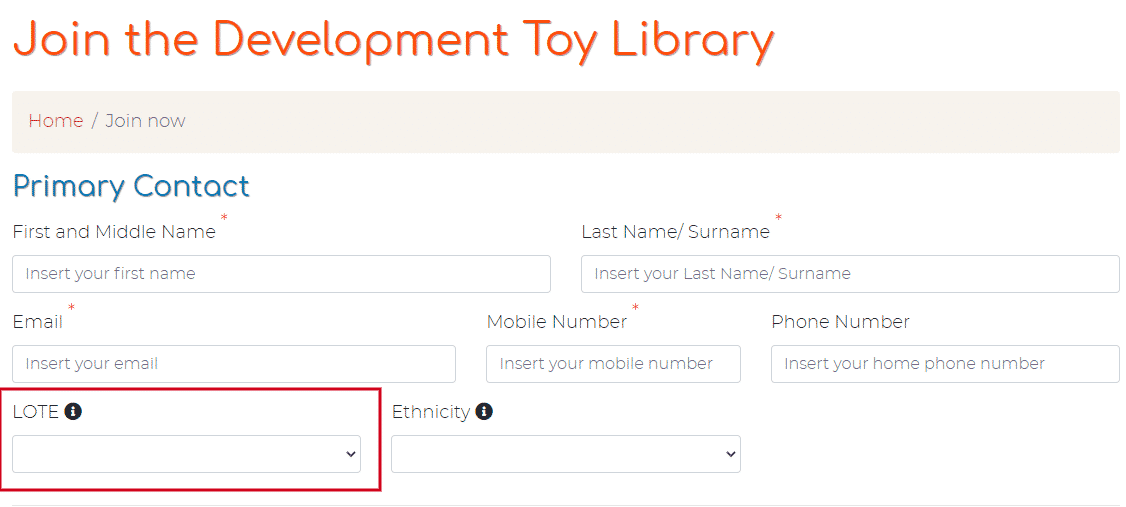
When Adding a new member, their nationality/language can be selected from the dropdown menu.

This function can also be seen on the Join Now page of your public website. Members who join online will be able to choose from the dropdown menu.
The post LOTE (Language Other Than English) – add or delete appeared first on MiBase New Zealand.
]]>Go to Member -> Payment Type
The post Payment Types – add or delete appeared first on MiBase New Zealand.
]]>Go to Member -> Payment Type Here you can see a list of the different payment types.
To remove a payment type, click the orange Delete button alongside it.
If you would like to add a new payment type, click Add New. 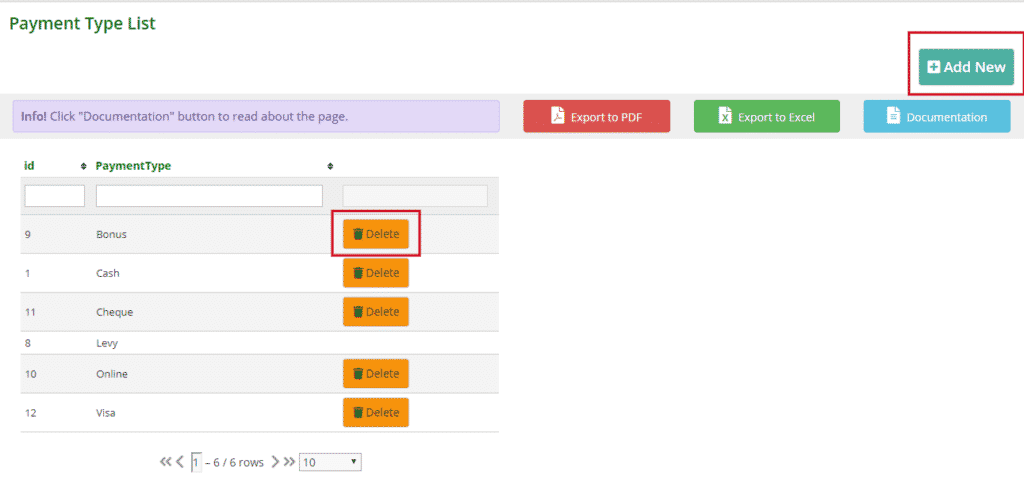 Type in the payment and click the pink Add a New Payment Type button underneath.
  You will see the Success message appear. An Error message may appear if there is a problem.
  When you click OK you will be taken back to the Payment Type List page. Once you have finished adding all payment types, you are ready to Add Payment Options.
The post Payment Types – add or delete appeared first on MiBase New Zealand.
]]>The post Ethnicity – add or delete appeared first on MiBase New Zealand.
]]>Ethnicities are added when a new member signs up with your toy library as a walk-in or they use the online Join Now form on your public website. For existing members, this information can be added by editing their details page.
To view the list and add or delete options, go to Member -> Ethnicity
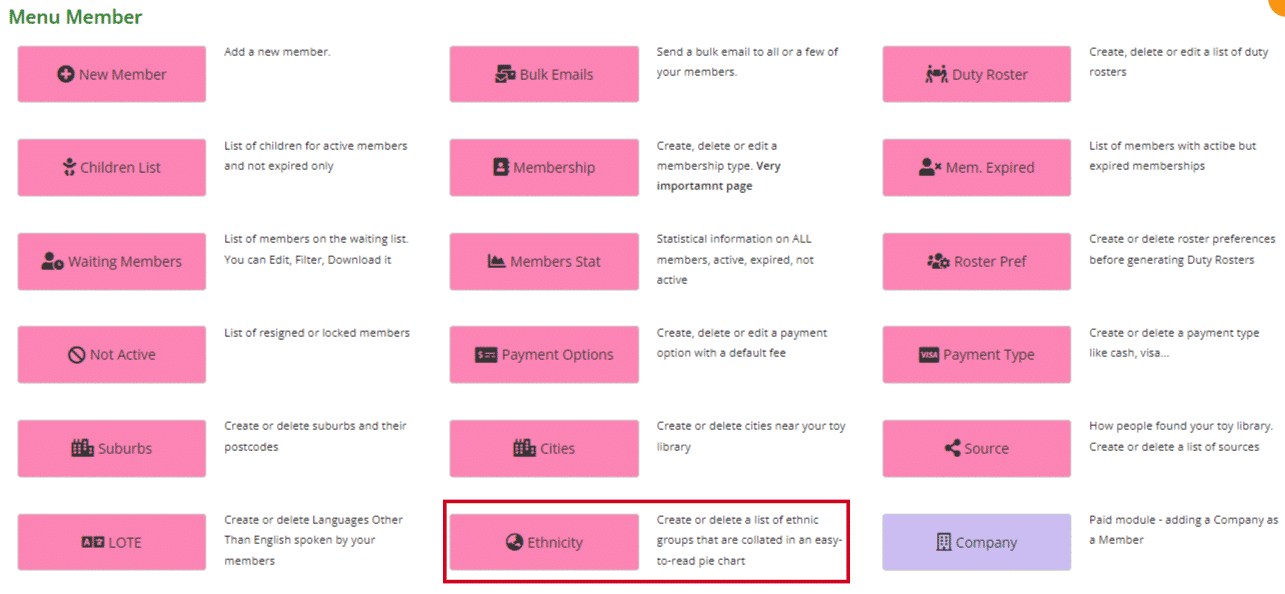
On the left, you can see the list of ethnicities.
On the right, is a pie chart to provide you with a visual representation of your members’ ethnicities. If you hover your mouse/arrow over each section of the chart, you can see the number of members in each ethnic group.
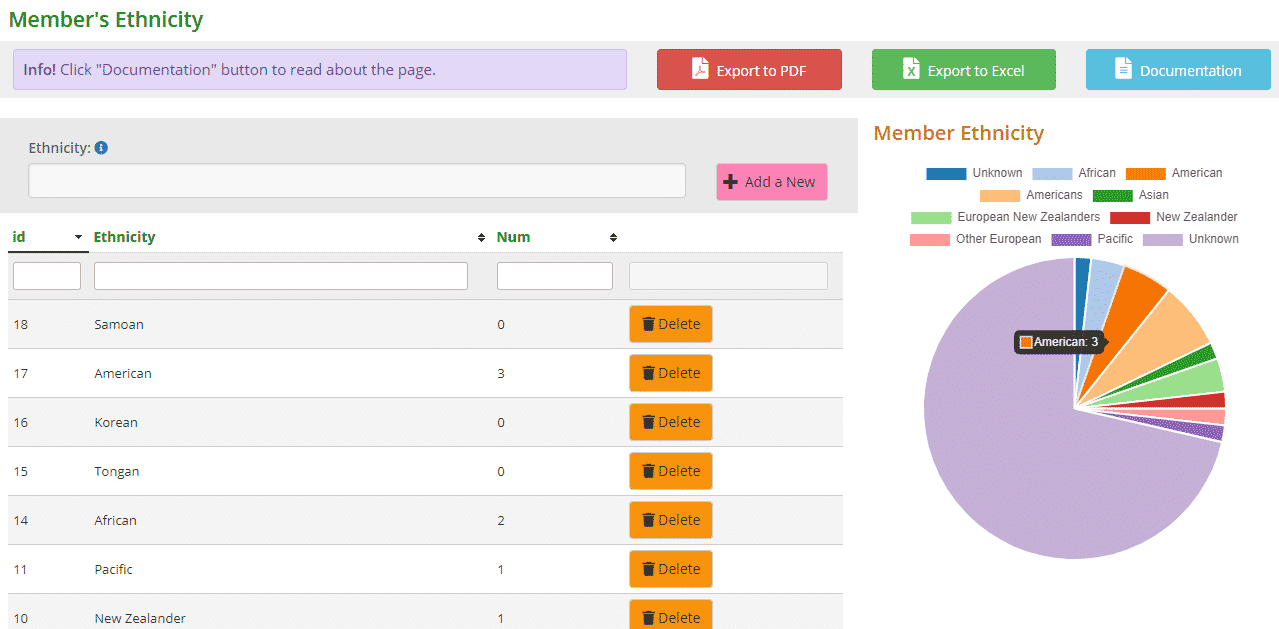
To remove an ethnicity, click the Delete button alongside it.
To add a new ethnicity, type your preference in the box and click Add a New. It will automatically be added to the list.

You can also download the list to PDF and/or Excel by clicking the Export to PDF or Export to Excel buttons.

As mentioned in the beginning, once the Ethnicity page has been set up, the information can be gathered in 3 ways.
- When Adding a new member, their ethnicity can be selected from the dropdown menu.

- When a member joins online using the Join Now page of your public website they can choose from the dropdown menu.
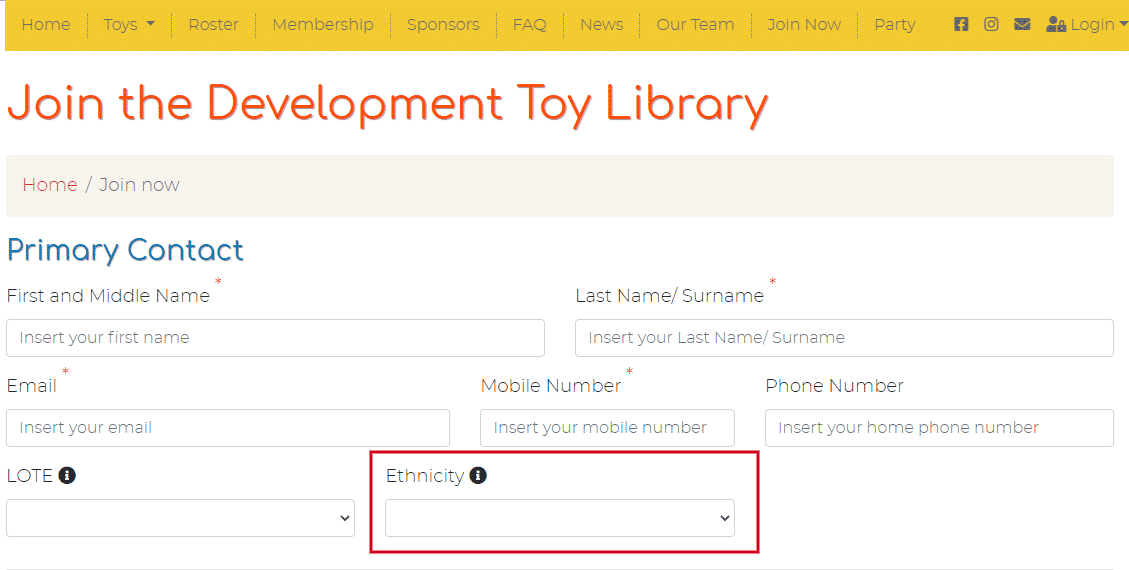
- Updating existing members by editing their Member Detail Page…
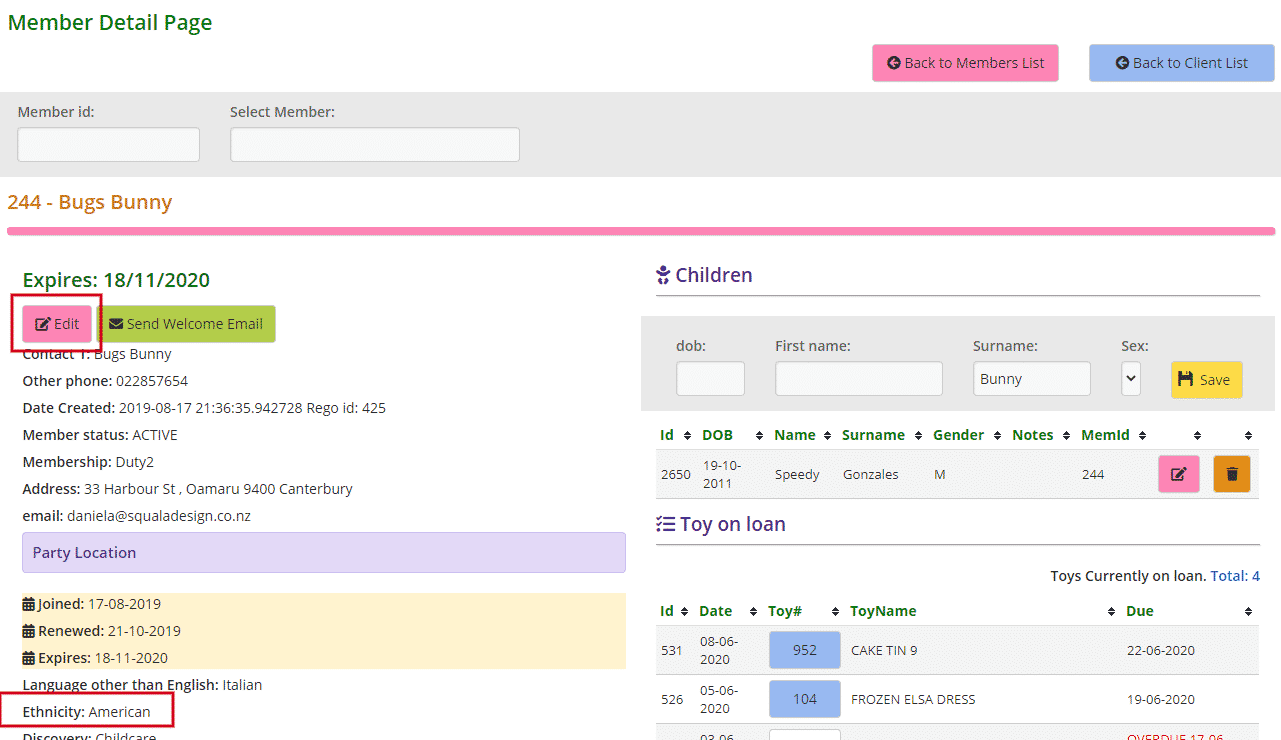
……and selecting from the dropdown menu.
The post Ethnicity – add or delete appeared first on MiBase New Zealand.
]]>The post Sources – add or delete appeared first on MiBase New Zealand.
]]>Go to Member -> Source
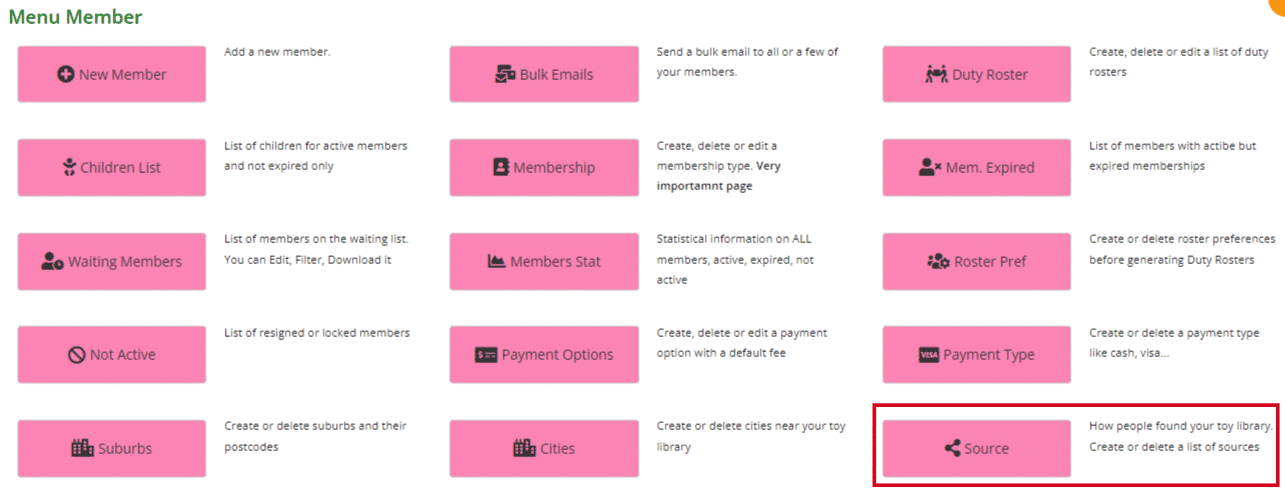
On the left, you can see the list of sources.
On the right, is a pie chart to provide you with a visual representation of how your members discovered your toy library. If you hover your mouse/arrow over each section of the chart, you can see how many members discovered your toy library through that source.
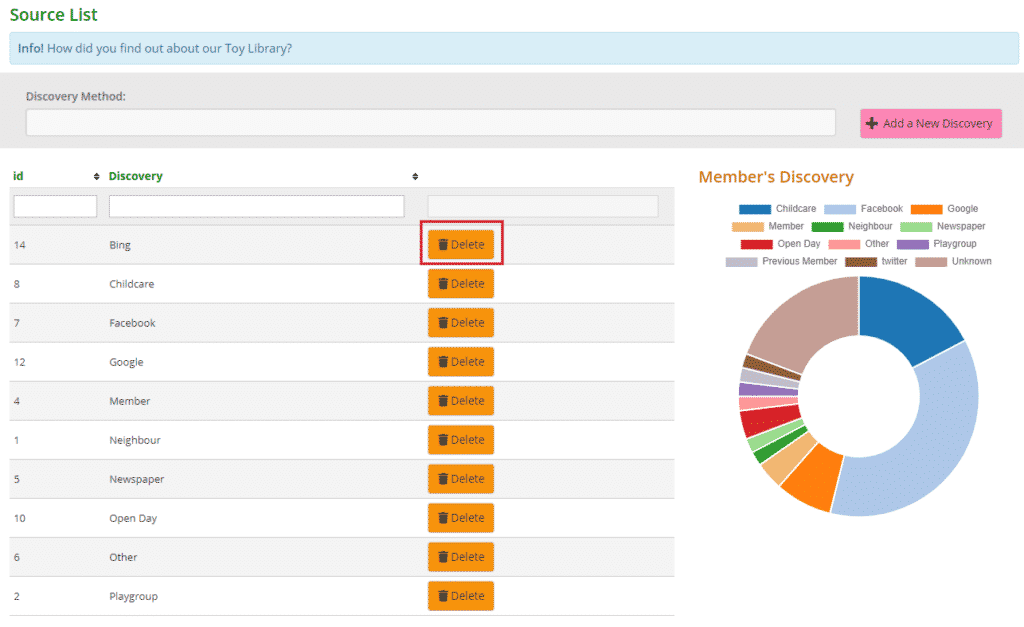
To remove a source, click the orange Delete button alongside it.
To add a new source, type your preference in the Discovery Method field and click Add a New Discovery.

You will see the Success message appear underneath. An Error message may appear if there is a problem.

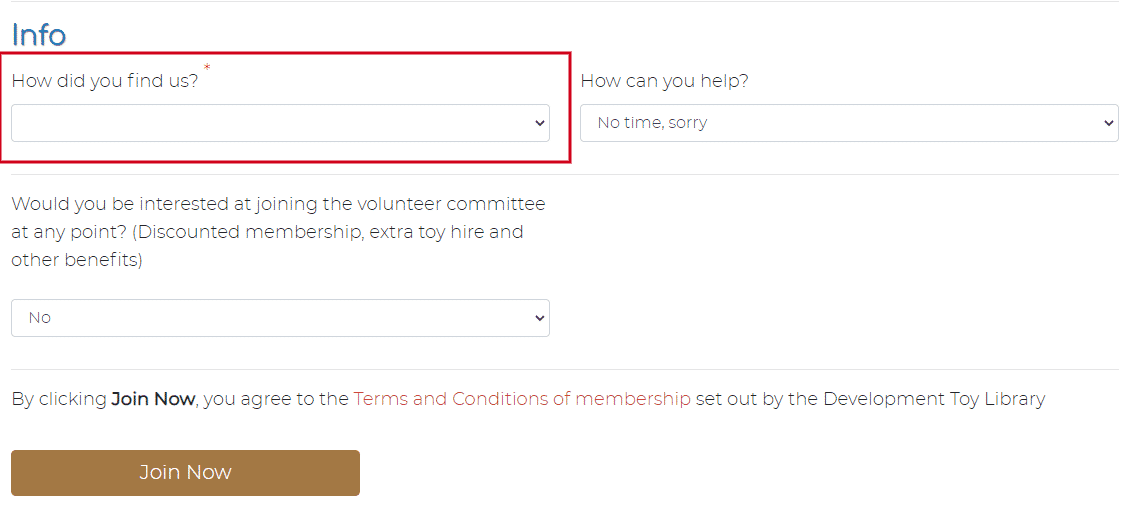
When Adding a new member, the source can be selected from the dropdown menu found under the heading “Other Info”.

This function can also be seen in the Join Now page of your public website. Members who join online will be able to choose from the dropdown menu “How did you find us?”.
The post Sources – add or delete appeared first on MiBase New Zealand.
]]>The post Suburbs – create, delete or edit appeared first on MiBase New Zealand.
]]>Go to Member -> Suburbs
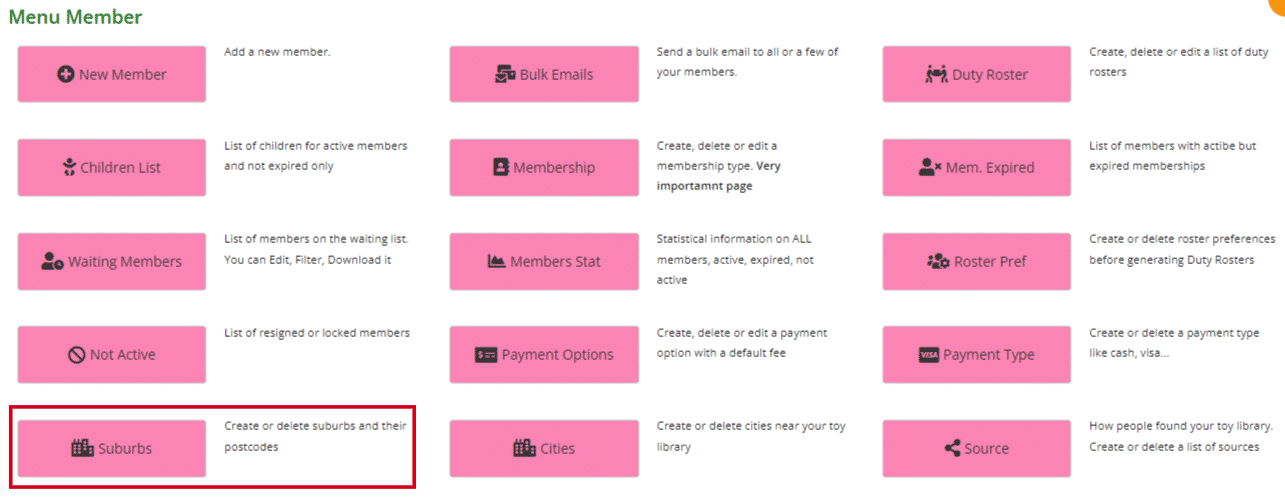
On the left, you can see the list of suburbs and postcodes.
On the right, is a pie chart to provide you with a visual representation of the number of members within each of the suburbs listed. If you hover your mouse/arrow over each section of the chart, you can see the number of members you have in each suburb.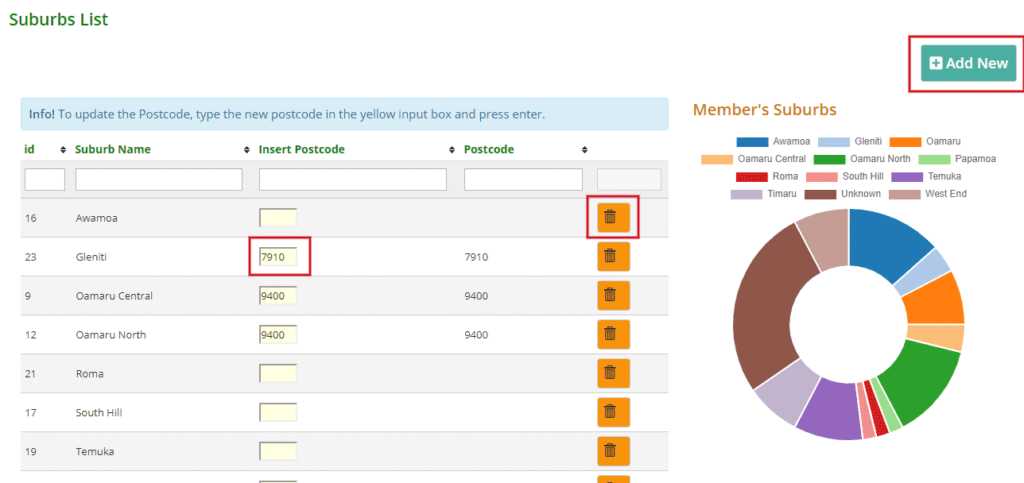
To remove a suburb, click the orange Delete button alongside it.
To edit the postcode, type in the yellow input box and press Enter.
To add a new suburb and postcode, click Add New.

Type in the suburb and postcode and click the Add a New Suburb underneath.
You will see the Success message appear underneath. An Error message may appear if there is a problem.

When you click OK you will be taken back to the Suburbs List page.
The post Suburbs – create, delete or edit appeared first on MiBase New Zealand.
]]>