How Can We Help?
Every toy within MiBaseNZ has its very own Edit a toy page. This is where, at any time you need to, you can update or amend any of the toy’s details. Also, once you have Added a new toy to the system, the next step to complete the process is to go to its Edit a toy page to add in all the remaining information.
The Edit a toy page can be accessed from a number of pages within MiBaseNZ. These include the Stocktake page, Toy Alerts list, Toy Detail page and the Toys List page.
For this article, we will be accessing it through the Toys List in the second menu. From there, click on the blue Edit button alongside the toy you would like to edit. 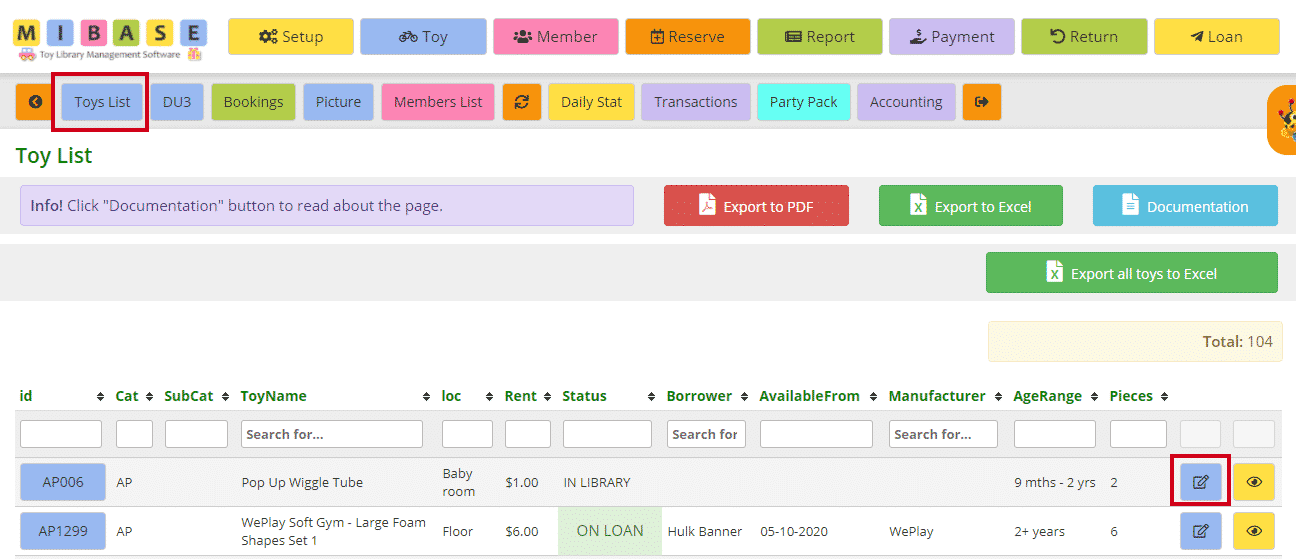
There is a lot of information on this page. We will break it down in sections and explain it in more detail below.
Toy details
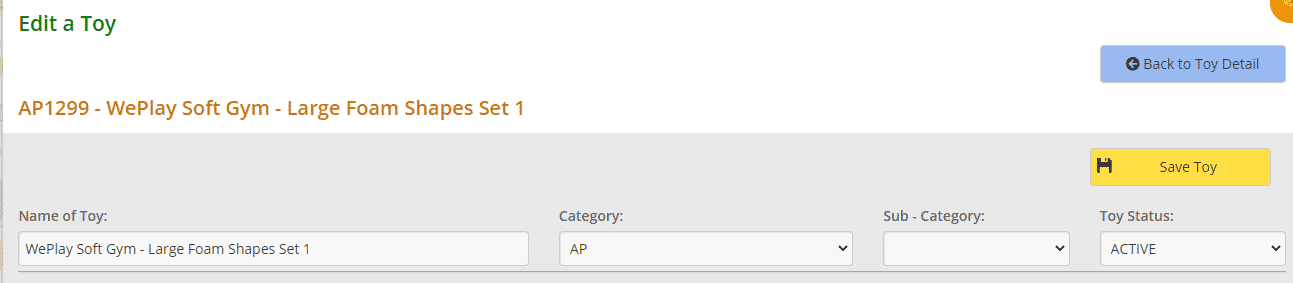
- Name of Toy: be as descriptive as possible. It will be helpful for everyone; members and admin
- Category: select from the dropdown menu what category best suits the toy. If you need to Add a new category, follow this link
- Sub-Category: select from the dropdown menu what sub-category best suits the toy if you are using this function. If your category list is rather long then you should use sub-categories as it helps members to search for more specific toys. To Add new sub-categories, follow this link
- Toy Status: select from the dropdown menu. Most toys will be Active meaning it can be loaned and seen on all websites unless there is a reason for it not to be, for example, it is damaged, has been sold or it’s being repaired in which case it cannot be loaned Processing means the toy is active in the admin website but not the member or public. This status is used when a new toy has been added to the system and the information and image have still to be completed. It also means this toy cannot be loaned
Toy info

- Age: select from the dropdown menu the appropriate age for the toy. To Add another age group, follow this link
- Condition: the condition/quality/state of the toy. Select from the dropdown menu. To Add a new condition follow this link
- Date of Purchase: the date the toy was purchased. It will always have the current day’s date however you can backdate using the calendar when you click on the box
- N. Pieces: number of pieces – this does not have to be just toy pieces. It can include for example storage bag or box or instruction manuals. The total number of pieces must match with what is in the Contains list outlined below
- Storage: how the toy is stored. Select from the dropdown menu. To Add a new storage type, follow this link
- Renewable: would you like this toy to be renewed by members in the Member Website?
It auto-fills as Yes so to change to No, select from the dropdown menu - Supplier: where the toy was purchased from. Type in the name or website
- Manufacturer: who made the toy, type in the name
- Donated by: only use if the toy was donated. Type in the name of the person or company
- Needs battery: if the toy needs batteries type in how many and the type
- Party Pack: would you like to include this toy in the Party Pack if your library has the module, yes or no?
- Location: where the toy can be found within the toy library, for example, shelf or room. This is very handy if your toy library is large or has various locations/shelves. It is also great for volunteers or helpers to know where to return a toy. To Add a new location, follow this link
- Accessories Location: some libraries like to keep a toy’s accessories in another location for example behind the counter. Type in a location if it applies to the toy
- This toy can be reserved: select this box if you would like to make this toy available for members to reserve
Toy cost

- Rent: the cost to hire the toy. To Add a rent group, follow this link
- Cost: the cost of the toy when purchased
- Replacement cost: if the cost was discounted you can add the full price here
- Packaging cost: depending on how precise your toy library wants to be you could add the cost for the storage/packaging or printing of the label
- Freight: or delivery cost. If you have bought in bulk, you can divide the cost of delivery for each toy
Descriptions
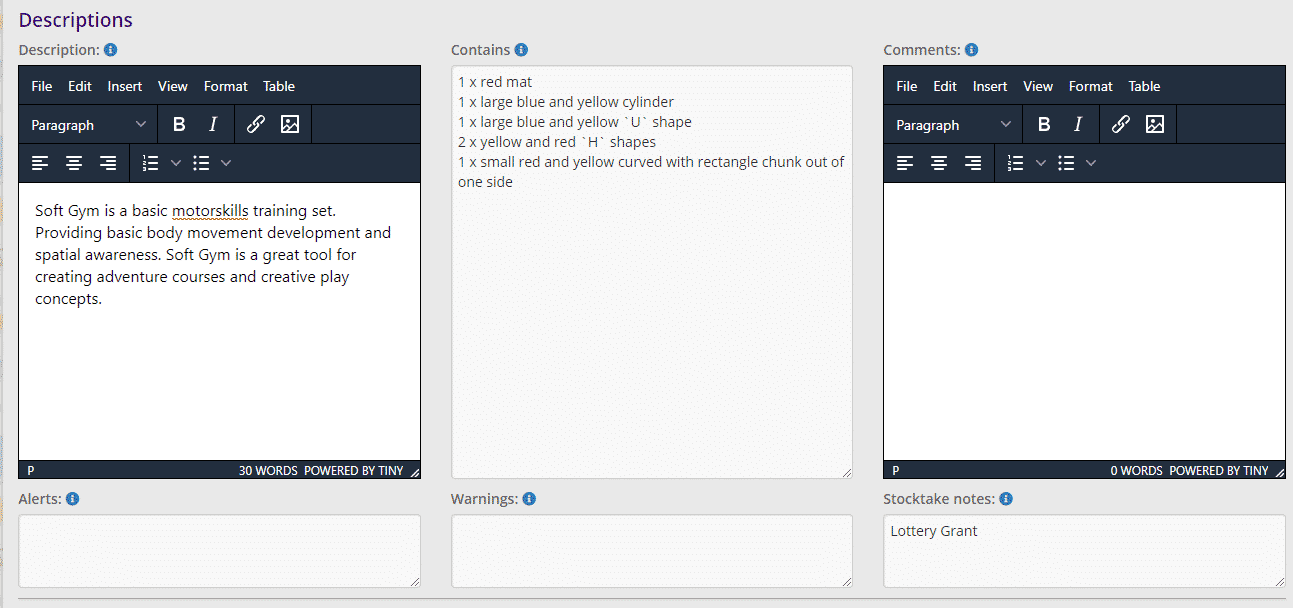
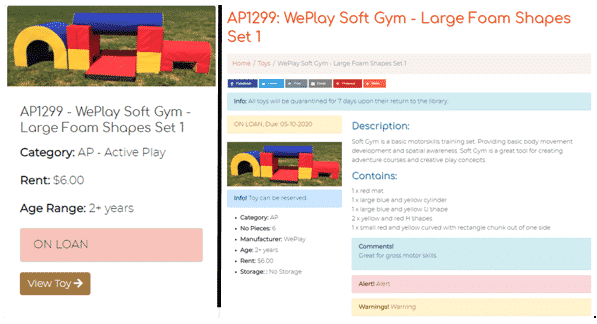
- Description: be as descriptive as possible as it will be seen in the Public and Member Website and can also be used on the bag label. It is great for google searches as well. There is no need to create your own description for the toy, you can just copy and paste it from the website it was purchased from. If there is no description, google search the toy in another website. Adding dimensions is also great if toys are rather large.
Follow this link for further information on Adding a great description - Contains: be as thorough and precise as possible as this list will be used when checking returned toys. It will be seen in the Public and Member Website and can be used on the bag label which is great for members to see what pieces are in the toy and if any are missing
- Comments: appears in a blue box in the Public and Member Website. This section is great for adding things like purpose of toy or how playing with this toy promotes certain skills or learning
- Alerts: appears in a red box in the Public and Member Website, for example, children will need to be supervised with this toy. It can also be used on the bag label. Follow this link for more information on Toy alerts
- Warnings: appears in an orange box in the Public and Member Website, for example, not suitable for under 3 year olds. It can also be used on the bag label
- Stocktake notes: this is where you can add notes after completing a stocktake. Only admin can see this
Extra info

- Processing time: where you can record how long it takes to add a new toy into the system
- Block image: selecting Yes will stop this toy image from being seen on the Public Website
- Link: can add a website link but it will be seen on the Public Website or you can add a link to assembly instructions. Follow this link to see how to Upload toy instructions
- Stockdate date: add the date of when this toy had last been checked
- Withdrawn date: if you have decided to withdraw this toy from the system, the date you do this will automatically be added in this section
- Withdrawn Reason: type in a reason for withdrawing the toy for future reference
- Keywords: adding keywords specific to the toy is great for members or the general public when searching on Google.
The type of keywords you can use is the category, what the toy promotes, manufacturer or key features of the toy.
It can be more than one word, separate the keywords by a comma, don’t use characters so, for example, Melissa & Doug – take out the ‘&’, use singular words not plural
Save toy
Once all information has been added or updated click Save at the top right of the page.
In the Second Menu, the Toy id button will appear as well as the Picture button.
A Success message will appear as well as buttons to the Stocktake List and Add New Toy page.

- Toy id: clicking this button will take you to the toy’s detail page where you can see all the information added
- Picture: clicking this button will take you to the page where the image can be uploaded. Follow this link for more information on Uploading Images
- Stocktake Page: follow this link for more information on the Stocktake page
- New Toy: follow this link for more information on Adding a new toy
On the Member and Public Websites, click the View Toy button to see all the information added as well as comments and warnings/alerts if applicable.