How Can We Help?
If you are reading this page, you have purchased the Booking System Premium Module under the Reserve page.
MiBaseNZ has created this Booking System to allow admin, members and the public to be able to book a time to visit your toy library. This module is not linked with the Reservation System so toys do not need to be reserved to use it.
Note: if you have the Click and Collect module, you will not need this module.
Before you can start using this system, you will need to complete three steps first.
Step 1
Ensure your toy library’s opening times have been set up correctly. To learn how to do this read the article Days and Times page. Once set up, these opening times will be seen by admin, members and the public when they go to book a time to visit.
Step 2
Set up the Booking System. To do this go to Reserve -> Booking System

Click on the Settings and content button.

There are six settings to change.
To make these changes click the Edit button alongside each setting, use the arrows or type in your preference and click Save.
Once the settings are changed you must log out and then log back in again for the settings to take effect.
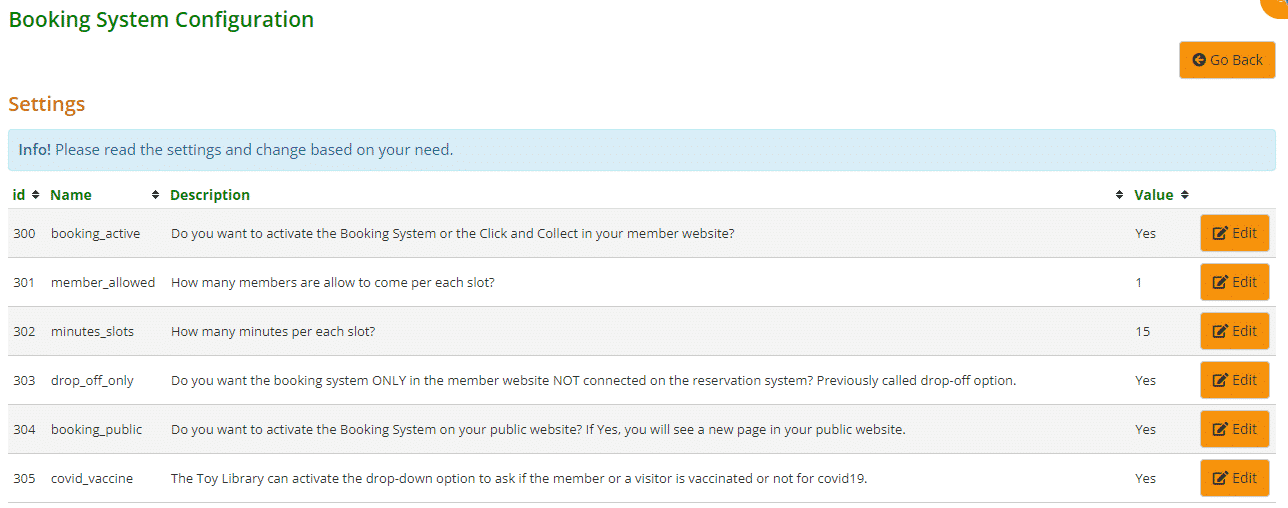
- #300: select Yes for the booking system to be activated
- #301: decide how many members you would like per time slot
- #302: decide how many minutes you would like to allocate to each time slot
- #303: select Yes if you do NOT want the Booking System to be connected to the Reservation System on the Members Website
- #304: select Yes for the booking system to be active on the Public Website
- #305: select Yes to activate the drop-down menu asking members or visitors if they are vaccinated
Select the Go Back button to take you back to the Booking page.
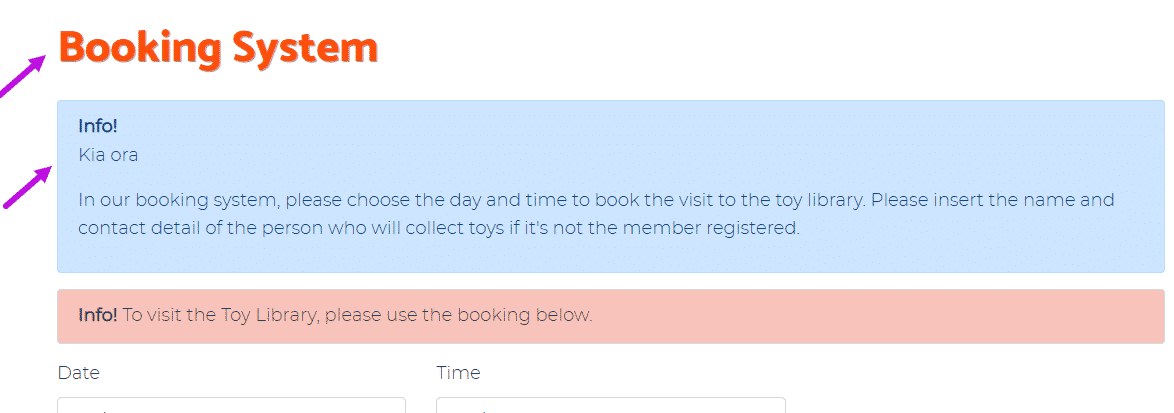
With this part of the setup complete, the module has now added the Booking System page on your Member Website and Public Website, if you have selected this option.

Step 3
Personalise your Booking System page. To do this you will need to edit the title and content of the Member/Public website content page listed under the settings. Once you have made the changes click Save.
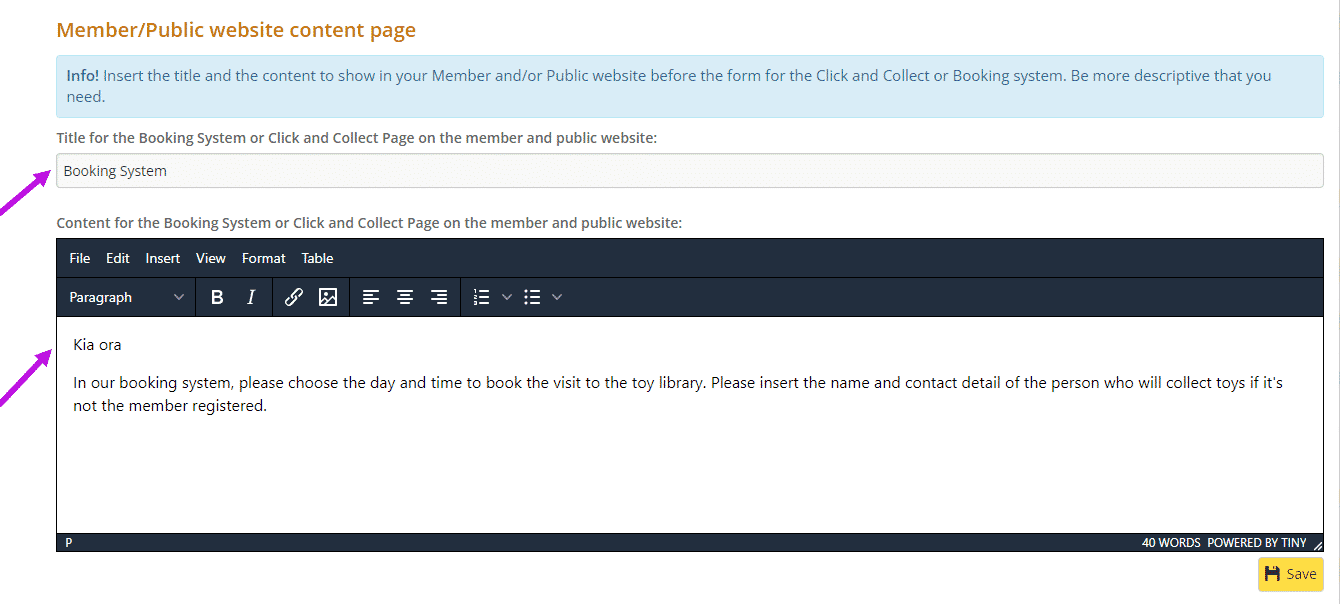
This will automatically update the Member and Public Website and the title and content will appear on the Booking System page.
Now that you have set up the Days and Time page and the Booking System page, you are ready to make a booking. The following three articles will tell you how to use the booking system on the Admin Website, Member Website and Public Website.
How to use the Booking System in the Admin Website
How to use the Booking System in the Member Website
How to use the Booking System in the Public Website (article coming soon)
