How Can We Help?
If you have activated the Roster page on your Member Website, thus allowing members to book their own duties, you will need to decide what functions and information you would like members to see and to use.
To see the options, go to Setup -> Members.
Type the word “roster:” in the Description box. The list will be filtered to show all settings related to the Roster page. Each setting can be easily changed by clicking the Edit button alongside it, making the change if necessary and clicking Save.
Once the settings are changed you must log out and then log back in again for the settings to take effect.
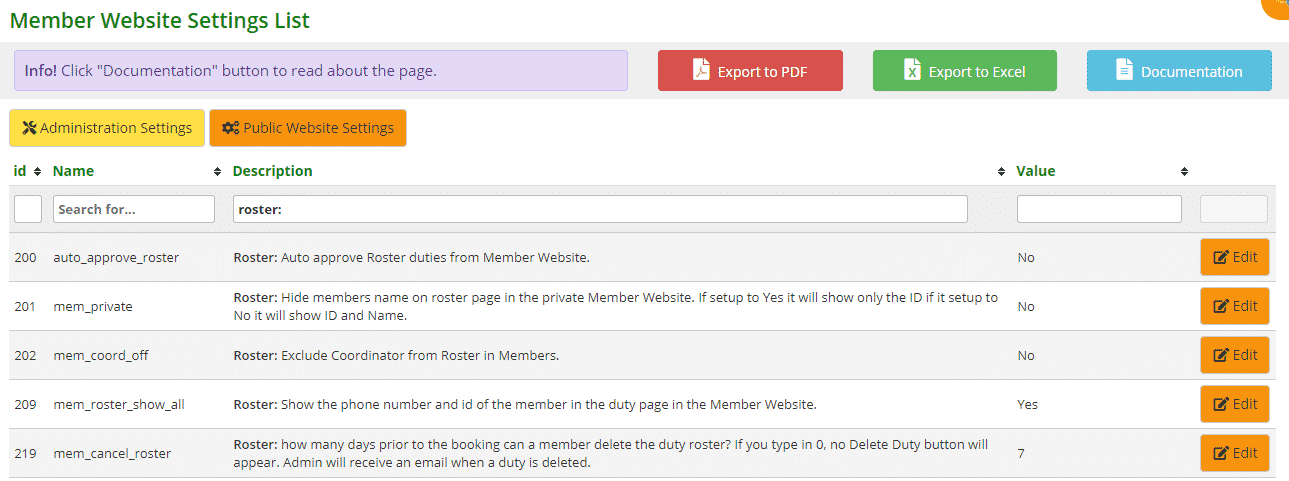
- #200 – auto_approve_roster: When a member selects a duty session on the calendar, this setting will allow it to be automatically approved rather than waiting for the admin to approve it. Select No if you do not want this to automatically happen
- #201 – mem_private: When a member logs on to the Member Website and views the roster calendar, you can decide if they can see the details of other members who have selected a duty, or not. Yes will show ID number, No will show ID number and member’s name
- #202 – mem_coord_off: this setting will exclude coordinators (committee members) from roster duties, select Yes to exclude, No to include
- #209 – mem_roster_show_all: if you have selected No for setting #201, you can also add the member’s phone number as well by selecting Yes for this option.
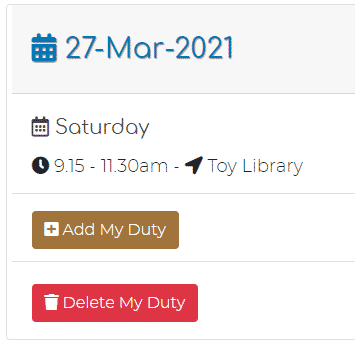
Toy Libraries show other members details to allow them to call each other if they need to swap their duties. Remember to ask for your members’ permission to show their details. - #219 – mem_cancel_roster: you can decide up to how many days prior to the duty a member is able to delete it. When a member deletes the duty, the admin will receive an email notification. If you do not want any member to be able to delete a duty, type in 0. The Delete My Duty button will not appear on the Member Website
If you are using the Roster System in the Member Website, you should then activate this below setting for the Admin Website.
Go to Setup -> Administration
 Type in ‘roster’ and change the setting to Yes.

What this will do is activate the two tables below on the admin Home page.

- Members on Duty Today: will list what members will be completing their duty today
- Member signed up for duty online: will list the members that have signed up for duty in the Member Website.
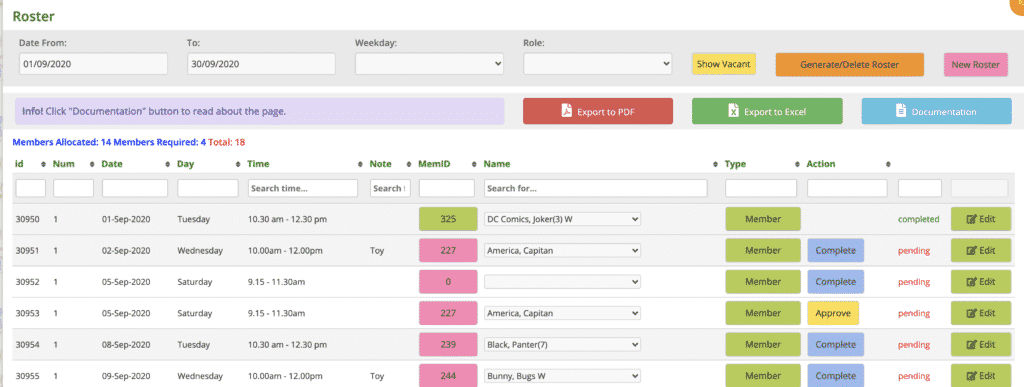
If you have selected Yes for setting #200 above, this duty will automatically be approved. If you have selected No, an admin will need to approve it by clicking the pink Go to Duty Page button which takes you to the Duty Roster page where you can click the yellow Approve button (see below).