How Can We Help?
MiBaseNZ allows toy libraries to personally design their own Public and Member Websites. There are a number of options to choose from to set your toy library apart from everyone else. You are provided with a selection of background images, a variety of fonts and a choice of many different colours.
Go to Setup -> Design your website

Important notes before starting
Your choices will be applied to both websites. Your Public Website can not be different from your Member Website.
Each time you make a selection, click Save. To view the change in the website, you will need to refresh the page.
![]()
At the bottom of the page, you will find the Save button as well as two other buttons.
Import from settings – this button is no longer required. Before this page was created, you would change the backgrounds and colours in the settings. This button allowed you to import your design from your settings instead of starting from the beginning.
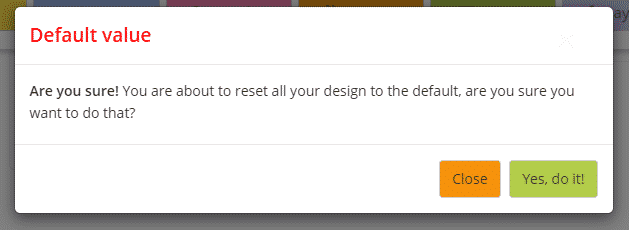
Default value – clicking this button will reset your website back to the original backgrounds, fonts and colour schemes when you first signed up with MiBaseNZ. If you click this button, an Are you sure! pop-up screen will appear.

Background – Body, Header and Footer
The first step in designing your websites is to decide on the backgrounds for the main body of the websites as well as the header and footer which will be seen on every page.
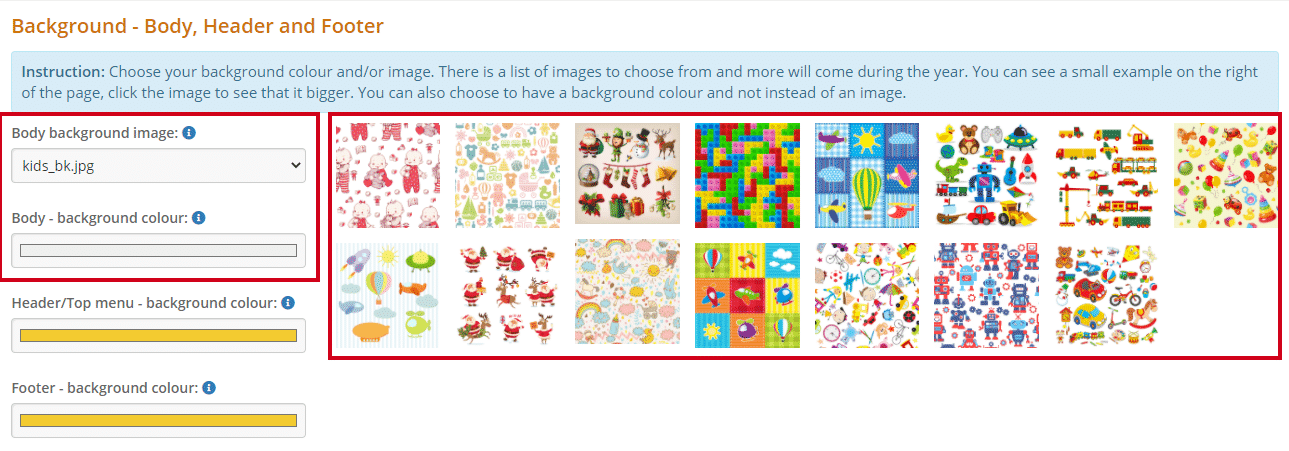
Body background – image or colour
You can either choose an image or a colour, but not both.

To the right, you will see a selection of images. Click on each one to enlarge it. The name of the image can be seen at the top. Once you have chosen an image you like, to the left you will see the heading Body background image. Find the image name in the dropdown menu and select it.
Scroll down to the bottom of the page and click Save.
Refresh your website to see the changes.
If you would like a different image that is not listed or you would like to see some other options, please send an email to daniela@mibase.co.nz.
If your toy library would prefer to have no image and would rather just a colour background, make sure the Body background image dropdown menu is selected at ‘none’ then choose a colour by clicking the colour bar under the heading Body – background colour.
 You can choose from the rainbow or if you would like to use a colour from your toy library logo, type in the code for the colour. If you don’t know the code for your logo, please send an email to daniela@mibase.co.nz.
Scroll down to the bottom of the page and click Save.
Refresh your website to see the changes.
Examples of image and colour backgrounds


Header and footer – background colour
The header (or top menu) and the footer are the bars at the top and bottom of each page of your website. It is important when choosing these colours to try and match them to the background. Also, when making your choice, be aware of the font colour you would like to use for the words in the header and footer.

Same as above, click the colour bar and choose a colour from the rainbow or type in a colour code.
Scroll down and click Save.
Refresh your website to see the changes.


Fonts – Style and colour
The font is the style of writing. You will be able to decide the font style for the headings and titles and for the main text (body font). You will also be able to choose the font colour for some of this text but not for all. For the main text, the colour can not be changed and is automatically set. You can change however the colour for the titles and headings, the header/top menu, the footer and any links you create within these.
Titles/Headings and Body – font styles
The body font is everything but the title or headings. This should be different from the title or headings as the title is big and short whereas the body needs to be easy to read as there is a lot more writing involved.

To the right, you will see a selection of fonts. Click on each one to enlarge it. Once you have chosen a style you like, to the left you will see the headings Titles/Heading font and Body font. Find the font names in the dropdown menus and select them.
Scroll down to the bottom of the page and click Save.
Refresh your website to see the changes.
If you would like a different font than the ones listed, in the blue box above the font styles, there is a link to a number of other options. Once you see one you like, send an email to daniela@mibase.co.nz and it will be added to the list.
Title/Heading colours
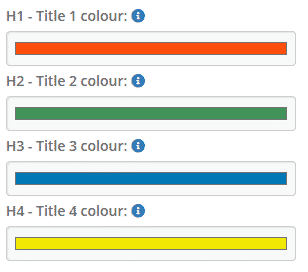
Each of the headings or titles on your website can be a different colour, or not, you decide. Again, think about your colour choices and whether they will work with the background and the header and footer.
Click the colour bar and choose a colour from the rainbow or type in a colour code.
Click Save. Refresh your website to see the changes.

- H1 – Title 1 is the toy library name and the title or heading for each page of the website
- H2 – Title 2 is for sections in the page such as the header under the toy library name
- H3 – Title 3 is for subtitles, in this case, the right-hand column headings; Opening hours, Where we are, Contacts, Follow us
- H4 – Title 4 is also for subtitles, in this case, the Our Team names as well as the membership headings
Font colour – top menu/header, footer and links
When deciding on your colour choices for these fonts, it is important to choose a contrasting colour otherwise it won’t be clear and easy to read.
For example, dark background/light font or light background/dark font. See the examples below.
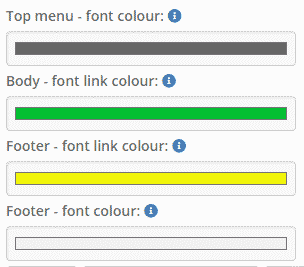
The Body – font link is the link to another page added within your website pages, for example, an email.
The Footer – font link is the links added in the footer.

Click the colour bar and choose a colour from the rainbow or type in a colour code.
Click Save. Refresh your website to see the changes.
As you can see, choosing a dark grey colour for the top menu words makes it stand out against the yellow background. The footer, however, the words and link colours are lost against the yellow background.

![]()
