How Can We Help?
When you purchase MiBaseNZ Management System to manage your toy library, you will also have access to a new Public Website. As you can see from the image below it will include information such as your toy list, the roster, and a news page which will be all visible to the public.
The Public Website is part of MiBaseNZ with NO additional cost. You can choose some pages/modules you would like to appear simply by activating or deactivating them.
The Home Page schema is described in the image below.
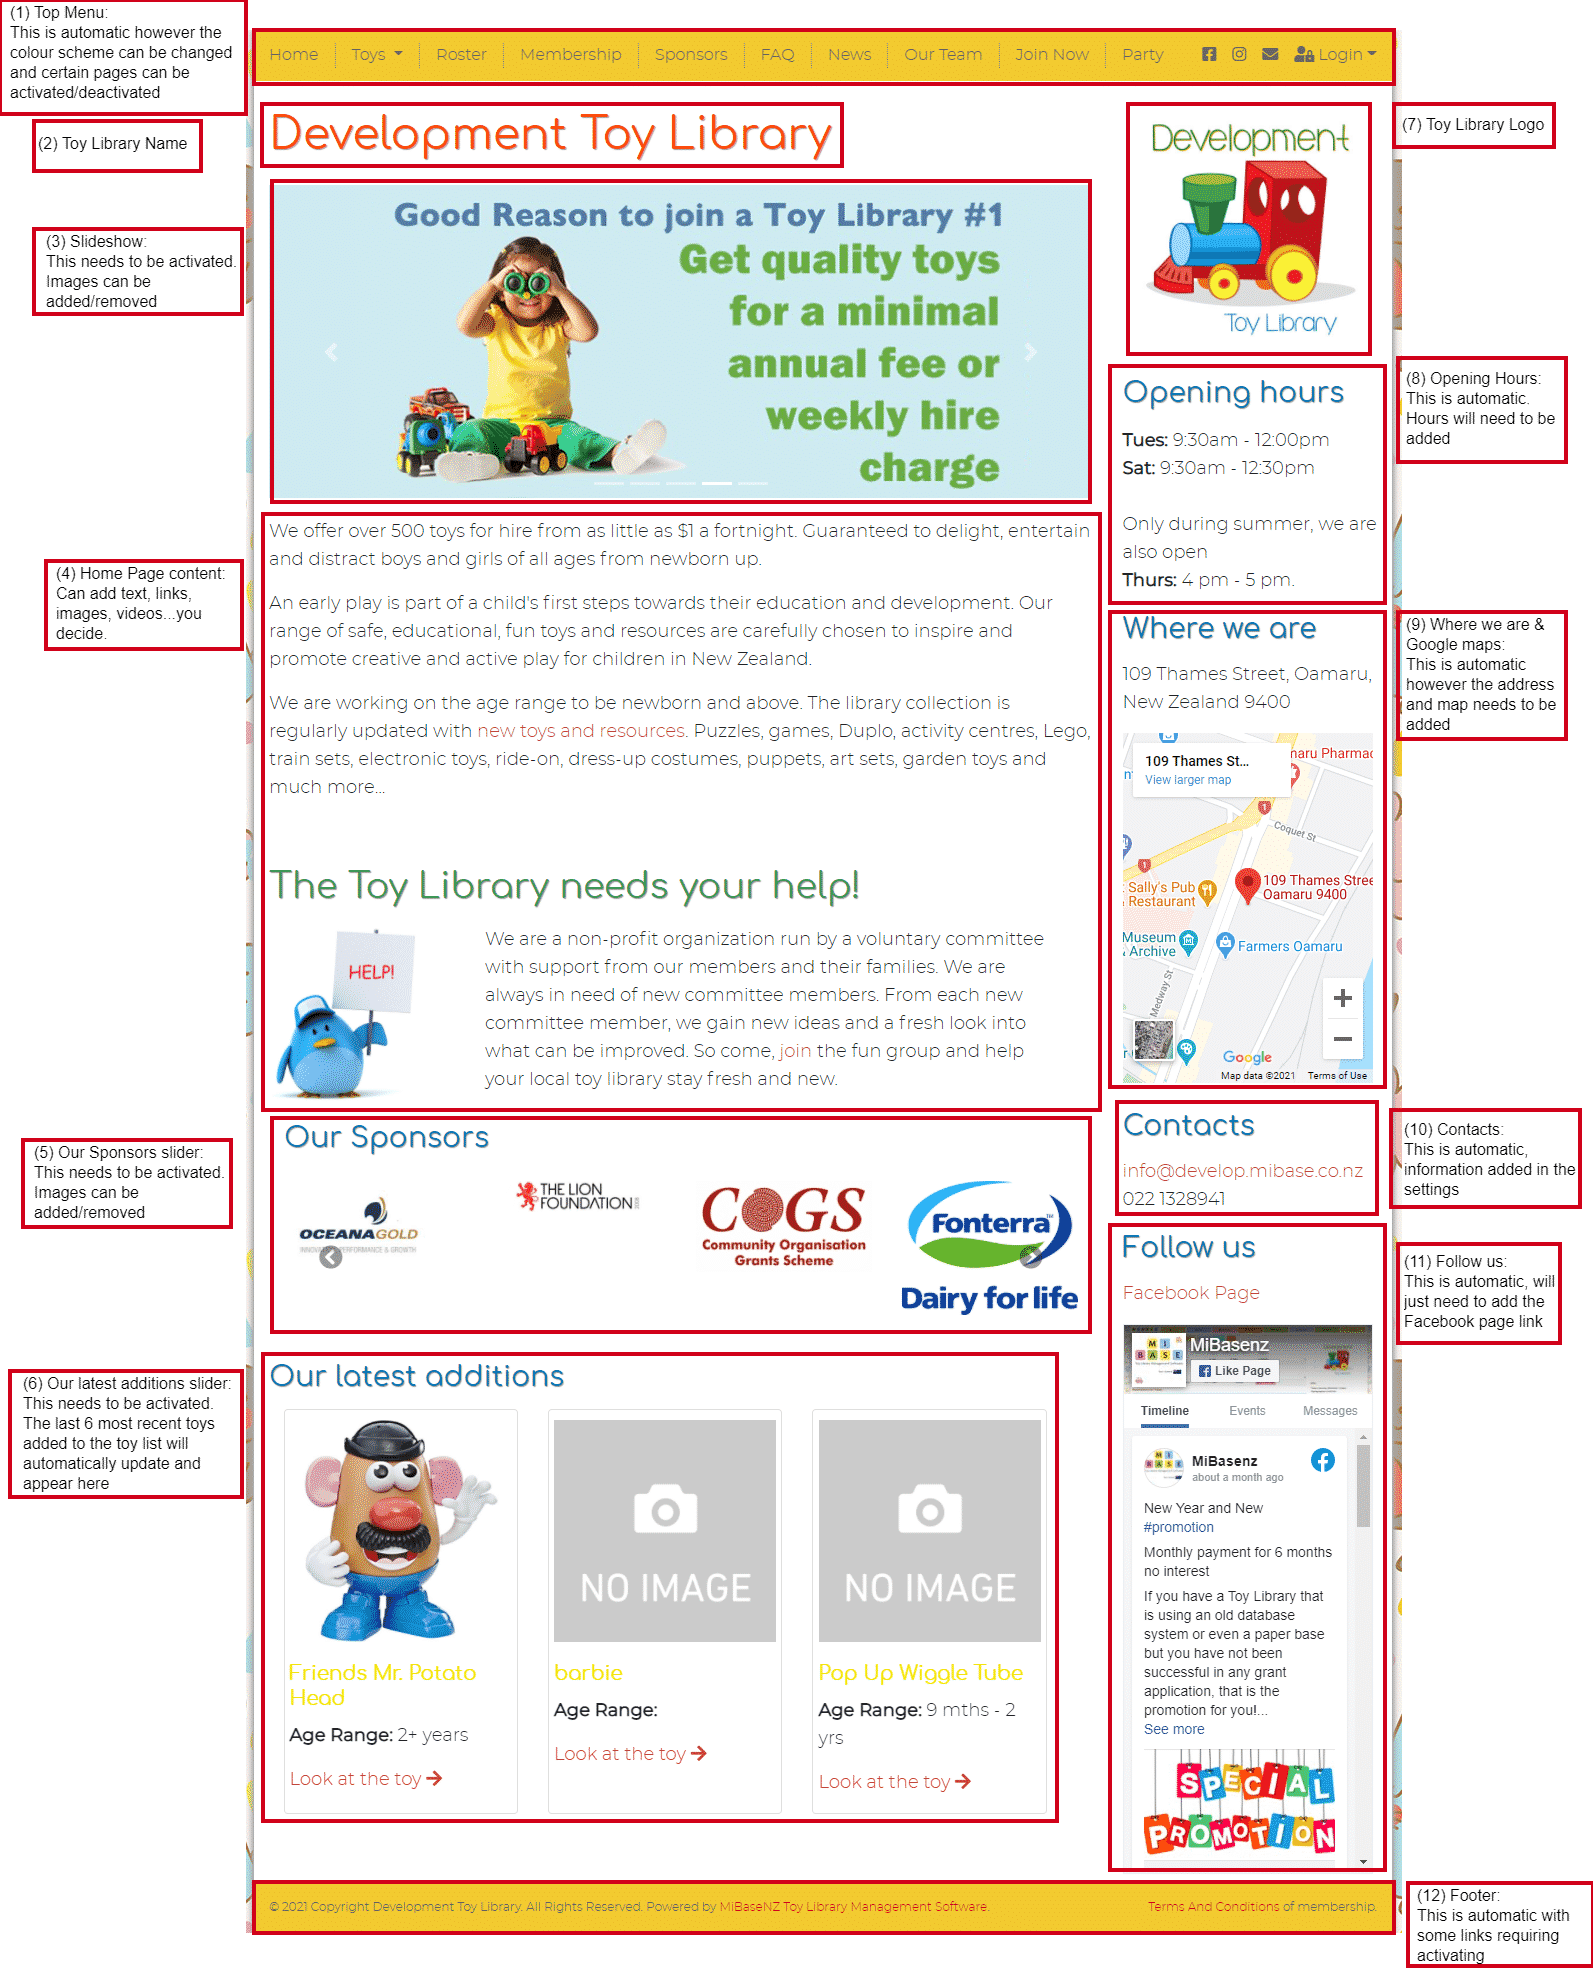
(1) Top menu:
Located at the top of every page of the Public Website, this bar-shaped menu lists the modules/pages that can be accessed on the Public Website.
To activate these pages read the article Settings for Top Menu items.
To change the font and background colour of the top menu, read the article Design your Public Website.
(2) Toy Library Name:
To add your toy library name go to Setup -> Administration, search for the setting libraryname, click Edit and type in your name. Click Save.

(3) Slideshow:
To activate the slideshow, read the article Settings for the Home page.
To add/remove images in the slideshow, read the article How to add images to the slideshow.
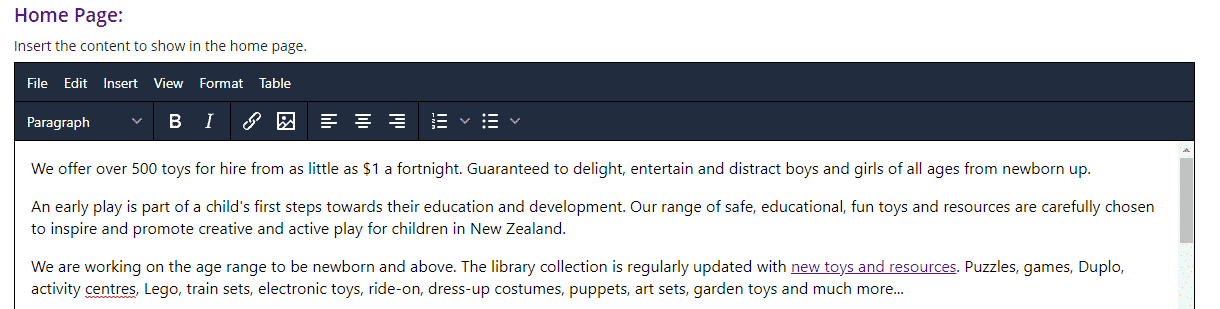
(4) Home Page content:
This is where you can add whatever content or images about your toy library you like. You can even add links to other pages within your website too. Remember this is the first page people will see when they view your Public Website.
To add this content, go to Setup -> Edit website and add under the Home Page section.
Read the article Edit your Public Website for further information.
(5) Our Sponsors slider:
To activate the slider, read the article Settings for the Home page.
To add/remove images in the slider, read the article How to add sponsors logos.
(6) Our latest additions slider:
To activate the slider, read the article Settings for the Home page.
(7) Toy Library Logo:
This is part of the initial setup, and cannot be changed by the toy library. If you would like to change it, however, please send an email to daniela@mibase.co.nz.
(8) Opening hours:
To add the opening hours, go to Setup -> Administration, search for the setting open hours, click Edit and type in the hours. Click Save.

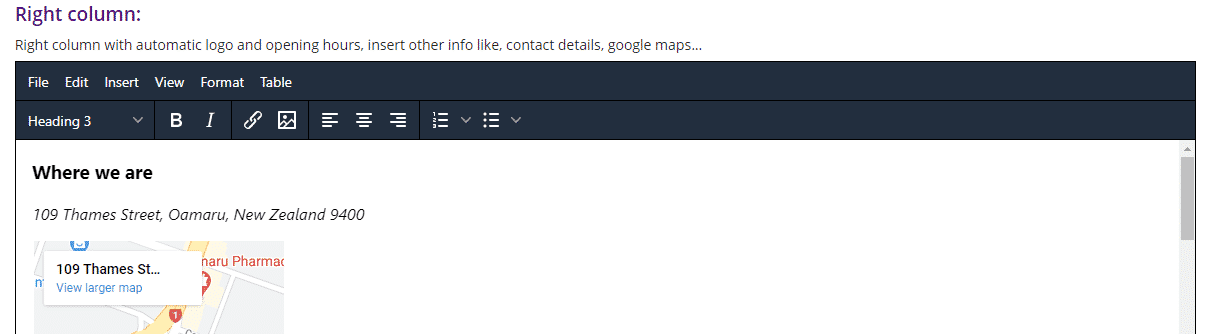
(9) Where we are:
To add your toy library’s address, go to Setup -> Edit website and add under the Right column section.
Read the article Edit your Public Website for further information.
It is highly recommended you add a Google map here as well as the written address.
To add a map into this section, read the article, How to add a Google map on your website.
(10) Contacts:
To add your toy library’s contact details you will need to go to two different settings.
To add the email address, go to Setup -> Administration, search for the setting email_from, click Edit and type in the address. Click Save.

To add the number, go to Setup -> Members, search for the setting phone, click Edit and type in the number. Click Save.

(11) Follow us:
To activate this section, go to Setup -> Public Settings, search for the setting facebook, click Edit and insert the complete Facebook Page URL. Click Save.
An icon will also appear in the Top Menu.

(12) Footer:
The footer content is automatic, however, you are able to change the font, links and background colour. Read the article Design your Public Website to see how.
