How Can We Help?
If you have set up your toy library’s Roster Preferences, you are now ready to set up a Duty Roster. MiBaseNZ’s Duty Roster page allows you to generate rosters month by month or for the whole year if you are open all year round.
Generate the Duty Roster Calendar
To add a roster, go to Member -> Duty Roster Click the orange button Generate/Delete Roster 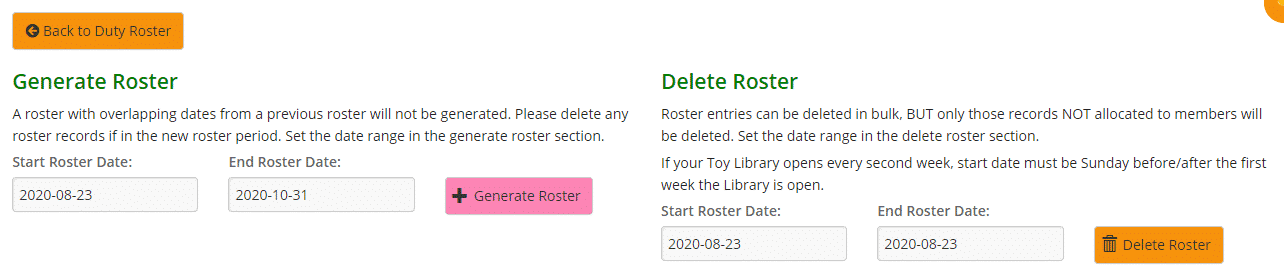 Under the heading ‘Generate Roster’, select a ‘start roster date’ by clicking the box and selecting from the calendar. Do the same for ‘end roster date’. Click Generate Roster. A Success message will appear with the total number of duties created between the dates you have selected.
  A warning message will appear if you have already created a roster and the dates overlap.
  Click the orange ‘Back to Duty Roster’ button. You will now see a list of all the duties you have generated.
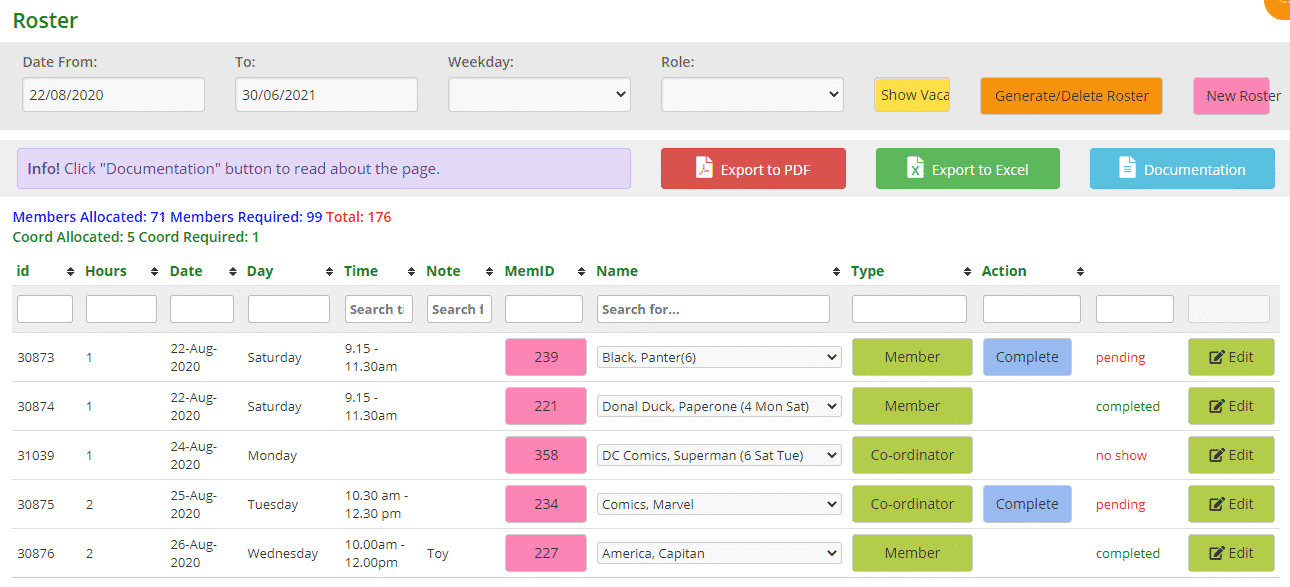
There is a lot of information and functions on this Duty Roster page. See below for explanations. First Row:
- Date From/To: you can select the date range of the rosters you would like to see listed in the table. A certain month or the entire year.
- Weekday: select from the dropdown menu what days you would like to see listed
- Role: select from the dropdown menu the member type you would like to see listed. For example, selecting Co-ordinator will list the duties being completed by co-ordinators
- Show Vacant: by selecting this yellow button, the list will be filtered to show duties that have no member assigned to it. This button will turn green and say Show All. Selecting it again and the full list will appear
- Generate/Delete Roster: as explained above for Generate Roster, further below for Delete Roster
- New Roster: this is a great function to use if, for example, there has been a double-up of members by mistake because admin has forgotten to approve a duty and someone else has selected the same day OR you have realised you just need an extra member for a particular day only. If these situations happen you can just add an extra duty for one day. Click on ‘New Roster’, add the relevant information and click ‘+Generate’
Second Row:
- Export to PDF / Excel: clicking either of these buttons will download the list of duties. It will export the full list. If you want to download a filtered list, export to Excel and sort or filter through there
- Documentation: this just provides a short instruction of the Roster page
Underneath the second row, is a summary of the data from the List of Duties. List of Duties table:
- id: an allocated number to identify/record the duty
- Hours: how long the duty is for
- Date: date of the duty
- Day: the day the duty is on
- Time: the start and end time of the duty
- Note: location the duty takes place (relevant if a toy library has moved locations)
- MemID: the member’s ID number. If you click on this button it will take you to the Member Detail Page
- Name: Displays the name of the member who is doing the duty that day. If no member has chosen that day it will remain blank. To remove someone from the duty, just click on the name dropdown menu and select the blank space at the top The dropdown menu will list all members, not just duty members in case any member would like to help out. See below for further information regarding the dropdown menu
- Type: can click the green button to change the member to co-ordinator
- Action: Complete – when a roster has been done, admin must click the ‘Complete’ button otherwise there will be no record in the system
Approve – this button is linked to the Member Website when a member has selected a duty. This needs to be clicked to avoid double-ups as mentioned above. - Completed/Pending: this is the roster’s status. If a roster has been completed and the ‘Complete’ button has been clicked, the status will change to ‘completed’ otherwise it will remain as ‘pending’
- Edit: clicking this button will allow you to edit the roster. For example, if you want to close the library for the day and someone is rostered on, you can delete the roster by clicking the edit button
Deleting a Roster
If you want to close your toy library for a week or a month and you have already created a roster for that time period, you can easily delete it. Click the orange Generate/Delete Roster button, under the heading ‘Delete Roster’, add the dates and click delete. A Success message will appear with the dates that have been deleted  If members have already been assigned for that month, the roster will not delete and you will need to manually delete those people by either clicking ‘Edit’ or selecting the blank space under the Name dropdown menu. Once this has been done you can go back and delete the roster. Name dropdown menu
 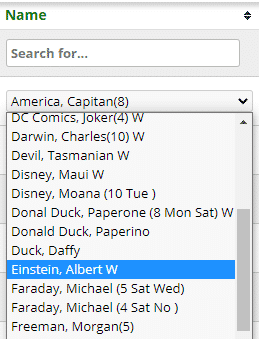 As you can see in the above dropdown menu, there are numbers and days in brackets next to the members’ names or there is nothing. Number: this is the number of duty hours a member still needs to do Day: if a member, or admin, has selected a roster preference, those days will appear next to the number Blank: these members are not duty members.
Sometimes you can also see an E after the name, which means that the member is Expired.

