Skip to main content
How Can We Help?
MiBaseNZ‘s Top Menu items are the modules/pages in the navigation bar that can be seen across the top of each page in the Public Website.

Each of these modules/pages needs to be activated in the Public Settings page which means you can choose which module/page you would like to use, or not use.
Go to Setup -> Public Settings
Type the words “top menu” in the Description box. The list will be filtered to show all settings related to the Top Menu. Each setting can be easily changed by clicking the Edit button alongside it, making the change if necessary and clicking Save.
Once the settings are changed you must log out and then log back in again for the settings to take effect.
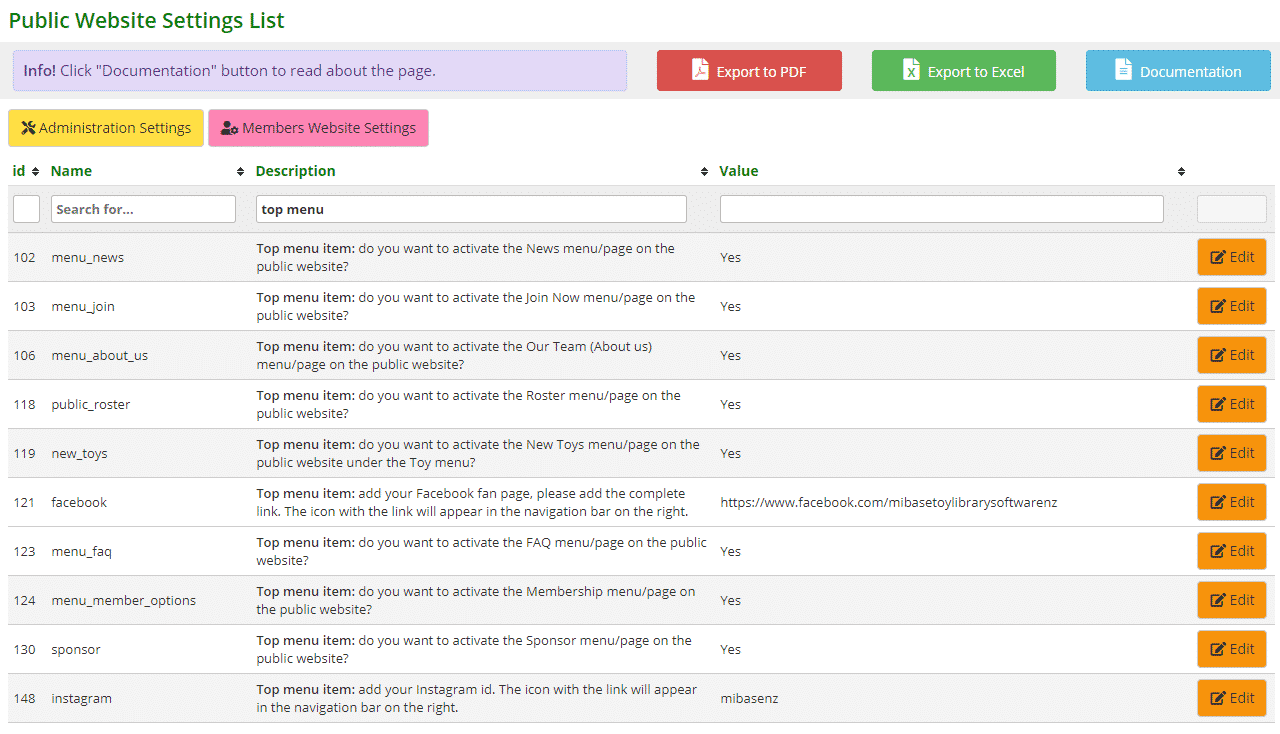
- #102: select Yes to activate the News page in the navigation bar. Follow the link to learn how to add a news article to this page
- #103: select Yes to activate the Join Now page in the navigation bar, selecting No the page will not appear. Follow the link to learn how to setup the Join now page
- #106: select Yes to activate the Our Team page in the navigation bar. Follow the link to learn how to edit the Our Team page
- #118: select Yes to activate the Roster page in the navigation bar. Follow the link to learn how to add or delete roster preferences to this page
- #119: select Yes to activate the New Toys page under the Toys menu in the navigation bar, selecting No the option/page will not appear
- #121: by adding the link to your Facebook page (if you have one), the Facebook icon will appear in the navigation bar on the right (see above) as well as under the Follow us section in the right column of the Public Website.
- #123: select Yes to activate the FAQ page in the navigation bar. Follow the link to learn how to add FAQ’s to this page
- #124: select Yes to activate the Membership page in the navigation bar. To add all your membership options to this page, you will need to go to Setup -> Edit Website. Scroll down to the heading Member Options on Website and type in the details there
- #130: select Yes to activate the Sponsors page in the navigation bar. Here you can add the logos of all your sponsors. Follow the link to learn how to upload files/logos to this page
- #148: by adding the link to your Instagram account (if you have one), the Instagram icon will appear in the navigation bar on the right (see above). You need to add your library name without the ‘@’ icon.
