How Can We Help?
MibaseNZ’s Add New Toy page is where you can add a new toy to your system. This toy, once active, can also be seen on the Member and Public Websites.
To add a new toy go to Toy -> Add New Toy

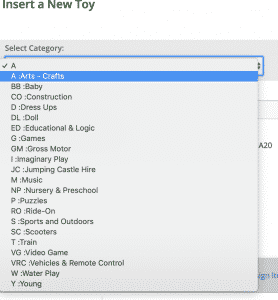
Step 1: Select the category
Before you can add any details you must first choose the toy category.
Why choose it first? Because everything within MiBaseNZ is linked to toy categories making it a rather important feature.

Choose from the dropdown menu which one best matches the toy.
If you need to Add another category, follow the link to learn how.
Once selected, you will see a toy number is automatically generated under the heading New Toy No alongside the category box.
Note: Some libraries like to use the category id before the number id and some do not. This option can be selected in the admin settings.
You will also see more fields appear underneath. Under the blue Save Toy button, you may have a list of numbers appear as well.
If you would like to change the toy number, you may select from these choices and it can be added in the Change Toy Number box however it is best to NOT change it and use what MiBaseNZ allocates.
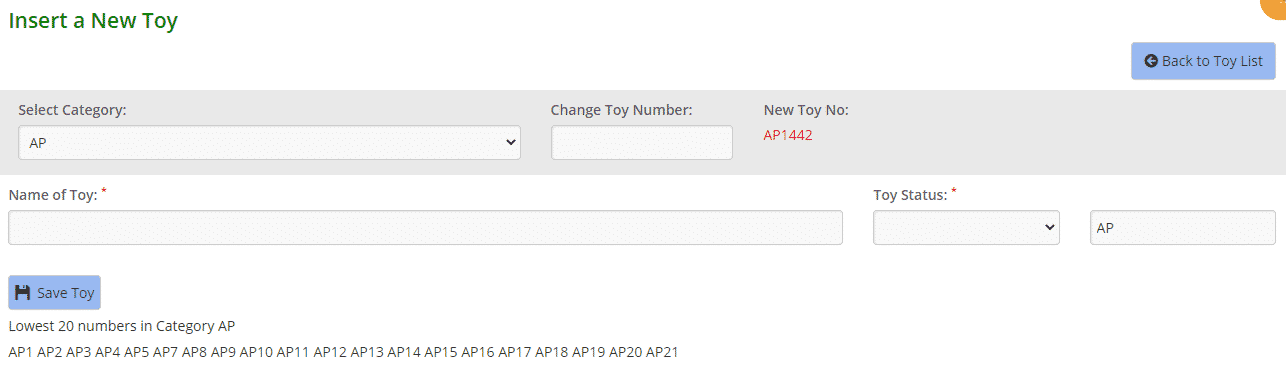
Step 2: Add toy name
Write a descriptive name for the toy rather than a generic. Or just cut and paste from a website if you are not sure of the full name. This field is compulsory.
Step 3: Select the toy status
Alongside the toy name is the Toy Status field where you can choose Active or Processing from the dropdown menu.
Active means it will go straight into the member and public website before you have added all the information and toy image.
Processing means the toy is active in the admin website but not the member or public. It also means this toy cannot be loaned.
Step 4: Save
Once all fields have been filled click Save Toy.
The toy has been added to the system. A Success message will appear as seen below.
Step 5: Add image & other information
Now the toy has been saved, you can upload an image as well as add all the other information for the toy.
You can select from the buttons that will appear when you save the toy.
Click Upload Toy Picture to add a photo or image. Follow this link for more information around adding pictures.
To add other information such as the description, rent, age group etc click the blue Edit New Toy button.
Follow the link Editing a toy to learn how.

Toy List button will take you to the Toy List page.
View New Toy button will take you to the toy’s detail page.
